Download
1 / 12
120 likes | 222 Views
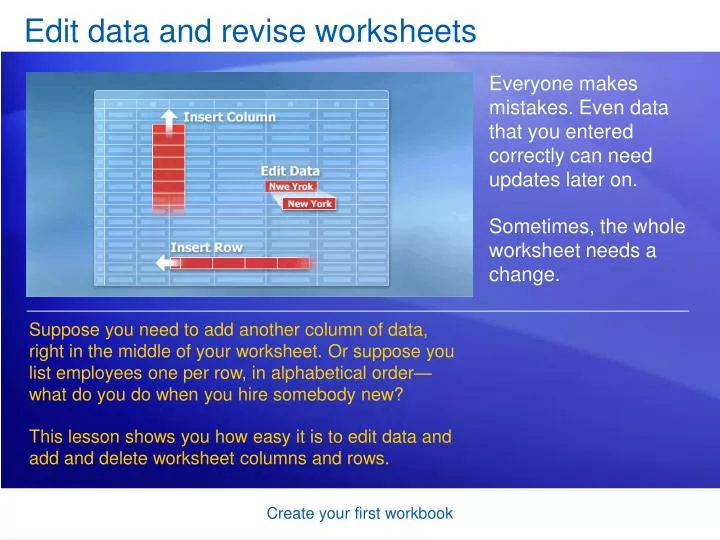
Edit data and revise worksheets. Everyone makes mistakes. Even data that you entered correctly can need updates later on. Sometimes, the whole worksheet needs a change. .

E N D
Edit data and revise worksheets Everyone makes mistakes. Even data that you entered correctly can need updates later on. Sometimes, the whole worksheet needs a change. Suppose you need to add another column of data, right in the middle of your worksheet. Or suppose you list employees one per row, in alphabetical order—what do you do when you hire somebody new? This lesson shows you how easy it is to edit data and add and delete worksheet columns and rows. Create your first workbook
Edit data Say that you meant to enter Peacock’s name in cell A2, but you entered Buchanan’s name by mistake. Once you spot the error, there are two ways to correct it. Double-click a cell to edit the data in it. Or, after clicking in the cell, edit the data in the Formula Bar. After you select the cell by either method, the worksheet says Edit in the status bar in the lower-left corner. Create your first workbook
Edit data What’s the difference between the two methods? Your convenience. You may find the Formula Bar, or the cell itself, easier to work with. Here’s how you can make changes in either place: • Delete letters or numbers by pressing BACKSPACE or by selecting them and then pressing DELETE. • Edit letters or numbers by selecting them and then typing something different. Create your first workbook
Edit data What’s the difference between the two methods? Your convenience. You may find the Formula Bar, or the cell itself, easier to work with. Here’s how you can make changes in either place: • Insert new letters or numbers into the cell’s data by positioning the cursor and typing. Create your first workbook
Edit data What’s the difference between the two methods? Your convenience. You may find the Formula Bar, or the cell itself, easier to work with. Whatever you do, when you’re all through, remember to press ENTER or TAB so that your changes stay in the cell. Create your first workbook
Remove data formatting Surprise! Someone else has used your worksheet, filled in some data, and made the number in cell C6 bold and red to highlight that Peacock made the highest sale. But Peacock’s customer has changed her number, so the final sale was much smaller. You want to remedy the situation. Create your first workbook
Remove data formatting Surprise! Someone else has used your worksheet, filled in some data, and made the number in cell C6 bold and red to highlight that Peacock made the highest sale. As the picture shows: The original number was formatted bold and red. So you delete the number. You enter a new number. But it’s still bold and red! What gives? Create your first workbook
Remove data formatting What’s going on is that the cell itself is formatted, not data in the cell. So when you delete data that has special formatting, you also need to delete the formatting from the cell. Until you do, any data you enter in that cell will have special formatting. Create your first workbook
Remove data formatting Here’s how to remove formatting. • Click in the cell, and then on the Home tab, in the Editing group, click the arrow on Clear . • Click Clear Formats, which removes the format from the cell. Or you can click Clear All to remove both the data and the formatting at the same time. Create your first workbook
Insert a column or row After entering data, you may find that you need to add columns or rows to hold additional information. Do you need to start over? Of course not. To insert a single column: • Click any cell in the column immediately to the right of where you want the new column to go. • On the Home tab, in the Cells group, click the arrow on Insert. On the drop-down menu, click Insert Sheet Columns. A new blank column is inserted. Create your first workbook
Insert a column or row After entering data, you may find that you need to add columns or rows to hold additional information. Do you need to start over? Of course not. To insert a single row: • Click any cell in the row immediately below where you want the new row. • In the Cells group, click the arrow on Insert. On the drop-down menu, click Insert Sheet Rows. A new blank row is inserted. Create your first workbook
Insert a column or row After entering data, you may find that you need to add columns or rows to hold additional information. Do you need to start over? Of course not. Excel gives a new column or row the heading its place requires, and changes the headings of later columns and rows. Create your first workbook