Download
1 / 20
200 likes | 311 Views
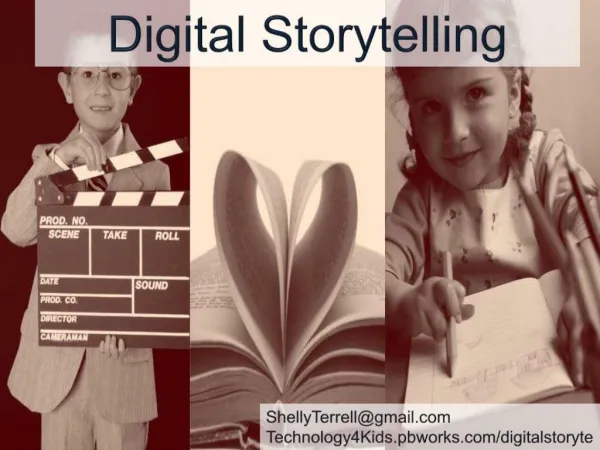
Digital Storytelling: Teaching Writing Through Digital Storytelling. Digital Storytelling: Teaching Writing Through Digital Storytelling Presented by Julie Hoffman. Presented by Julie Hoffman. What is a Digital Story?. The process of researching, planning and producing a digital story:

E N D
Digital Storytelling: Teaching Writing Through Digital Storytelling Digital Storytelling:Teaching Writing Through Digital Storytelling Presented by Julie Hoffman Presented by Julie Hoffman
What is a Digital Story? • The process of researching, planning and producing a digital story: • Encourages reflection (Jenkins &Lonsdale, 2007; Genereux & Thompson, 2008; Sandars & Murray, 2009) • Improves reading and writing (Gregory & Steelman, 2008; Kajder, 2004; Sylvester & Greenidge, 2010) • Increases understanding of content (Sadik, 2008) • Facilitates critical thinking (Borneman & Gibson, 2011) • Helps learners to construct meaning(Rossiter & Garcia, 2010) • Give children opportunities to express themselves non-linguistically (through pictures and music) • Engage and motivate reluctant learners • Provide scaffolding for struggling writers • Deepen understanding of story structure • Promote creativity and problem-solving • Allow children to share their stories with a wider audience
Steps to creating a digital story: • Step 1: Download Photo Story 3on your computer. http://www.microsoft.com/en-us/download/details.aspx?id=11132 • Step 2: Select “Begin a New story”.
Step 3: Import and arrange your pictures • Import your pictures from the folder into the Photo Story project by clicking on the Import Pictures… button. Browse to the folder where you have saved your pictures. You can select multiple pictures by holding down the Ctrl key as you click with your mouse on the icon. Once all the pictures desired have been selected, click the OK button to bring the pictures into the project. Figure 2:Importing pictures into the Photo Story project.
Step 4: Arranging pictures in order • Now begin to arrange the pictures in the order that you want to appear in the final video, by dragging the picture thumbnails and rearranging them in the sequence that is desired (see Figure 3). Photo Story has picture tools that will allow you to adjust the color, rotate the picture, and do basic image editing. You can also change the picture by selecting from the Edit and then Add Effect menu.
Step 4: Arranging pictures in order Continued Once you have your pictures arranged the way you want them, click on the Save Project … button and then click on the Next button.
) Step 5: Adding Titles to your pictures • Once you have your pictures in the project you can add titles, quotes, or other statements over the pictures. • Type in what you want on the screen in the text box. The titles can be placed in different locations on the screen using the option buttons. You can also change the color, font size, and font type by clicking on the Select Fontbutton. • Click on different pictures to add titles to them. • Once you have all the titles created, click on the Save Project … button and then click on the Next button.
Step 6: Narrate your pictures and customize motion • In this step you can add your own audio track and decide how you want your pictures to move and change. Each picture can have its own audio recording and individual movement. • Movement: By default each picture is displayed for five (5) seconds before changing to the next. You can change this amount for any picture by clicking on the Customize Motion… button You can also use this option to change the way the picture is displayed. Here you can adjust how much of the picture to display at the start and at the end. The computer will then create a motion effect between the two settings. • For example you could have the picture start out wide and then zoom into a part of the picture (see Figure 5). To change the size or position of motion, first click in the box to Specify start and end position of motion, then click on either the left or right picture. Adjust the size by clicking and dragging the corner boxes to the desired size. Adjust the position by clicking and dragging the picture box to the desired location. The video display will be a smooth zooming transition from the wide angle to the small focus. Select each picture and change the motion or duration if desired. The second tab here allows the user to change the transition effect between pictures. The default is a cross fade, but each picture can have its own transition from the fifty available options. Click on the arrows near the bottom of the window to change between pictures. • Once you have your motions and transitions set, click the Close button to return to the project window. Now would be a good time to click on the Save Project…. button.
Step 6: Continued Setting the motion of the screen action
Step 7: Adding Audio • Audio Narration: Students will have already written their story. I have students keep their original story in front of them while reading. I usually have them read it 3 times aloud to me or through a whisper phone prior to recording. You can also have them use their storyboard while recording.. • When you are ready to record click on the picture to which you want to add your narration and then click on the record button (see figure) picture click on the stop button. If you make any mistakes you can click the Delete narration button and start again for this picture. The display time will adjust to your recording time, so you will not need to go back to the Customize Motion section to change the amount of time for the picture. Click on a different thumbnail picture or use the arrows under the large picture to change to another picture and add a new narration.
Step 7: Adding Audio Once you have the movements, transitions, and narrations set, save your project and then click on the Next button.
Step 8: Add background music • This step is optional. You can now add background music that plays during your story, by either selecting from music saved on your computer or by creating new music. Similar to the movements, transitions, and narrations, it is possible to have a different piece of music play for each picture or for a group of pictures. Click on the Select Music button to choose a piece of music saved as a digital file from your computer, a network folder, or the Internet.
Step 8: Add background music • Clicking on the Create Music button allows you to adjust or customize specialized prerecorded music by selecting the genre, style, bands, mood, tempo, and intensity of the music. • Click on the first picture of the project and then click on the music button. Try playing with the options, making adjustments, until you have the background that you feel goes with your story, then click the OKbutton. • he music will now spread across the entire project. You should now adjust the volume setting of the background music • . I would suggest that you set it at half or lower so that it doesn’t interfere with the narration. If you wish, you can now click on another picture and set the music for that one. • Click on the Preview button to see how your movie will look and sound. • Once you have the background music set, save your project and then click on the Next button.
Step 9: Finishing it up! • It is now time to save your Photo Story project file as a movie (*.wmv). At this stage the program will take the project file (.wp3) and create a separate movie file. While Photo Story gives you a variety of options I would suggest that you use the Save your story for playback on your computer (see Figure). You will need to go into the Settings… to select one of the built in options. I would suggest that you pick from the Profiles 1-4 for computers, understanding that the larger screen setting will cause the movie to have a larger file size. • If you are planning to create a Video CD or DVD and play your stories on a television you should choose those options. You will then need to import the movie into a DVD/CD Video creation program to actually burn the videos onto a disc. • The smallest file size would be the one for e-mail, but this one would also have the least clarity.
Step 9 Continued • Click on the Next button now to start the building process, in which the program takes your project and turns it into a movie file. Once this building process is completed the program will give you the option of watching your finished video or starting a new project. A three minute project, with eleven pictures, music, and narration, set for a 640 x 480 pixel display, took up only 3.45 Megabytes of space, meaning that you could fit about 180 little movies of this size on a CD. You can play your story's movie using Window’s Media Player, Real Player, or QuickTime (with plug-in), which are all available for free.
One last thing… • I use PowerPoint to create a lot of the slides. • Inserting a PowerPoint slide into Photo Story. You must save the slides as gif files NOT jpg files. This will allow them to be imported into the program.
Rubrics • Create your own rubric: http://digitales.us/evaluating-projects/scoring-guides • Digital storytelling Rubric by Kevin Hodgson http://umass.edu/wmwp/digitalstorytelling/rubric%20assessment.htm • Rubistar http://rubistar.4teachers.org
Websites • The Center for Digital Storytelling http://www.storycenter.org • Classroom Clipart http://classroom20.com • Digitales http://digitales.us • digital storytelling in the Scott County Schools http://www.dtc.scott.k12.ky.us/technology/digitalstorytelling/ds.html • The Educational Uses of Digital Storytelling http://digitalstorytelling.coe.uh.edu • Find Sounds http://www.findsounds.com • Freeplay Music http://www.freeplaymusic.com • Integrating Digital storytelling in Your classroom http://its.ksbe.edu/dst • Pics4learning http://pics4learning.com • Soundzabound http://www.soundzabound.com
References • Beach, R., Hull, G. & O’Brien, D. (2010). Transforming English language arts in a Web 2.0 world. In D. Lapp. & D. Fisher (Eds.), Handbook of research on teaching the English language arts (pp. 161-167). New York, NY: Routledge. • Czarnecki, K. (2009). Digital storytelling in practice: Storytelling in context. Library technology reports, 45(7), 5-8. • Genereux, A. & Thompson, W. (2008). Lights, camera, reflection! Digital movies: A tool for reflective learning. Journal of college science teaching, 37(6), 21-25. • Jenkins, M. & Lonsdale, J. (2007). Evaluating the effectiveness of digital storytelling for student reflection. Proceedings from ascilite Singapore 2007, ICT: Providing choices for learners and learning. Nanyang Technological U • Beach, R., Hull, G. & O’Brien, D. (2010). Transforming English language arts in a Web 2.0 world. In D. Lapp. & D. Fisher (Eds.), Handbook of research on teaching the English language arts (pp. 161-167). New York, NY: Routledge. • Czarnecki, K. (2009). Digital storytelling in practice: Storytelling in context. Library technology reports, 45(7), 5-8. • Genereux, A. & Thompson, W. (2008). Lights, camera, reflection! Digital movies: A tool for reflective learning. Journal of college science teaching, 37(6), 21-25. • Jenkins, M. & Lonsdale, J. (2007). Evaluating the effectiveness of digital storytelling for student reflection. Proceedings from ascilite Singapore 2007, ICT: Providing choices for learners and learning. Nanyang Technological U