Download
1 / 27
270 likes | 538 Views
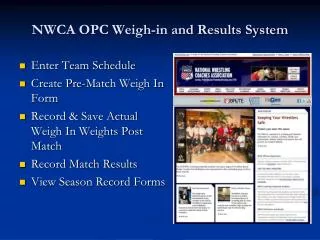
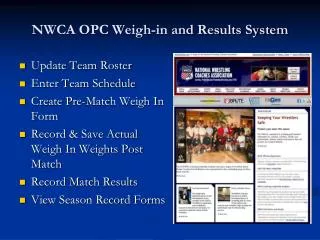
NWCA OPC Weigh-in and Results System. Update Team Roster Enter Team Schedule Create Pre-Match Weigh In Form Record & Save Actual Weigh In Weights Post Match Record Match Results View Season Record Forms. Login Page and Main Menu .

E N D
NWCA OPC Weigh-in and Results System • Update Team Roster • Enter Team Schedule • Create Pre-Match Weigh In Form • Record & Save Actual Weigh In Weights Post Match • Record Match Results • View Season Record Forms
Login Page and Main Menu • Log into the OPC using the Coach’s Login ID and Password assigned • Once logged in, click the Coaches tab on the menu bar on the Scholastic home page
Coaches Dashboard – Roster • On the Coaches Dashboard, click on Wrestlers, then click on the plus sign (+) beside Rostered Wrestlers to view wrestlers currently on your Roster • To update wrestlers, click on Show Entire Roster. Edit the Grade or Remove a wrestler using the drop down options. If you choose Remove, the wrestler will be removed from your active Roster and be placed on the Reinstate Removed Wrestlers List. Select Prior Year Placement if applicable • Click the Save Roster Information button to save your changes
Reinstate Removed Wrestlers • To reinstate removed wrestlers, click on the Reinstate Removed Wrestlers link on the dashboard • You will now see a roster of removed wrestlers. To reinstate a wrestler, select a valid Grade from the drop down selection. • Then click Save Roster Information to reinstate the wrestler to your active Roster
Coaches DashboardMy Schedule/Results • Click on Add New Event, then select the event type from the drop down (multi duals event refer to tri or quad dual meets) • Complete the event details and click Save and Add Another Event or Save and View Event
Adding Multi Dual Events • Enter Event Name and select the Date from the calendar • Select the participating teams from the drop down and click the ADD button to save them as Opponents (program defaults to your state’s schools) • For out of state schools use the Filter to select the state. If a school does not appear, click the link to add the school by typing in the name • Check mark the box if the event is using custom weight classes from another state and then select the state from the drop down that is participating with custom weight classes
Multi and Dual Meet Events Display • Once you have entered your Dual Meets and Multiple Dual Events, you will see them populated under the Dual Events link on the dashboard by clicking the plus sign (+) to expand. Notice the multi dual meet shows as (1) event, with multiple opponents. • Continue to complete the field boxes for every dual meet and tournament on your schedule for the year
Adding Tournaments Enter Event Name and select the Date from the calendar For out of state schools use the Filter to select the state. If a school does not appear, click the link to add the school by typing in the name Check mark the box if the event is using custom weight classes from another state and then select the state from the drop down that is participating with custom weight classes Click Save and Add Another Event or Save and View Event to save
Tournament Display • Once you have entered your Tournaments you will see them populated under the Tournaments link on the dashboard by clicking the plus sign (+) to expand. • Continue to complete the field boxes for every dual meet and tournament on your schedule for the year
Show Entire Schedule • Click the Show Entire Schedule link once you have entered all your dual meets, multi dual meets and tournaments to view a complete schedule
Event Tabs for the Weigh in Form and Results Entry • To create a weigh in form for an event, click on the event name on the dashboard. You will see that events tab displayed. • Click on the Weigh in Form tab to create your pre-match weigh in form
Weigh In Form – Step 1 • The Date and Opponent/Event Name will be pre-populated from your schedule • Select the consecutive day pound (s) allowance from the drop down if it applies. (Please refer to your state rules on the consecutive day allowance • Then click “Next”
Weigh In Form – Step 2 • A grid page will appear listing all your wrestlers. The grid will display their eligible weight class and weight loss plan weight for this competition • Uncheck any wrestlers not competing • You may select an alternate higher wt class for a wrestler using the drop down selection under match weight. • Once reviewed and correct click “Next”
Weigh In Form – Step 3 • Review the wrestlers and weight classes you have chosen for this competition • Compare the Match Wt., Eligible Wt. Class to be sure that each wrestler is eligible for the Match Wt. chosen • Then click “Print Weigh In Form” at the bottom of the page
Printable Weigh In Form • A printer friendly version of the weigh in form will appear as a PDF • Print the form using the toolbar print option • Take copies to the match with you to exchange with the opposing coach • Write down each wrestlers actual weigh in weight in the space provided under the “Actual Weight” column heading
Post Match Weigh In Form – Step 4 • Log back into the OPC and click on the Event displayed on the dashboard to retrieve your previously created weigh-in form. • Click on the Weigh in Form tab to complete your weigh in form by recording actual weigh in weights • Put your cursor over the text box titled “Actual Weight” for each wrestler and enter in their actual weigh in weight recorded on the printed weigh-in form
Post Match Weigh In Form – Step 5 • Once all the actual weigh in weights have been recorded on the weigh in form • Click the “Save Weigh In Information” button at the top of the page to save your actual weigh in weights • A dialogue box will appear, verifying you have saved your actual weigh in weights. Click “OK”
Record Competition Results • Click on the Event Name on the dashboard to view the Event Details and tabs • For Multi Dual Events, click the plus sign (+) beside the event to see the teams participating and click on the team name to access the Enter Results tab • Click the Enter Results tab to open up the results reporting form for that specific event and enter the match results
Dual Meet Results – Step 1 • The Date and the Opponent Name fields will be pre-populated from the event details • Enter in Your Team Score and the Opponent Team Score or enter the matches first and then click Calculate Team Score
Dual Meet Results – Step 2 • Select your wrestler from the drop down under “Wrestler Name” then the opponent from the “Opponent’s Name” for the corresponding weight class • Then select “W or L” a win or loss • Select the win type • Enter in the score for each wrestler • Enter a time if there is a fall, default or disqualification
Dual Meet Results – Step 3 • Enter the results for each match and wrestler • Click the Calculate Team Score button and the scores will appear (you may edit) • Once completed, click the “Save Meet Information” button at the bottom of the screen to save your results • A dialogue box will appear and click “OK”
Tournament Results – Step 1 • Click on the Tournament Event Name to view the event tabs • Click the Enter Results tab to open the tournament results entry form
Tournament Results – Step 2 • Select the Wt Class, your Wrestler’s Name • Select the Opponent’s School from the drop down • Select the Opponent’s Name, select win or loss “W or L” • Select a Win Type, enter the scores, a time if a fall, default or disqualification • The wrestlers tournament finish • Then click “Next Match” to enter additional matches for this wrestler
Tournament Results – Step 3 • The match results will save each time you click Next Match and will populate on the page • Once you have completed one wrestlers results, click the New Wrestler button to move on to the next wrestler • Enter the results for each wrestler that competed at the tournament in their specified weight class
Individual Season Record Form • To access your Teams Individual Season Record Forms, click on the link titled: Team Season Record Forms on the Coaches dashboard
Individual Season Record Form Select wrestler & matches • A list of your Rostered Wrestlers will appear • Click the “Select” button beside the wrestlers name to view his/her Individual Season Record Form • A grid page will appear of that wrestlers competitions • Uncheck any competitions that should not appear on the Individual Season Record Form • Then click the “Show Season Record Form” button
Print Individual Season Record Form • A printer friendly version will appear in a pdf, use the toolbar print option to print out the Individual Season Record Form