Download
1 / 21
210 likes | 335 Views
Discover the art of using slide shows in education to enhance learning experiences. Learn the importance of subtle backgrounds, effective titles, and maintaining readability with simple fonts and contrasting colors. Explore the difference between internal and external fertilization through clear visuals and memorable images, and understand the reproductive habits of salmon. Incorporate interactive elements, mini activities, and self-assessments into your lessons to keep students engaged. Create a dynamic atmosphere with animations and supportive media while preparing for technology challenges.

E N D
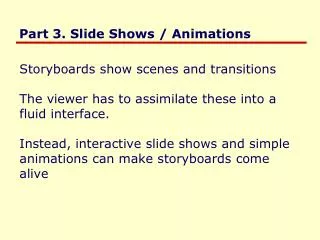
Use titles • Be subtle with backgrounds
Use titles Try to write six words or less per line. • Be subtle with backgrounds • Use contrast with fonts Studies show that it is easier for people to read dark font on a light background… … it strains people’s eyes a bit more to read light font on a dark background. Try to stay under six sentences or ideas per slide.
Internal vs. Ext. FERTILIZATION. Use appropriate and memorable images to illustrate ideas. • Internal Fertilization is when gametes meet inside of a female. (ex. Primates, Elephants) • External Fertilization is when two gametes meet outside of an adult. (ex. Fish such as salmon) Caution, please look away if you are easily offended. Avoid writing in caps and abbreviations. They are hard to read. Use bold and enlarged font to draw attention to key ideas. Be consistent with transitions and organization of lessons.
An aside about salmon • Incorporate small “out loud” readings. • Class reading gets everyone, especially those with week reading skills, to focus on a passage. • Adult salmon return to their birth stream for reproduction. In general this occurs during summer or fall. • It may be triggered by day length, water temperature or other environmental changes. • Some salmon swim thousands of miles to get to the mouth of the stream where they were born. Use text colour to help students to identify discussion information vs. content or note information. For my readings, red means put your pencil down.
Adult salmon swim upstream to the same area where they hatched. • This is thought to be accomplished by their outstanding sense of smell that 'imprinted' the smell of their birth stream at birth. • Fish that swim long distances are exhausted by the time they arrive but still have enough energy for reproduction. • Some species must jump again and again to get up and over waterfalls in their stream. • Only the fittest fish make it to the spawning grounds. Build up ideas in gradual sequences and in manageable amounts. Avoid using fancy fonts and serif fonts. They are harder to read on a screen.
Salmon use external fertilization. • They release their gametes (eggs and sperm) through an opening right in front of their anal fin. • External fertilization is possible for fish because the sperm have a fluid to travel through outside of the body. Clearly identify key ideas within context, just like a good text book
Quick Quiz Immediately check basic understandings without marks. Use mini self assessments. Why would external fertilization be more common in animals that live in the water? • Water animals are better evolved to have sex. • Water animals produce more sperm, so it doesn’t matter how they fertilize. • Sperm needs a fluid to swim through. • Water animals do not stay with their mates.
The Human Result of SEX! • Have fun! There is so much potential for playfulness in a slide show. Propagation of the species. Let’s talk about the steps that lead up to a new baby… • Use “gif” animations to illustrate ideas, grab attention, or transition. • But don’t overdo it! • Transparency allows you to see through objects.
Using the image search engine on the Google home page you can find lots of great illustrations • If you include file extensions like gif and words like animation, you can get some nice moving illustrations. • Even with great illustrations, try to limit them to 2 or less per slide.
Sample of curriculum related gif animations that took about twenty minutes to find. • With a flash editor you can make your own. But that takes me a long time.
10 minute Work Time • Draw the sketch, then Determine the labels and function of each part of the flower. • Include the male and female parts below. • Anther • Filament • Stamen • Sepal • Stigma • Style • Ovary Make a table of functions Resource: Academic Nelson Text Page 210 • Build in mini activities to break up the lesson without the need for handouts.
Draw a four image comic strip to show Flower • Use the richness of the medium to transition into different types of reflective note taking. • Use hyperlinks to link to other files or web sites Link to tonight’s homework
Links to an alternative • Overhead Lesson • Student handout for overhead or powerpoint Have a backup plan for when the technology gods get angry. Insert a link to the Apollo video file that is on file
The basic skill set • Inserting objects and text boxes • Changing backgrounds • Locating illustrative or meaningful anchoring images • Locating specific file types, like animations • Animating objects or transitions • Inserting hyperlinks to websites, text files or videos. • Building a layered slide (with overlaid items) • Inserting Sounds
Helping it all to run smoothly • Time your presentation • Practice your presentation • Edit after a lesson involving powerpoint, this is a part of the refinement process and is easily done so that a lesson will be better next time. You can even edit minor things like wording during a lesson if it bothers the class or is unclear.
What do we need in our hands • Always have a plan B in case the technology gods are angry that day. • Distribute a handout. For those who like to take notes, they can take them right on the handout. It also keeps students from getting frustrated when they can’t write down what is on every slide. In my experience, a handout helps them stay focused on the ideas rather than the act of writing.
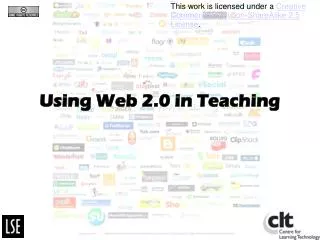
Hardware Wants • When possible, run your slides from hard disk rather than floppy or flash drive. Especially if you are using large images, animations or videos in your slide show. • If possible, use a remote USB mouse “clicker”, so that you can walk the room. They are getting cheaper and cheaper and allow you to interact with the class more.
A great “How to” for using the software itself can be found at…http://www.actden.com/pp/ Breakaway Assignment: Rewrite an appropriate lesson that you teach in the form of a powerpoint. The slideshow can be the main communication medium or it can be there in the background to keep the lesson on track. Starting with a board note or overhead as your rough draft for a slideshow is one way of approaching this.
Mr. Killins’s Home Page • Other links • Senior English Exemplar • Other links • Tonight’s homework Return Back to previous page