Download
1 / 27

E N D
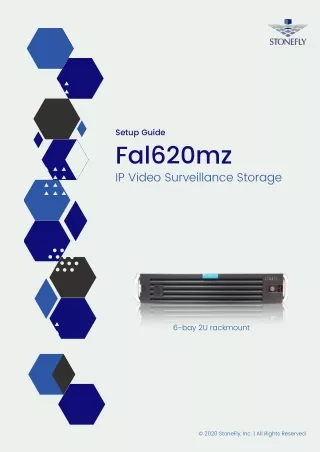
Setup Guide Fal620mz IP Video Surveillance Storage 6-bay 2U rackmount © 2020 StoneFly, Inc. | All Rights Reserved
Copyright © 2006-2020 StoneFly, Inc. All rights are reserved. No part of this document may be photocopied or reproduced without the prior written consent of StoneFly. The information contained in this document is subject to change without notice. StoneFly shall not be liable for errors contained herein or for consequential damages in connection with the furnishing, performance, or use of this material. StoneFly, the StoneFly logo, Storage Concentrator, Integrated Storage Concentrator, ISC, Modular Storage Concentrator, StoneFly Backup Advantage, StoneFusion, StoneFly Replicator CDP, ValueSAN, Unified Scale Out, USO, Super Scale Out, SSO, Twin Scale Out, TSO, Unified Storage & Server, USS, Unified Deduplicated Storage, UDS, Unified Encrypted Storage, UES, OptiSAN, StoneFly Voyager, DR365, DR365 Fusion, StoneFly Mirroring, Storage Concentrator Virtual Machine, SCVM, Software-Defined Unified Storage, SDUS, and StoneFly Cloud Drive are property of StoneFly, Inc. Other brands and their products are trademarks or registered trademarks of their respective holders.
Table of Contents Introduction............................................................................... Error! Bookmark not defined. Scope of the Document ...............................................................................................................1 Dimensions .................................................................................................................................2 Front Panel – System Interface ....................................................................................................2 Control Panel Buttons .................................................................................................................3 Control Panel LEDs ....................................................................................................................3 Identifying the Sections of the Rack Rails ........................................................................5 Releasing the Inner Rail ....................................................................................................5 Sliding the Chassis onto the Rack Rails ............................................................................8 Installing the Chassis into a Rack ......................................................................................8 Removing the Chassis from the Rack ............................................................................. 10 .......................................................................................................................................... 10 Cabling the FAL620mz ............................................................................................................. 10 Software Operation ................................................................................................................... 11 Configuring the IPMI KVM ...................................................................................................... 12 Accessing the IPMI Interface ............................................................................................. 16 Removing Power from the System ............................................................................................ 19 Removing the Chassis Cover ..................................................................................................... 19 Removing / Replacing Hot-Swap Drives ................................................................................... 20
P a g e | 1 FAL620mz Setup Guide Introduction The Falcon series are high performance high capacity video recording platforms optimally designed for silent computing without compromising airflow and cooling capabilities. The Falcon appliance series is built for the enterprise-grade use-case with several tower and rackmount configurations capable of storing from a few terabytes to hundreds of terabytes of video data. The Falcon 620mz is a fault-tolerant data storage appliance that comes in a convenient, space- saving 3U rack mount chassis with hot-swappable drives and trays supporting storage capacities up to 224TB (when fully populated). The FAL620mz enables users to configure RAID 0, 1, 3, 5, 6, 10, 30, 50, and 60 with RAID cache battery backup delivering highly reliable, robust and available video storage solution. The Falcon appliance family also supports optional cloud connect to public and private clouds for cost effective video archiving. By leveraging the built-in cloud storage gateway, users can configure the video recording platform to store live videos as they are recorded while archived footage is transferred to secure storage in Azure, AWS, or any other S3 compatible cloud or in StoneFly private cloud. Scope of the Document The purpose of this document is to guide the user through the setup process and to share the technical specifications and hardware information of the FAL620mz video recording platform. The technical specifications, hardware build, hardware components, and troubleshooting of FAL620mz are described in this document © 2020 StoneFly, Inc. | All rights reserved.
P a g e | 2 FAL620mz Setup Guide FAL620mz - Hardware Dimensions Height 5.2” (132 mm) Width 17.2” (437 mm) Depth 25.5” (647 mm) Gross Weight 72 lbs (32.66 kg) Front Panel – System Interface Buttons Power On/Off Alarm Mute System Reset LEDs Power Status HDD activity 2 LAN activity Fan Failure and Overheat FAL620mz - Front Control Panel © 2020 StoneFly, Inc. | All rights reserved.
P a g e | 3 FAL620mz Setup Guide Control Panel Buttons Power The main power switch is used to apply or remove power from the power supply to the server system. Turning off system power with this button removes the main power but keeps standby power supplied to the system. Therefore, you must unplug system before servicing. Reset The reset button is used to reboot the system. Control Panel LEDs There are six LEDs that provide status information about the system. Power Indicates power is being supplied to the system power supply units. This LED should normally be illuminated when the system is operating. © 2020 StoneFly, Inc. | All rights reserved.
P a g e | 4 FAL620mz Setup Guide HDD Indicates network activity on GLAN2 when flashing. Indicates activity on the hard drive when flashing. Indicates network activity on GLAN1 when flashing. © 2020 StoneFly, Inc. | All rights reserved.
P a g e | 5 FAL620mz Setup Guide Rack Installation Mounting rails for the FAL620mz are included in the package. One set of rails is required for rack mounting each FAL620mz. This section is written for 2U FAL620mz, but other FAL rack installations are similar. This guide provides information on installing the StoneFly FAL620mz chassis into a rack unit with the rails provided. There are a variety of rack/cabinet units on the market, which may mean the assembly procedure will differ slightly. You should also refer to the installation instructions that came with the rack unit you are using. NOTE: This rail will fit a rack/cabinet between 28" and 33" deep. Identifying the Sections of the Rack Rails The StoneFly FAL chassis package includes two rack rail assemblies in the rack mounting kit. Each assembly consists of three sections: an inner rail that secures directly to the chassis, an outer rail that secures to the rack. These assemblies are specifically designed for the left and right side of the chassis. Releasing the Inner Rail Each inner rail has a locking latch. This latch prevents the server from coming completely out of the rack when the chassis is pulled out for servicing. To mount the rail onto the chassis, first release the inner rail from the outer rails. Releasing the Inner Rail from the Outer Rails: 1.Pull the inner rail out of the outer rail until it is fully extended as illustrated below. 2.Press the locking tab down to release the inner rail. 3.Pull the inner rail all the way out. 4.Repeat for the other outer rail. © 2020 StoneFly, Inc. | All rights reserved.
P a g e | 6 FAL620mz Setup Guide Figure 1: Extending and Releasing the Inner Rail Installing the Inner Rails on the Chassis Installing the Inner Rails 1.Identify the left and right inner rails. They are labeled. 2.Screw in stand-off screws provided with the rails to the side of the chassis. 3.Align inner rail holes with the screws then slide the inner rail forward toward the front of the chassis until the screws click into place, securing the rail to the chassis. 4.Optionally, you can further secure the inner rail to the chassis with a screw. 5.Repeat for the other inner rail. © 2020 StoneFly, Inc. | All rights reserved.
P a g e | 7 FAL620mz Setup Guide Figure 2: Installing the Inner Rails Assembling and Installing the Outer Rails onto the Rack Each outer rail comes in three sections that require assembly before mounting onto the rack. 1.Find the outer rail mounting pins in the packaging of the rails. Round hole pins. Square hole pins. Only one type of pin is needed. Use the type that matches the mounting holes on your rack. Steps are visualized in figure 3. 2.Insert pins into the holes on the front of outer rail. 3.Attach outer rail to the rack, click will be heard if attached properly. Adjust the outer rail to the exact depth of the rack by sliding the rear bracket. © 2020 StoneFly, Inc. | All rights reserved.
P a g e | 8 FAL620mz Setup Guide Figure 3: Installing the Outer Rails to the Rack Sliding the Chassis onto the Rack Rails Warning: Mounting the system into the rack requires at least two people to support the chassis during installation. Please follow the safety recommendations printed on the rails. Installing the Chassis into a Rack Once rails are attached to the chassis and the rack, you can install the server. The rack stabilizing mechanism must be in place, or the rack must be bolted to the floor before you slide the unit out for servicing. Failure to stabilize the rack can cause the rack to tip over. Do not use a two post “telco” type rack. 1.Pull the middle rail out of the front of the outer rail and make sure that the ball bearing shuttle is locked at the front of the middle rail. © 2020 StoneFly, Inc. | All rights reserved.
P a g e | 9 FAL620mz Setup Guide 2.Align the rear of the chassis rails with the middle rails and then push evenly on both sides of the chassis until it clicks into the fully extended position. 3.Depress the locking tabs on both sides of the chassis and push it fully into the rack. The locking tabs should “click”. 4.Optional screws may be used to hold the front of the chassis to the rack. Figure 4: Installing the Chassis into a Rack Keep the ball bearing shuttle locked at the front of the middle rail during installation. Figure is for illustrative purposes only. Always install servers to the bottom of a rack first. Caution: Do not pick up the server with the front handles. They are designed to pull the system from a rack only. Caution: Verify ball bearing retainer is locked forward. © 2020 StoneFly, Inc. | All rights reserved.
P a g e | 10 FAL620mz Setup Guide Removing the Chassis from the Rack It is dangerous for a single person to off-load the heavy chassis from the rack without assistance. Be sure to have sufficient assistance supporting the chassis when removing it from the rack. Use a lift. 1. Pull the chassis forward out the front of the rack until it stops. 2. Find the release lever (Figure 1) on each side of the chassis on the inner rails. Release the chassis by simultaneously lifting the left lever and pushing down the right lever. Continue to pull the chassis out of the rack. Cabling the FAL620mz NICs USB ports Connect a video display to the blue 15-pin VGA port. Connect a keyboard to a USB port. Connect a mouse to a USB port. Connect power to the power supplies via the provided power cords, preferably from a UPS (Uninterruptible Power Supply) with battery backup rated to handle the appliance. Connect 1 network cable to the IPMI port and 4 network cables (preferably CAT-6 or CAT-5e) to the NIC ports (see above figure). Note: For camera/system connection examples, refer to Appendix A. © 2020 StoneFly, Inc. | All rights reserved.
P a g e | 11 FAL620mz Setup Guide Software Operation Power On the system and login using the following credentials: oUsername: administrator oPassword: Falcon! Fill out the end user registration form that will pop up on startup. If you wish to register at a later date, you could use the link on the desktop. Note: Support will not be provided until the form is completed and submitted. You will also find the following links on the system desktop: oRAID Management GUI(the login information is Username: administrator and Password: Falcon!) oProduct Registration Form (for faster support and assistance we highly recommend registering your product) oAny requested [pre-installed] video management software shortcut. The factory preset system information for the Falcon series video storage system is as follows: Username: administrator Password: Falcon! IP Address: DHCP Workgroup: Servgroup © 2020 StoneFly, Inc. | All rights reserved.
P a g e | 12 FAL620mz Setup Guide Configuring the IPMI KVM The Intelligent Platform Management Interface (IPMI) KVM configuration allows for Remote Management and Power Control of the StoneFly FAL620mz system. This configuration is optional to perform, but recommended. To configure the IPMI module, connect a keyboard and monitor to the system. Power on the system and press the Del key to enter the BIOS setup. Navigate to IPMI tab and go to BMC Network Configurations: In the BMC Network Configuration tab, select Update IPMI LAN Configuration and press Enter: © 2020 StoneFly, Inc. | All rights reserved.
P a g e | 13 FAL620mz Setup Guide When prompted, select Yes and press Enter. From the additional list of options, select Configuration Address Source and press Enter: © 2020 StoneFly, Inc. | All rights reserved.
P a g e | 14 FAL620mz Setup Guide From the prompt, select Static and press Enter: Enter the Static IP Address, Subnet Mask and Gateway IP Address. © 2020 StoneFly, Inc. | All rights reserved.
P a g e | 15 FAL620mz Setup Guide When entering addresses, please note: 1.IP Address: Must be on the same subnet as FAL620mz’s Management port 2.IP Subnet Mask: Same as FAL620mz’s Management port 3.Default Gateway: Same as FAL620mz’s Management port Press the “ESC” key to exit. Navigate to the Exit tab and select Save Changes and Exit. Note: The system will require power to be removed before IPMI IP Address will take effect. © 2020 StoneFly, Inc. | All rights reserved.
P a g e | 16 FAL620mz Setup Guide Accessing the IPMI Interface Start a browser and navigate to the configured IP address. Enter the following information in the login screen: Username: falcon Password: Falcon1! © 2020 StoneFly, Inc. | All rights reserved.
P a g e | 17 FAL620mz Setup Guide Navigate to Remote Control tab and select iKVM/HTML5: Click on iKVM/HTML5 to launch remote console: © 2020 StoneFly, Inc. | All rights reserved.
P a g e | 18 FAL620mz Setup Guide Select Launch Console to open the system console. The system user console screen will appear. © 2020 StoneFly, Inc. | All rights reserved.
P a g e | 19 FAL620mz Setup Guide Chassis Maintenance This section covers the steps to perform maintenance on the chassis. The only tool required is a Phillips screw driver. Review the warnings and precautions listed in the manual before setting up or servicing this chassis. Removing Power from the System Before performing some setup or maintenance tasks, use the following procedure to ensure that power has been removed from the system. Use the operating system to power down the node, following the on-screen prompts. After the system has completely shut-down, carefully grasp the head of the power cord and gently pull it out of the back of the power supply. Disconnect the cord from the power strip or wall outlet. Removing the Chassis Cover 1.If necessary, unplug the chassis from any power source. 2.Depress the two release buttons, pushing the cover toward the rear of the chassis, and lift it up, and off. © 2020 StoneFly, Inc. | All rights reserved.
P a g e | 20 FAL620mz Setup Guide Caution: Except for short periods of time, do not operate the server without the cover in place. The chassis cover must be in place to allow proper airflow and prevent overheating. Removing / Replacing Hot-Swap Drives Note: Installation varies on depending on Falcon Series Model. 1.Press the release button on the drive carrier. This extends the drive carrier handle. 2.Use the handle to pull the drive carrier out of the chassis. Caution: Except for short periods of time, such as while swapping hard drives, do not operate the server with the carriers removed from the chassis drive bays. © 2020 StoneFly, Inc. | All rights reserved.
P a g e | 21 FAL620mz Setup Guide Troubleshooting Guide In this section, we describe some of the most commonly encountered issues. If you cannot resolve your hardware problems using the information provided in this section, please contact support at the number listed on the README page attached to the system, or by using the information provided at the end of this document. Question: The unit is beeping, what do I do? Answer: Make sure that all the cables, specially the power cables are connected. Check to see if any of the disk drives has failed. Check to see if a power supply has failed. Question: One of my power supplies or disk drives have failed, what do I do? Answer: Please contact StoneFly support at the number listed on the README page, which was shipped with the system, and request an RMA for the failed component. Question: When I power the system On, I get message “No Operating system found”. What should I do? Answer: It is possible that the boot sequence in the BIOS is attempting to boot the machine from the wrong device. Please enter the BIOS and set the OS disk as the first boot device. If it still does not work, please contact StoneFly technical support. © 2020 StoneFly, Inc. | All rights reserved.
P a g e | 22 FAL620mz Setup Guide Appendix A Possible Camera Configuration Examples: © 2020 StoneFly, Inc. | All rights reserved.
P a g e | 23 FAL620mz Setup Guide © 2020 StoneFly, Inc. | All rights reserved.
www.stonefly.com 26250 Eden Landing Rd, Hayward, CA 94545, USA. +1 (510) 265-1616 support@stonefly.com