Download
1 / 35
560 likes | 1.07k Views
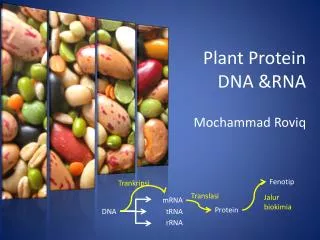
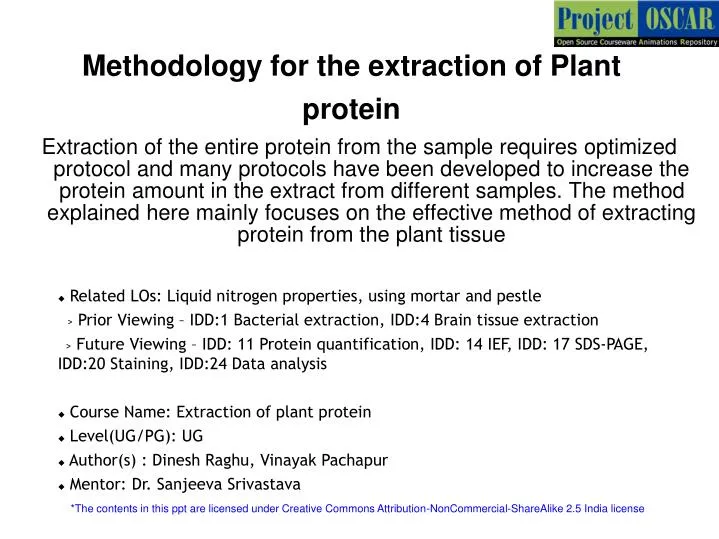
Extraction of the entire protein from the sample requires optimized protocol and many protocols have been developed to increase the protein amount in the extract from different samples. The method explained here mainly focuses on the effective method of extracting protein from the plant tissue .

E N D
Extraction of the entire protein from the sample requires optimized protocol and many protocols have been developed to increase the protein amount in the extract from different samples. The method explained here mainly focuses on the effective method of extracting protein from the plant tissue Methodology for the extraction of Plant protein • Related LOs: Liquid nitrogen properties, using mortar and pestle > Prior Viewing – IDD:1 Bacterial extraction, IDD:4 Brain tissue extraction • > Future Viewing – IDD: 11 Protein quantification, IDD: 14 IEF, IDD: 17 SDS-PAGE, IDD:20 Staining, IDD:24 Data analysis • Course Name: Extraction of plant protein • Level(UG/PG): UG • Author(s) :Dinesh Raghu, Vinayak Pachapur • Mentor: Dr. Sanjeeva Srivastava *The contents in this ppt are licensed under Creative Commons Attribution-NonCommercial-ShareAlike 2.5 India license
Learning objectives 1 After interacting with this learning object, the learner will be able to: • Define protein extraction using lysis buffer. • Describe protein solubilization using rehydration buffer. • Operate steps involved in handling the instrument and the materials used. • Interpret the results of the experiment. • Assess the troubleshooting steps involved in the experiments. 2 3 4 5
Master Layout 1 Reagent preparation (Slide:5-9) Cleaning and weighing of leaves (Slide:10-11) 2 Liquid Nitrogen treatment (Slide:12-14) Grinding the leaves (Slide:15) 3 Lysis Buffer treatment (Slide:16-17) Protein precipitation at -20’c (Slide:19) 4 Centrifugation and Acetone treatment (Slide:20-23) Rehydration buffer treatment (Slide:24-27) 5 Sample storage at -20’C (Slide:28)
Definitions and Keywords 1 1.Protein : Proteins are the biomolecules, composed of amino acid, forming the building block of the system and performs most of the biological functions of the system. 2.Protein extraction: The process by which the proteins from the cell are recovered for the analysis purpose is called protein extraction. The chemicals involved in the extraction are 3) Lysis Buffer: A cocktail of reagents used for cell lyses. a) Trichloro acetic acid: The acid used in the lyses buffer for lyses of the cell and helps to precipitate the protein. b) Acetone: One of the constituent of lyses buffer used to denature the protein. c) Dithiothreitol: Constituent of lyses buffer used to reduce the disulfide bonds in the protein. 4) Rehydration buffer: A cocktail of reagents used for sample solubilization and used for sample storage. a) CHAPS: is a zwitter-ionic detergent, constituent of rehydration buffer that is used to solubilize the proteins including membrane proteins. b) Urea: It is a organic compound in rehydration buffer that is used to denature protein. 5)Bromophenol blue (BPB) : Used in rehydration as color marker and acid –base indicator 2 3 4 5
Step 1: T1: Reagents preparation 1 2 3 Description of the action Audio Narration (if any) Show a measuring balance the user should click ON the Instrument, pick paper from rack, fold it across and on the edge, place it on the balance so that balance reads 0.03g and the user should press ”0” on the balance to make the reading to “0.00”. Animate the action, whenever user starts to weigh any reagents. Clean the surface of the balance, Tare the weight of the paper before weighing for each reagent. 4 5
Step 1: T1: Reagents preparation 1 TCA 2 Lysis buffer DTT Acetone 3 Audio Narration Description of the action Instruct user to prepare lysis buffer. Animator redraw above figure as shown. Let user takes out the bottles from the racks. Instruct user to weigh TCA and DTT, tare the balance like in previous slide, the user should pick the spatula open the lid of the TCA to weigh 1g and DTT bottle to weigh 0.007g separately and put in the tube labeled as lyses buffer. In case if the gram exceeds user should remove some quantity or if it is low add to get required amount and instruct user to click on acetone bottle, to take out 10ml in 25ml cylinder to transfer to lysis buffer bottle, now let user take the bottle for a brief vortex to mix the solution. Weigh 10% trichloroacetic acid, 0.07% of Dithiothreitol, add it to 10 ml of acetone to prepare lysis buffer and store it at 4’C. 4 5
Step 2: T1: Reagents preparation 1 2 Wash buffer DTT Acetone 3 Audio Narration Description of the action Weigh for 0.07% of Dithiothreitol, add it to 10 ml of acetone to prepare wash buffer and keep it 4’C. Instruct user to prepare Wash buffer. Animator redraw above figure as shown. Let user takes out the bottles from the racks. Instruct user to weigh DTT, tare the balance like in previous slide, the user should pick the spatula, open the lid of DTT bottle to weigh 0.007g separately and put in the tube labeled as wash buffer. In case if the gram exceeds user should remove some quantity or if it is low add to get required amount and instruct user to click on acetone bottle, to take out 10ml in 25ml cylinder to transfer to wash buffer bottle, now let user take the bottle for a brief vortex to mix the solution. 4 5
Step 3: T1: Reagents preparation 1 CHAPS 2 Rehydration buffer water urea 3 Audio Narration Description of the action Instruct user to prepare rehydration buffer (RF). Animator redraw above figure as shown. Let user takes out the bottles from the racks. Instruct user to weigh CHAPS and Urea, tare the balance like in slide:5, the user should pick the spatula open the lid of the CHAPS to weigh 0.02g and Urea bottle to weigh 0.6g separately and put in the tube labeled as RF. Instruct user to click on water bottle, take out 1ml pipette, set it for 1000ul and pipette in water into RF bottle. let user take the bottle for a brief vortex to mix the solution. Weigh 0.6g of urea, 0.02g of CHAPS to prepare rehydration buffer to store it at 4’C. 4 5
Description of the action/ interactivity Audio Narration (if any) Step 4: T1: Reagent preparation 1 2 3 Zoom in tube with reagents at the bottom and water on top. Instruct user to click start and keeping the tube on it. During vortex, animate like the urea and CHAPS mixing in the tube and disappearing into the solution same vortex steps for Wash buffer tube. Now show a tube labeled as BPB (blue in color) and instruct the user to set the pipette to 25ul and take the BPB solution into it to add it to the rehydration buffer tube. again follow the vortex mixing as mentioned before. Now show the colorless solution turning blue Vortex the tube containing the reagents until it goes completely into the solution. 4 5 Video File: Vortex
Description of the action Audio Narration Step 5: T2:Cleaning and weighing of leaves 1 2 3 First show the fresh leaves, animate like the user cleaning the leaves with water in a tray, let user pick the individual leaves and transfer the leaves on tissue paper, show like drying the leaves to remove water. Clean the leaves with distilled water and dry it remove the water 4 5
Description of the action Audio Narration (if any) Step 6: T2:Cleaning and weighing of leaves 1 2 3 Weighing balance Weigh 300mg of cleaned fresh leaves for the protein extraction to start with. 300mg is suggested which is according to the reagents and solution prepared. Depending upon the requirement the scale-up can be down. Tear the weighing balance like in Slide:5. Let user weigh 300mg of leaves with the help of forceps like shown in figure. 4 5 Video File: Balancing
Description of the action Audio Narration (if any) Step 7: T3:Liquid Nitrogen treatment 1 2 3 Show a tank labeled as liquid nitrogen, let user wear the gloves, user should take out the liquid with help of long spoons, as shown in figure and Animate like pouring in the pestle and mortar. Change the appearance of pestle and mortar to frozen phase to show a pre chill effect. when the user clicks on the liquid nitrogen should pour into the pestle . Kindly redraw the figures Add liquid nitrogen to mortar and pestle to prechill them. Care should be taken while pouring not to spill out and action to be carried out away from body. To bring down the temperature of mortar and pestle, this step is carried out. 4 5
Description of the action/ interactivity Audio Narration (if any) Step 8: T3:Liquid Nitrogen treatment 1 2 3 First show the pre-chilled mortar and pestle (MP), let user transfer the weighed leaves to the pre-chill MP. Transfer t he 300mg of cleaned fresh leaves into the prechilled pestle and mortar 4 5
Audio Narration (if any) Description of the action/ interactivity Step 9: T3:Liquid Nitrogen treatment 1 2 3 let user pour in liquid nitrogen, as in figure. when the user clicks on the liquid nitrogen, animate user action to pour liquid nitrogen into the mortar. Animate the fresh leaves changing to frozen crisp ones. Kindly redraw the figures Add around 10ml of liquid nitrogen to the leaves, add it at one go. After addition of nitrogen a crisping noise is heard. 4 5
Description of the action/ interactivity Audio Narration (if any) Step 10: T4:Grinding the leaves 1 2 3 Once the liquid nitrogen is added, let user start the grinding process. Show the hands grinding on leaves sample, the grinding should be carried only when the user continuously clicks on the pestle and it should stop when the user unclick on it. While grinding animate the large leaves, to small pieces to turning into powder form. Kindly redraw the figures Grind the sample until it looks powdery, the cells present in the leaves must be brought to molecular level for the further treatment. 4 5
Step 11: T5:Lysis Buffer treatment 1 2 3 Description of the action/ interactivity Audio Narration (if any) Zoom in lyses buffer tube, animate like the user unscrewing the cap, taking 1ml pipette and setting to 500ul to pipette out the lyses buffer to add on to the powdered sample in mortar. show the grinding action again as described in slide:15 and animate the powder sample getting into the paste as shown above. To the powdered sample add the lysis buffer. In presence of lysis buffer perform excessive grinding as cells are lysed at higher rates. 4 5
Description of the action/ interactivity Audio Narration (if any) Step 12: T5:Lysis Buffer treatment 1 2 3 Animate like the user taking the pipette and setting the value to 1000ul and pipetting out the lyses buffer when the user clicks on it and adding it to the paste (green in color) and griniding again. Now show the transfer of the paste from the MP to the eppendorf tube, the transfer should be done, with user taking out the paste from the MP with spatula, and transferring it to tube. This should happen with user click. Kindly redraw the figures Transfer the paste to the clean, autoclaved eppendorf tubes. Make sure to transfer all the paste into the tube. 4 5
Description of the action/ interactivity Audio Narration (if any) Step 13: T6:Protein precipitation at -20’c 1 2 3 Animate the user picking the ependroff tube, opening the -20C freezer and placing it inside the freezer. Once all the tube are placed, close the door of freezer and animate the clock running for 1hr. Kindly redraw the figures Place the sample at -20 C incubator for 1hour for protein precipitation. At this step the proteins recovered from the cells tend to get prepcipitated. 4 5
Description of the action/ interactivity Audio Narration (if any) Step 14: T7: Centrifugation and Acetone wash 1 2 3 Place the sample in the centrifuge , balance with equal number of tubes and centrifugation should be carried out at 4’C at 14000 rpm for 30 minutes After 1hr, instruct user to open door, take out the tubes, transfer it to centrifuge. Zoom in the drum, balance equal number of tubes inside the drum of centrifuge . Close the lid of drum and of centrifuge with hand action. Instruct user to set the 14000 rpm, 4’ C temperature and 30 minutes time along with display. User can increase and decrease the values of set parameters. Animate the clock for 30min. Kindly redraw the figures 4 Video File: Centrifuge 5
Description of the action/ interactivity Audio Narration (if any) Step 15: T7: Centrifugation and Acetone wash 1 2 3 After 30min, instruct user to open the lid of centrifuge, drum and animate the hand action to left the tube from drum. Now zoom the tube having two different layers, bottom one opaque and top one transparent phase. Now pipette out top portion (supernatant) completely and discard into empty tube, the action should take place only when the user clicks on the pipette and tube. Kindly redraw the figures After centrifuge, protein being heavier in nature settles down as pellet leaving out unwanted particles as supernatant. Remove as much as supernatant from the tube, without disturbing the pellet and discard it. 4 5
Description of the action/ interactivity Audio Narration (if any) Step 16: T7: Centrifugation and Acetone wash 1 2 3 Once the supernatant is removed show tube with pellet, let user takes out the wash buffer prepared earlier, picks up the pipette to set it to 1ml and takes out wash buffer to add on the pellet. Action should be done only when the user clicks on the pipette. Kindly redraw the figures Add 1ml of ice cold wash buffer to the pellet. This step is carried out to remove the color retained by the pellet. 4 5
Description of the action/ interactivity Audio Narration (if any) Step 17: T7: Centrifugation and Acetone wash 1 2 3 Zoom in tube with pellet and liquid over it. Instruct user to vortex the tube, hand animate by picking the tubes and placing on top of rubber pad for vortex. During vortex, animate user holding the tube on the rubber pad, the vortex must begin with pellet disappearing into the solution. show the tube with green color solution and kindly redraw the figures. Vortex the pellet until it goes completely into the wash buffer. 4 5
Description of the action/ interactivity Audio Narration (if any) Step 18: T7: Centrifugation and Acetone wash 1 2 3 Place the sample in the centrifuge , balance with equal number of tubes, after centrifugation and once pellet becomes color-less air drying of the tube helps to remove excess acetone. Animate like placing the tube into centrifuge. Zoom in the drum, balance equal number of tubes inside the drum of centrifuge . Close the lid of drum and of centrifuge with hand action. Instruct user to set the 14000 rpm , 4 C temperature and 10 minutes time along with display. User can increase and decrease the values of set parameters. Animate the clock for 10min. Finally after color-less pellet if observed remove the supernatant, leave the cap open and keep it on tube stand for 5min. Kindly redraw the figures. Repeat the steps in slide 20, 21, 22, and 23 for 3 times 4 5
Audio Narration (if any) Description of the action/ interactivity Step 20: T8: Rehydration buffer treatment 1 Urea 2 CHAPS 3 Zoom-in tube showing the colorless pellet and show like keeping on the tube stand for 10minutes. Instruct user to pick the pipette and to set the pipette to 400ul and pipette out rehydration buffer and add rehydration buffer to the tube. Animate the step as shown in slide-22. Display the contents of rehydration buffer when user clicks on the tube. Kindly redraw the image Add 400ul of rehydration buffer which helps for protein extraction. 4 5
Description of the action/ interactivity Audio Narration (if any) Step 21: T8: Rehydration buffer treatment 1 2 3 Zoom-in tube with blue solution, and instruct user to open the fridge and keep the tube and close it .Animate a clock running for 12 hours store the tubes at -20’C into the freezer. Incubate the sample at 4’C overnight for the protein to solubilize in the rehydration buffer. 4 5
Description of the action/ interactivity Audio Narration (if any) Step 22: T8: Rehydration buffer treatment 1 2 3 Instruct user to open the fridge and take out the tube and close the fridge and show like keeping the tube for centrifugation as shown in next slide. The sample in rehydration buffer can be stored at -20’C and can be thawed and used during the experiment. 4 5
Description of the action/ interactivity Audio Narration (if any) Step 23: T8: Rehydration buffer treatment 1 2 3 Place the sample in the centrifuge, balance with equal number of tubes and centrifugation should be carried out at 4’C at 14000 rpm for 15 minutes Animate like placing the tube into centrifuge. Zoom in the drum, balance equal number of tubes inside the drum of centrifuge. Close the lid of drum and of centrifuge with hand action. Instruct user to set the 14000 rpm , 4 C temperature and 15minutes time along with display. User can increase and decrease the values of set parameters. Animate the clock for 15 min. Kindly redraw the figures. 4 5
Description of the action/ interactivity Audio Narration (if any) Step 24: T9: Sample storage 1 2 3 After 15 min, instruct user to open the lid of centrifuge, drum and animate the hand action to left the tube from drum. Now zoom the tube having two different solutions, bottom one opaque and top one transparent blue phase. Now pipette out top portion (supernatant) completely and transferring into empty tube and the user should take a marker and write it as “sample” on the tube and open -20C freezer, keep the tube and close it .The action should take place only when the user clicks on the pipette and tube. Kindly redraw the figures After centrifuge, pellet being heavier in nature settles down as and the solution containing proteins leaving out as supernatant. Remove as much as supernatant from the tube and store it in the fresh tube at -20C. For more information and continuity follow the future viewing IDD like mentioned in slide: 1. 4 5
Button 01 Button 02 Button 03 Slide 10 -11 Slide 16-17 Slide 12-14 Slide 15 Slide 19 Slide 5-9 Introduction Tab 01 Tab 02 Tab 03 Tab 04 Tab 05 Tab 06 Name of the section/stage Animation area • INTERACTION 1: In Slide-6: let user weigh excess amount of reagent and proceeds with the setup. • Instruction: animate to show during the mixing process the reagent unable to get into the solution and instruct user to weigh the reagent with exact amount. • INTERACTION 2: In Slide-16: let user apply little pressure while grinding and proceeds with the setup. • Instruction: animate to show small pieces of leaves floating in the solution. Instruct user to re-do the grinding step again with fresh leaves. Interactivity area Instructions/ Working area Credits
Button 01 Button 02 Button 03 Slide 20-23 Slide 24-27 Slide 28 Tab 07 Tab 08 Tab 09 Tab 10 Tab 05 Tab 06 Tab 07 Name of the section/stage Animation area Interactivity area Instructions/ Working area Credits
Questionnaire: APPENDIX 1 Question 1: Which among the following acts as a “cell lysing and precipitating agent” in the lysis solution? • Trichloroacetic acid and acetone • Water • Acetone • Dithiothreitol Answer: Trichloroacetic acid and acetone Question 2: The reagent that denatures protein is • Water • Liquid nitrogen • urea • Trichloroacetic acid Answer: Urea
Questionnaire: APPENDIX 1 Question 3: What is the use of prechilled acetone? • Washing the pellet • Drying the pellet • Removing the pellet • Washing the tube Answer: washing the pellet Question 4: Role of CHAPS in the rehydration buffer • Detergent that dissolves protein • Detergent that disrupts the cell • Detergent that dissolves membrane proteins • Detergent that removes the stain from the pellet Answer: Detergent that dissolves membrane proteins
Questionnaire: APPENDIX 1 Question 5: Which one of the following is the cooling agent? a)Acetone b) Urea c)Liquid nitrogen d)Water Answer: Liquid nitrogen
APPENDIX 2 Links for further reading Chen JH, Chang YW, Yao CW et al. Plasma proteome of severe acute respiratory syndrome analyzed by two-dimensional gel electrophoresis and mass spectrometry.ProcNatlAcadSci U S A2004, 7;101(49):17039-44. Eymann C, Dreisbach A, Albrecht D. A comprehensive proteome map of growing Bacillus subtilis cells. Proteomics. 2004 :2849-76. Maldonado AM, Echevarría-Zomeño S, Jean-Baptiste S. et al. Evaluation of three different protocols of protein extraction for Arabidopsis thaliana leaf proteome analysis by two-dimensional electrophoresis. Proteomics 2008, 71(4):461-72. 2DE Tutorials by Angelika Görg : http://www.wzw.tum.de/blm/deg/ BOOKS Biochemistry by Stryer et al., 5th edition Biochemistry by A.L.Lehninger et al., 3rd edition Biochemistry by Voet & Voet, 3rd edition
APPENDIX 3 Summary The experiment mainly focused on the extraction of protein from the plant tissue which involves cell lyses using lyses buffer and grinding, protein precipitation, washing to remove excess chlorophyll and protein solubilization. Each step has to be followed as recommended so as to yield better result. The extraction process works best, when all the steps described above are followed properly. Soon after the extraction process the sample protein obtained can be taken out for further 1D and 2D run analysis.