Download
1 / 27
270 likes | 380 Views
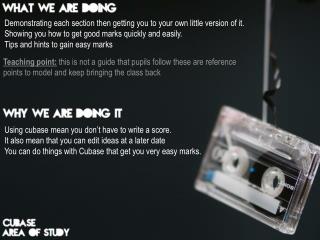
Demonstrating each section then getting you to your own little version of it. Showing you how to get good marks quickly and easily. Tips and hints to gain easy marks. Teaching point: this is not a guide that pupils follow these are reference points to model and keep bringing the class back.

E N D
Demonstrating each section then getting you to your own little version of it. Showing you how to get good marks quickly and easily. Tips and hints to gain easy marks Teaching point: this is not a guide that pupils follow these are reference points to model and keep bringing the class back Using cubase mean you don’t have to write a score. It also mean that you can edit ideas at a later date You can do things with Cubase that get you very easy marks.
1: Use a scale to compose a chord sequence (triads) Am ?dim ? ?m ?m ? ? Am Tone SemiToneTone Tone SemiTone Tone Tone I II III IV V VI VII VIII Tonic Supertonic Mediant Sub-dominant Dominant Sub-mediant Leading tone Octave TASK 1: Decode the A minor scale. The primary and secondary chords are there. TASK 2: Compose a chord sequence in 3/4 time signature 1 2 3 1 2 3 1 2 3 1 2 3 Count Chords ? ? Am ?
1: Use a scale to compose REFERENCE: Notes within a a triad
2: Using Cubase – Set up In pairs get Cubase loaded • Select More. • 2. Select Empty • Select Create. • When saving: Save in your ‘My documents’ folder.
2: Using Cubase – Set up Right mouse click here Select ADD MIDI TRACK Click ADD TRACK
2: Using Cubase – Set up Click here Select ADD MIDI TRACK
2: Using Cubase – Always use the metronome Turn the metronome on TASK: Hit record and play in your chord sequence
2: Using Cubase – Getting your music in time Enlarge, Snap, Select all and Quantise.
2: Using Cubase – Windows shortcuts • Ctrl + D = Duplicate • Ctrl + C = Copy • Ctrl + V = Paste • Ctrl + Z = Undo • Crtl + A = Select all TASK: Duplicate your Chord progression 3 times.
3: Melody: Punch in using Cubase • 1. Select ‘Draw’ from the tool bar • 2. Draw across 4 bars in BASS, creating a box. • Select the arrow from the tool bar and then duplicate your new box 3 times. A B C D E F G A The melody will come from the same place the chords did. Tone SemiToneTone Tone SemiTone Tone Tone
3: Melody: Punch in using Cubase + Conjunct & Disjunct Conjunct: Melody that moves mainly by step never more than a tone. Doesn’t jump around and sounds smooth. Task: 1st box Punch in a conjuct melody Disjunct: Melody that moves by using lots of jumps (larger than a tone). Task: 2nd box Punch in a Disjuct melody
3: Melody: Punch in using Cubase + Duration 1 2 3 4 5 6 7 8 1 2 Quantize: • Correct timing mistakes. • Input notes with precise timing. • Ensure ‘Snap’ button is blue. • Select the quantize box. • Select 1/8: By selecting 1/8 your dividing each bar into 8ths. 1 block 2 blocks 4 blocks
3: Melody: Punch in using Cubase + Trill, Duration and Triplets Trill: Rapid movement back and forth Between the note = Task: 2nd box Replace last three notes for a trill Triplets: 3 equal beats that last as long as one crotchet. Task: 3rd box Punch in a triplet melody Task: 3rd box Duplicate the 3rd box
3: Melody: Punch in using Cubase + Trill, Duration and Triplets Duration: Copy and paste the first box and use the select tool to make note longer and shorter Task: 4nd box Change the duration
4: Melody: Drone & Adding a MIDI track 1. Right mouse click in the space below the tracks you already have. 2. Click add MIDI • 1. Select ‘Draw’ from the tool bar • 2. Draw across 17 bars in your new MIDI track, creating a box. • Select the arrow from the tool bar and then double click to open the editor page.
4: Melody: Drone, Octave & Adding a MIDI track Task: Draw an A note across 17 bars Task: Drag down and ocatve or two
4: Melody: Drone & Adding a MIDI track 1. Turn PC mode on MU2 If you’re using a new Keyboard hold PC mode down until ‘PC mode’ appears on Keyboard then turn black dial to ‘On’ mode. If you’re using an old keyboard press ‘PC’ and then the ‘+’ button. 2. chn = Channel. Ensure each track has a different channel. To change channel click on the number and a drop down box will appear. For drum sounds you will need to be on Channel 10. 3. prg = Programme number. Look at the voice list on the next slide. 4. bnk = Bank number. Look at the voice list on the next slide. Task: bnk = 119 prg = 082
5: Drum track – Syncopation & Polyrhythm THE DRUM KIT http://www.drumnuts.com/GAMES/Virtual-Drums-Buckle.php Snare Drum Bass Drum How the drums work: Basic beat over 1 bar Count 1 2 3 Beat Getting drum kits in Cubase 1. Chn = 10 2. PRG = 1 3. Bnk = 16256 4. Map = The map must be set to GM map. Task: Draw across 4 bars in you r drum track, double click to open editor and then turn quantise back to 1/4
5: Drum track – Syncopation & Polyrhythm Task 1: Make your drumbeat • Select the drumstick tool from the tool bar. 2. Attempt composing your own drum beat. Ensure your quantise in 1/4. Task 1: Syncopation is where the accent is shifted from the main beat to a weaker beat. It’s a rhythm where the beats have different spacing between them. Make your drumbeat syncopated • Select the quantise to 1/32 to make more notes available. • Add notes, leave gaps and move existing notes!
5: Drum track – Syncopation & Polyrhythm Task: Make your drumbeat polyrhythmic Add another rhythm on the cowbell, triangle or bongo’s A polyrhythm doesn’t have to complicated, it doesn’t mean that you have to add another track – Do it in the same drum track!!
5: Drum track – Crash cymbal & drum fill Task: Crash cymbal Add a crash cymbal at the beginning of your drum section Task: Duplicate your drum section 3 times CTRL + D
5: Drum track – Crash cymbal & drum fill Task: Add a drum fill in the 4th box Use just the toms and this will be another easy mark in area of study 4
6: Texture – Unison and octaves Task 1: Duplicate your melody track Right mouse click and select duplicate MIDI track Leave box 1 as this is unison Texture 1 = Unison, DONE! Task 2: Octaves Open melody 2, select all and drag it down an octave Task 3: Polyphonic 2 or more melodies of equal importance being played at the same time. Completely change the melody of the 4th box and make it polyphonic.
7: Dotted rhythm • Select All - ctrl+A • Duplicate – ctrl+D • Select this arrow • Double click here • Type 100 • Click quantize • Listen to your new section