Download
1 / 38
490 likes | 1.12k Views
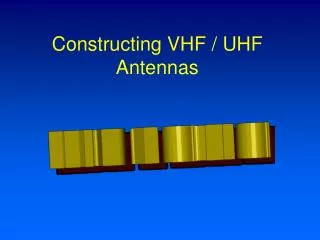
Constructing VHF / UHF Antennas. Presented at Ham Com 2014. Larry Brown WB5CXC Charles Webb W5WF. VHF / UHF Yagi Construction. Our favorite supplies are PVC pipe and wire. Most of the antennas we will be describing will have elements of 3.2 mm or 6 mm.

E N D
Presented at Ham Com 2014 Larry Brown WB5CXC Charles Webb W5WF
VHF / UHF Yagi Construction • Our favorite supplies are PVC pipe and wire. Most of the antennas we will be describing will have elements of 3.2 mm or 6 mm. • Most of the designs are from a German Ham, DK7ZB Martin Steger. His designs are very popular in Europe winning antenna gain contests. • Most of the models presented are lower gain antennas.
Construction cont’d • I have kept the dimensions in metric as it is easier to measure and build. • On 2M antennas the measurements are not a critical as they are on 70cm. • It is easier to measure 1036 mm than it is to measure 40 13/16 inches and it is a lot easier to find the middle.
Construction cont’d Tubing Conversion Table All booms are non-metallic. If using a metallic boom then the elements will have to be compensated.
Considerations • Single Frequency or Dual Frequency • Repeater or Single Side Band • Number of Elements • Length of Boom • Number of Elements and Boom length will determine the gain of the antenna.
Considerations cont’d • Single or Dual Frequency:For a given size you will have better gain with a single frequency. For some of us we don’t have big antenna systems & large lots so we are limited to how many and how high we can get our antennas, then a dual band might be a good choice. For portable operations a dual-band can be real handy.
Considerations cont’d • The Higher the Gain, the less bandwidth you have. • The Higher the Gain, the sharper the pattern. (You have to aim the antenna more precisely.)
Considerations cont’d • Repeater or Single Side Band:This will determine the band coverage and the orientation. Repeaters antennas are in the upper part of the band and are vertically polarized. Single Side Band (SSB) antennas are in the lower part of the band and are horizontally polarized. If you have a higher gain antenna then the antenna will probably not cover the entire band.
Considerations cont’d • Number of Elements:The number of elements determines the gain and the boom length. The more elements, the higher the gain, and the longer the boom. For repeater use, 3 elements on 2M and 5 elements on 70 cm should be adequate. For SSB, more elements usually are better.
Considerations cont’d • Length of Boom:As a rule the longer the boom the higher the gain (for same number of elements). If the boom is too long then the boom will have to be supported etc. For smaller portable antenna usually you don’t want a very long boom. • There could be design for the same number of elements with different boom lengths.
Materials • For the boom I use ¾” PVC pipe. In short lengths it is fairly rigid. You could use ½” or 1” PVC pipe. The ½” is usually a little small when you want to make your driven element inside a fitting. • The elements can be 3.2mm/1/8” aluminum welding rod, or # 8 solid cooper ground wire (available at Lowes or Home Depot ~ .55 - .95/ft.).
Materials cont’d • The 6mm tubing can be aluminum or ¼” copper tubing (the copper tubing is flexible and will tend to bend). The welding rods come in 3’ lengths, and aluminum tubing can be 4’ to 12’, companies can ship 4’ or 6’ lengths without too much cost.
Materials cont’d • One of the problems with the aluminum welding rods is they come in 36” lengths. Elements for 2M are a bit longer, so you have to join two rods together. I tried several solutions but ended up with a mechanical solution. I found some 5/32” brass tubing at the hobby store that fit perfectly. There is a problem on how to cut the brass tubes without distorting it.
Materials cont’d • I first make the elements. The Reflector and Directors are easy, just join two welding rods together with brass tubing. I crimp the brass tubing connection using a High Sierra coax connector crimper (it is just the right size). Measure from the middle of the brass tubing to each end and cut. Save the cut-off as they are long enough to make elements for 70cm.
Materials cont’d • Attaching elements to the boom is always a problem. Using 3.2mm or 6mm elements can make mounting to the boom simpler. For 3.2mm (aluminum welding rods, or # 8 solid copper wire) you can use conduit mountings. Drill a 1/8” hole (if you are using a brass tube in the middle you will need a little larger drill) through the top of the mounting and it is ready for attachment to the boom.
Materials cont’d • If you are using 6mm (1/4 tubing) drill a hole through the boom (snug fit). On the top of the boom drill a hole and tap it for a 6x32 or 8x32 screw. Slid the element in and the screw will hold it in place (use a brass or SS screw).
Materials cont’d • Making the driven element is similar to the regular elements. I just use 2 brass tubes and a 1/8” fiberglass rod for the insulator.
2M Yagi 3 Element – 2M 50 ohm – 19” Boom – 3.2mm elements
3 Element – 2M – 50 ohm – 34” Boom 4 Element – 2M – 50 ohm – 39” Boom
5 Element – 2M – 50 ohm – 60” Boom 6 Element – 2M – 50 ohm – 80” Boom
Dual Band Yagi – 2M / 70cm • The Dual Band 2M / 70cm antennas have a single feed point (50 ohm). These Yagi antennas have a unique element call an ‘Open Sleeve’. This is a director very close to the Driven Element (the Driven Element is sized for 2M). On 2M the ‘Open Sleeve’ has very little effect on the the antenna. On 70cm (3rd harmonic of 2M) the ‘Open Sleeve’ acts as part of the Driven element & has most of the current.
2M Current Distribution – 5 Element 70cm Current Distribution – 5 Element EZNEC 5 Models
4 Element Dual Band 2M/70cm – 18” Boom 5 Element Dual Band 2M/70cm – 20” Boom
5 Element Dual Band (2M/70cm) Yagi Elements are 3.2 mm diameter (1/8”)
9 Element Dual Band (2M/70cm) Yagi Elements are 3.2 mm diameter (1/8”)
5Element 2M/70cm Yagi 2M SWR Curve 70cm SWR Curve
5Element 2M/70cm Yagi 2M Azimuth Plot 2M Elevation Plot EZNEC 5 plots at 10’ elevation above medium ground
5Element 2M/70cm Yagi 70cm Azimuth Plot 70cm Elevation Plot EZNEC 5 plots at 10’ elevation above medium ground
Thank You for Attending Larry WB5CXC Charles W5WF Hand Out and Power Point Can be found at: www.WB5CXC.com/ham_com2014.html
Beam Width: The angle where the signal is reduced by 3dB Graph is Logarithmic – and the scale is shown in dB - 3 dB = 2 or .5 10 dB = 10 or 1/10 20 dB = 100 or .001 Front to Back Ratio: The ratio to forward signal to signal off the back Gain: Expressed in dBx
Modeling Antennas • You describe the elements in a 3D coordinate system (each end point x, y, z) • You select the kind of ground (we do not have perfect ground) • From the model - it will give you plots of Azimuth, Elevation, SWR, and others • There are limitations to what you can model