Download
1 / 22
220 likes | 411 Views
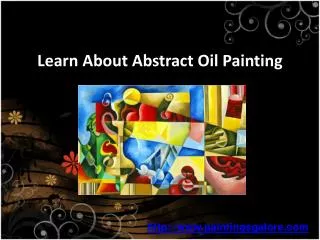
ALL ABOUT OIL PAINTING. Lisa Chui. WHAT IS OIL PAINTING?.

E N D
ALL ABOUT OIL PAINTING Lisa Chui
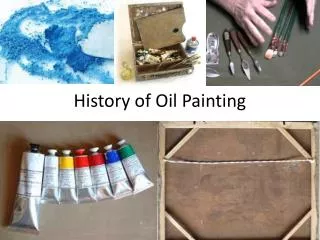
WHAT IS OIL PAINTING? • Oil painting is one of the oldest mediums available to an artist and is among the most beautiful. One of the more difficult aspects of oil painting is learning to correctly mix colors. Oil paints require many substances that other mediums do not. • Solvents are added to oil paints to temporarily change the way they work and are designed to evaporate evenly and totally as the oil paint dries. (Technically, the more correct term is diluents, as not all are solvents, but it's not the term commonly used.) Solvents are also used to dissolve resins, making mediums, cleaning up, and for cleaning brushes. It is essential to use solvents in a well-ventilated room and remember that they are flammable (catch fire easily).
Turpentine is the traditional solvent used in oil painting. It's based on tree resin and has a fast evaporation rate, releasing harmful vapors. • Mineral spirits is based on petroleum and has a moderate evaporation rate, releasing harmful vapors. Mineral spirits is less expensive than turpentine. Some people react less to mineral spirits than to turpentine. Mineral spirits is a stronger solvent than odorless mineral spirits. Also known as white spirits.
lkyd-based Mediums: If you want to speed up the drying time of your oil paint, consider using an alkyd-based medium such as Liquin (W&N) or Galkyd (Gamlin). • Tip: Test the quality of a solvent by putting a little on a drop of paper and letting it evaporate. If it doesn't leave any resident, stain, or smell, it should be good enough for oil painting.
Resins are used to increase the gloss of oil paint, reduce the color and drying time of a medium, and add body to drying oils. The most commonly used is a natural resin known as Damar, which should be mixed with turpentine as it will not thoroughly dissolve when mixed with mineral spirits. Damar can also be used as a varnish.
Instructions 1. Choose your oil paints. You'll need a blue, yellow, and red. Select student or artist grade, depending on the quality you prefer. 2. Create a palette. Do this by using the color wheel to create the colors you'd like to use. This can be done in a porcelain, plastic or disposable palate. Mix primary colors together with a palette knife and make sure the colors are evenly blended.
3. Make shades and tints. To make a shade, or darker version of a color you've just created, mix in black. To make a tint, or lighter version of the same color, add white. This allows you to make a range of the same color to use as gradients. 4. Weaken the paint as needed. To thin out oil paints, use turpentine or mineral spirits. This allows you to achieve a fine wash, or transparent coloring. Mineral spirits are generally less flammable and less toxic than turpentine.
5. Change the texture of the paint. Impasto mediums will thicken the oil paints and prevent cracking. Use these when you wish to mix thick, stiff paint. Sand, plaster or sawdust can be used to achieve the same effect. Useful Tips & Warnings • Watch out for hues, which are imitations of true pigments. These tend to be cheaper but do not mix nearly as well. • Remember that some pigments, such as cadmium, are toxic.
Tip 1:Always lay your oil paints out on your palette in the same order so that, with time, you'll be able to pick up a bit of a color instinctively. • Tip 2:The proportion of oil (medium) should be increased for each subsequent layer in an oil painting – known as painting 'fat over lean' – because the lower layers absorb oil from the layers on top of them. If the upper layers dry faster than the lower ones, they can crack.
Tip 3:Avoid using Ivory Black for an under painting or sketching as it dries much slower than other oil paints. • Tip 4:Pigments containing lead, cobalt, and manganese accelerate drying. They can be mixed with other colors to speed up drying and are ideal for under layers. (Student-quality paints usually contain cheaper alternatives to these pigments, generally labeled hues.)
Tip 5:Use linseed oil for an under painting or in the bottom layers of any oil painting done wet-on-dry as it dries the most thoroughly of all the oils used as mediums. • Tip 6:Avoid using linseed oil as a medium in whites and blues as it has a marked tendency to yellow, which is most notable with light colours. Poppy oil is recommended for light colours as it has the least tendency to yellow (although it does dry slower).
Tip 7:Don't dry your oil paintings in the dark. This may cause a thin film of oil to rise to the surface, yellowing it. (This can be removed by exposure to bright daylight.) • Tip 8:If, as the paint on your palette dries it forms a lot of wrinkles, too much oil (medium) has been added.
Tip 9:If you're not sure whether a bottle of mineral or white spirits is suitable for oil painting, put a tiny quantity on a piece of paper and let it evaporate. If it evaporates without leaving any residue, stain, or smell, it should be fine. • Tip 10:If you want to clean away a layer of oil paint or oil varnish, use alcohol, which is a powerful solvent. • Tip 11: Remember that you can paint with oils without using solvents, using brush pressure to spread the paint out thinly, only oil as a medium and to rinse your brush.
Question: What Happens When Oil Paint Dries? Answer: Although we talk about oil painting drying in the same way we talk about watercolor or acrylic paint drying, the process is different. With watercolor and acrylics, the paint dries through evaporation, that is the water in the paint is "lifted out" by spontaneously turning from a liquid into a gas, and the paint hardens. The hotter it is, the faster this happens.
With traditional oil paint, there isn't any water in the paint to evaporate. Nor does the paint dry by the oil in it evaporating away. Rather the oil oxidizes, that is it reacts with oxygen in the air which causes it to harden. (With water-soluble oils, the paint dries through a combination of the oxidization and evaporation.) • The process never really stopping is why you shouldn't varnish an oil painting as soon as it's touch dry, but should wait several months. The less time the oil paint has spent "drying", the more likely your varnish is too crack.
Question: What Happens if You Varnish an Oil Painting Too Early? • Answer: Unfortunately, if you varnish an oil painting that soon, it will crack later. This because the varnish will dry before the paint does, and then when the paint moves as it dries it'll "break" the layer of varnish. • If the paint is thin, the cracks will tend to be tiny and will take about a year to appear, but it's not worth the risk because your long-term reputation may be damaged. Oil paint should be given at least six months to dry, more if the paint is thick and depending on the medium you used.
Color Mixing Tips: • Tip No 1: Add Dark to LightIt takes only a little of a dark color to change a light color, but it takes considerably more of a light color to change a dark one. So, for example, always add blue to white to darken it, rather than trying to lighten the blue by adding white.
Tip No 2: Add Opaque to Transparent The same applies when mixing an opaque color and a transparent one. Add a little of the opaque color to the transparent one, rather than the other way round. The opaque color has a far greater strength or influence than a transparent color.
Tip No 3: Stick to Single Pigments For the brightest, most intense results, check that the two colors you are mixing are each made from one pigment only, so you’re mixing only two pigments. Artist’s quality paints normally list the pigment(s) in a color on the tube's label.
Tip No 4: Mixing the Perfect Browns and Grays Mix ‘ideal’ browns and grays that harmonize with a painting by creating them from complementary colors (red/green; yellow/purple; blue/orange) in the palette you’ve used in that painting, rather than colors you haven’t used. Varying the proportions of each color will create quite a range.
Tip No 5: Don’t Over mix If, when you mix two colors together on a palette, you don’t mix and mix until they’re totally, utterly, definitely combined, but stop a little bit beforehand, you get a far more interesting result when you put the mixed color down on paper or canvas. The result is a color that’s intriguing, varies slightly across the area you’ve applied it, not flat and consistent.
Procedure • Select an image of a landscape or cityscape, that represents your nationality or the country you are from. *If you are of mixed ethnicity, you should choose a different image for each nationality and make your images meet at some point. Tip: skylines, monuments, architectural buildings are good examples to choose. 2. Sketch the image onto your sketchbook and plan/test out the colors you would be using. Your colors must represent one of the following color schemes: Warm Colors (red, yellow, orange), Cool Colors (blue, green, purple), Complementary Colors (opposite colors on the color wheel such as red & green), or Monochromatic Colors (different shades of the same color). 3. Draw the final copy onto the canvas provided using a HB or 2B pencil. Start yourpainting using the techniques learned in class. Mix your colors carefully and remember to take your time to show details since neatness counts! For better accuracy, you may use the gridding technique previously learnt.