Download
1 / 10
110 likes | 432 Views
Summer Computing Workshop. Programming with Scratch. This workshop is designed to introduce basic programming concepts through the use of the highly intuitive programming environments of Scratch and Alice. Each of the six Scratch sessions will focus on one of these concepts.

E N D
Summer Computing Workshop Programming with Scratch
This workshop is designed to introduce basic programming concepts through the use of the highly intuitive programming environments of Scratch and Alice. • Each of the six Scratch sessions will focus on one of these concepts. • At the end of the workshop, there will be a chance for you to use your newfound skills to create programs which would be useful for teaching in a classroom setting.
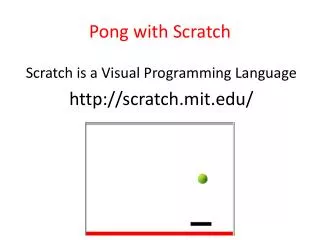
Scratch Overview • Created by MIT in 2007 • Written in Squeak • 100% GUI based programming environment • Object-oriented • Interpreted • Multi-threaded • Runs on Windows, Mac, and Linux • Free!
Scratch Interface • The Scratch interface is divided into four major sections: • The section on the far left is called the blocks palette. This is where the blocks used to create all your programs will be found. It is divided into eight color-coded subcategories • The center section contains information about the currently selected sprite • The top right corner is known as the stage. This is where you will see the results of your program • The remaining section contains a list of all the sprites associated with the current project
First Program • Enough talk, let’s start programming! • Select the only sprite in the lower right corner and make sure the scripts area is being displayed • Click the “Control” blocks category and drag a to the script area. This block is used in most programs and serves as a starting point for the other blocks and/or scripts • Click the “Motion” category and place the block directly underneath the other block already in the scripts area. The two blocks will join which means they will be executed one right after the other. Connected blocks such as these are called scripts. Blocks are the most basic element of a Scratch script • Click the green flag near the stage and watch the sprite! • That’s it! You have written your first scratch program!
Digging a little deeper • Let’s take a closer look at what’s going on in the program we just made • There are actually two objects that exist in the project, the cat named “Sprite1” and the stage • The small script we created was placed in the scripts area of sprite1 which means that the move block in the script will affect sprite1 and only sprite1. This behavior is the foundation of object-oriented programming • Sprites/objects in scratch are made up of two main elements: state (position, size, variables, current costume, etc.) and scripts. These two elements closely resemble the makeup of an object in other languages such as Java, C++ and even Alice
Double the excitement • Multi-threaded programs are easy to write in Scratch • We moved one sprite in the last example. Now let’s try to move two sprites at the same time • Copy the sprite by right clicking on it in the sprite list and selecting “duplicate.” You will notice that not only is the sprite copied, the scripts associated with that sprite are as well • Reposition the sprites by dragging them until they are no longer touching (this is so we can see the movement more clearly) • Click the green flag to test the program. If the sprites don’t appear to move, try increasing the number of steps in the move blocks
A few things to consider • You might have noticed that each sprite had to have its own script in order to move. This may seem unnecessary at first, but this behavior is crucial if objects are to remain isolated from each other. If sprites need to communicate, Scratch has certain provisions, but it is left up to the programmer to determine when and where they should be used. We will cover this in greater depth in session 6. • The two main elements of a Sprite/Object is it’s state such as costume, color, etc. and it’s scripts. • Object creation and deletion in Scratch and Alice is slightly different than in other languages. In Scratch, the programmer has to manually create or delete a sprite before the program is executed, but in other languages those tasks can be accomplished by the program while the program is running.
Session 1 Questions What is the most basic element of a scratch script? What are the two main elements of a(n) Sprite/Object? Can an object affect another object without you, the programmer, specifically allowing it? In a script, in what order are blocks executed? Can multiple scripts/methods run at the same time? In Scratch, can objects/sprites be created, destroyed, or deleted once the program has started?