Download

1 / 5
50 likes | 115 Views
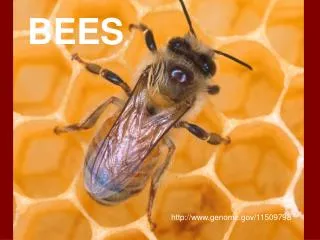
Installing Package bees. Things you will need. Pliers (regular and needle-nose) Hive tool Bee brush Smoker and fuel (probably not needed, but best to be prepared) Misting bottle filled with sugar syrup (1:1 ratio, sugar-water w/HBH ) Bee suit and veil Duct tape Gloves Extra box( es )

E N D
Things you will need • Pliers (regular and needle-nose) • Hive tool • Bee brush • Smoker and fuel (probably not needed, but best to be prepared) • Misting bottle filled with sugar syrup (1:1 ratio, sugar-water w/HBH ) • Bee suit and veil • Duct tape • Gloves • Extra box(es) • Feeder(s): pails or hive top (if hive top, bring a pail of sugar syrup to fill it; if feeder pails make sure they are full) • Wire, or rubber bands (<10”) (to suspend/hold the queen cage in the new colony) • Brick or stone (to weigh down the new colony’s cover) • Entrance reducer (must downsize the entrance to 1”) • A means to secure the entrance reducer (push pins, a small nail, even duct tape) • Hand operated staple gun • Hammer and a few nails • Notebook • Camera (This is a once in a lifetime event) • Bees – you will have to order them around December or January
Bees are sold by the pound ~ 3,500 bees in a pound. The most common size has 3 pounds or more than 10,000 bees. There will be some dead bees on the bottom of the cage; if there is more than ½ “ thick layer contact your supplier.
Things you should know… • It is recommended to start out in beekeeping with two colonies. • It’s best to order your bees from a local supplier. • Install your bees a.s.a.p. if conditions are right. If temperatures are below 40 F - wait. • Get the bees home a.s.a.p. If your not able to install the bees immediately feed the bees 1:1 sugar water by spraying them in the cage from both sides. Do not saturate them. Do this at least twice a day as long as they are in storage . Don’t assume that they are getting food from the can in the cage. Keep them in a cool dark place on a newspaper. • Set up your hive the day before you are going to install. The fewer things you have to do the day of installation the better. • The best time to install your bees is 1 hour to 45 minutes before dark. • **INSTALLING YOUR BEES**
What’s Next… • BE PATIENT! • Return 5 – 7 days later • Make sure the queen has been released • Remove the queen cage • Return a week later to see that she is laying • Continue to feed your bees until you have to add a honey super • When 6 frames are being worked (8 frame equipment) switch the two outer frames in one frame and add the second box. The same goes for 10 frame equipment when 8 frames are being worked switch the two outer frames in one frame and add the second box. • Remember your new colony will not actually start to grow for 4 weeks, in fact the population will decline during those first four weeks. • ENJOY YOUR BEES!!!