Download
1 / 11
110 likes | 224 Views
Create Alice world to practice distributive property with step-by-step guidance. Customize characters and 3D objects. Expert instruction from Duke University.

E N D
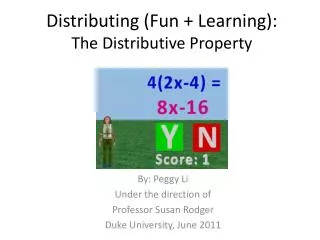
Distributing (Fun + Learning):The Distributive Property By: Peggy Li Under the direction of Professor Susan Rodger Duke University, June 2011
Overview • This tutorial will help you make an Alice world that lets you practice the distributive property. • An expression in the form a(bx+c) will appear, where a, b, and c are nonzero integers. • A possible answer for the expanded form will also show up. The user clicks Y if he/she thinks it is right, and N if he/she thinks it is wrong. • Concept can be further developed to practice more advanced concepts like adding algebraic expressions or using fractions.
Creating a new world • Open Alice and create a new world. • Select a template of your choice. (This tutorial uses Grass, but any other works too.) • Click Open to start building your world. • Remember to save your world somewhere you can find it later!
Adding a person • Click the green Add Objects button. • In the Local Gallery, scroll to the right until you reach the People folder. Click on the folder. • Scroll to the right until the very end. • You can use hebuilder and shebuilder to create your own character.
Why hebuilder/shebuilder Just a quick explanation! • You might have noticed there are lots of other cool people to choose from in the People folder! • We’re going to use the Character Builder because it comes with some built-in methods that will be helpful later on. • Once you’re comfortable working in Alice, you can use an existing character and create new methods for it.
Customizing your person • Customize your person! You can choose: • Body: head, torso, and legs • Face: skin tone, eyes, and lips • Hair: length/style and color • Clothing: shirt, pants, and shoes • Give your character a name and enter your name in the Created By box. Now click OK! Note: The person in the tutorial is named Guide. This will come up in future slides.
Rotating the arms • Your person’s arms will be spread out like in the picture. Let’s move them back down to his/her side. • Find the Object Tree on the left. • Click the + next to your person’s name, then click the + next to upperBody and Chest. • You should now see parts called rightUpperArm and leftUpperArm.
Rotating the arms • Right-click on rightUpperArm in the Object Tree. • Now go to Methods, select roll, and right. Click on Other and type in 0.2. • Do the same for leftUpperArm, but this time roll it to the left, again by 0.2. • Your person’s arms should look like this:
Adding 3D text objects • Click on Add Objects again and return to the Local Gallery. • Scroll all the way to the right until you reach Create 3D Text, and click that. • Enter “a(bx+c)= ” for the text. • If you want, you can change the font. The tutorial will use Arial bold. • Make another 3D Text that says “abx+ac”.
Renaming and turning 3D text • In the Object Tree, right-click on the first 3D Text you made and rename it “expression”. • Rename the second one “answer”. • Right-click on expression in the Object Tree. Go to Methods >> turn to face >> camera. • Repeat Step 3 for answer. • Both objects should now be facing you.
Repositioning objects • Locate the object control buttons. Use them to move and resize the objects until they look roughly like this: