Download
1 / 34
340 likes | 455 Views
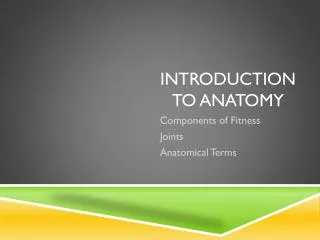
Introduction to Musculoskeletal Anatomy. IB SEHS. Starter. The anatomical starting position: 1. One person on the group should lie on the floor in the anatomical starting position Draw around the person lying on the floor with a marker Label the outline with following terms:

E N D
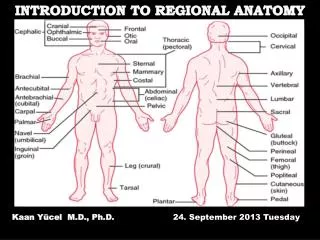
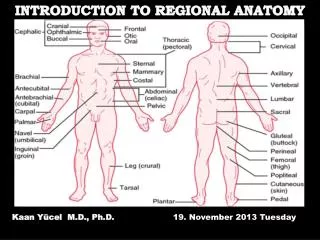
Starter The anatomical starting position: 1. One person on the group should lie on the floor in the anatomical starting position • Draw around the person lying on the floor with a marker • Label the outline with following terms: -head -trunk -arm -neck -forearm -hand -trunk -thigh -leg -foot
Learning Objectives Everyone should Applyanatomical terminology to the location of various body parts Most will: State the different functions of the skeletal system
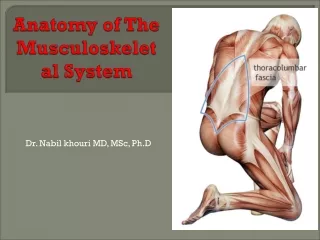
The Musculoskeletal system Skeletal system: • Bones • Joints Muscular system • Muscles Musclescross jointsand pull on bonescausing movement of joints To understand how bones and muscles are involved in sporting actions we need to know the locationand structureof specific muscles and bones and the way they work together.
Anatomical starting position head neck trunk arm forearm hand thigh leg Now copy this into your workbook! foot
Pairs activity • Look at your anatomical starting position diagram. • In turns, try and describe the location of a body part • Try and do this by relating its position to another body part e.g. your neck is below your head What kind of words did you use to help you do this? Prepositions?
1 2 3 4 5 The Skeleton There are five functions of the Skeleton Shape / Support Storage Protection Movement Blood cell production
Functions of the Skeleton Protection of vital organs The skeleton protects the most important internal organs from injury. Attachment point for muscles -bones connected by ligaments -muscles run from one bone to another -connected to bones via tendons -muscle/tendon contraction causes joint movement Now copy this into your workbook! Blood Cell Production (haemopoeisis) -RBCs, WBCs and platelets produced in red bone marrow -found in plat bones (e.g. ribs) and the end of long bones (e.g. femur) Storage -mineral homeostasis bones act as reservoirs storing vital minerals such as calcium and phosphorus -used for muscle contraction and nerve activity -energy storage -lipids stored inside yellow bone marrow -located inside long bones Shape / Support -skeleton serves as the structural framework for the body -each part bears the weight of all the structures above it -bones get bigger as you move down the body -
Time to mark off Learning Outcomes Everyone should: Applyanatomical terminology to the location of bones. Most will: State the different functions of the skeletal system
STARTER: GROUP ACTIVITY • Using the list of bones in the box below, use the ‘post-it’ labels to mark the bone location on a member of your team
Naming bones Cranium (skull) Clavicle (collar bone) Sternum (breast bone) Ribs Humerus Pelvis Radius Ulna Patella (knee cap) Femur Tibia Fibula
Learning Outcomes Everyone should: • Identify the axial skeleton • Applyanatomical terminology to the location of bones. Most will: • Describe the functions of the axial skeleton • Distinguish between the vertebrae and intervetebral discs
The skeletal system Made up of -bones -cartilage -ligaments -joints Skeleton • forms the framework of the body • Comprised of 206 bones grouped into two main parts 1. The axial skeleton (80 bones) 2. The appendicular skeleton (126 bones)
Pelvic girdle Now label the skeleton in your workbook
Forms the main core of the skeletal system and is more rigid than the appendicular skeleton. • Comprising of: • Vertabral column (spine) • Cranium (skull) • Thoracic (rib cage) • Sternum (breast bone) The Axial Skeleton Now color in the axial skeleton in your workbook
Functions of the vertebral column • supportsthe head • encloses and protects the spinal cord • Transmits weight from the body to the leg • Provide attachment points for the ribs and muscles of the back -smallest -greatest range of movement Now label and annotate the vertebral column in your workbook Don’t forget to answer the question too! -less mobile as ribs attached to each side of the vertebra restricting movement -biggest and strongest -major role in weight-bearing -absorb high compression loads transmit weight from body to pelvis and legs
Individual activity Can you describe the shape of the spine using the words listed below? • anterior • concave • convex The cervical and lumbar curves are ________ _________ The thoracic and sacral/coccgyeal curves are ________ ________ The curves increase the strength of the vertebral column and help maintain upright balance.
GROUP ACTIVITY Can you identify spinal disorder in the x-ray below?
To innervate – supply organ or body part with nerves Vertebrae Soft, gel-like and elastic Tough fibrocartilage The intervertebral discs make the vertebral column more flexible . They also flatten and bulge out to the sides when they are compressed making them important shock absorbers (vertebral foramen)
Plenary – Group Activity Now what can you label on the skeleton? DO not use your notes! Try and include as much as we have covered in the lesson as possible
Learning Outcomes Everyone should: • Identify the appendicular skeleton • Statethe four types of bone. Most • Distinguishanatomically between the axial and • appendicular skeleton • Drawand annotate the structure of a long bone.
The Appendicular Skeleton Comprises of the pectoral girdle & the pelvic girdle PAIRS ACTIVITY Can you list all the bones in the appendicular skeleton? Now color in the appendicular skeleton in your workbook
GROUP ACTIVITY-Match the picture with the name Flat bone Short bone Irregular bone Long bone To articulate– form a joint
Introduction to bone biology What is the scientific name for a bone cell? Why does bone need a blood supply? What gives bone its flexibility and strength?
INDIVIDUAL TASK: Anatomy of a long bone colouring • Read the page fully and carefully • Highlight the functionsof the different parts of the bones as you read through for the first time • Read through the page a second time • This time, follow the colouring instructions in the reading • Finally, annotate your coloured diagram with the sections underlined from the text
BONE LAB In pairs: • Carry out the bone structure lab in your workbooks • Carry out the bone strength lab in your workbook • Make sure you write a good, IB standard conclusion for the bone strength lab before the end of the lesson.
STARTER – Bone is a dynamic tissue What does dynamic mean in this context? How do our bones change over time? Why does this happen?
Bone as a dynamic tissue • Read the Case Study in your workbook • In pairs, discuss possible answers to the questions in your workbook • Individuallyanswer the questions in your workbook. Use full, meaningful sentences.
ToK in SEHS - Ballet GROUP ACTIVITY – What words come to mind when you see these pictures?
Buckhardt et al. 2011. “The effects of nutrition, puberty and dancing on bone density in adolescent ballet dancers.” Journal of Dance Medicine and Science. Vol 15 (2), Pp. 51-60. • 16 years old – 60 asians and 67 caucasians – all females • Normal BMI in only 42.5% of dancers • 15.7% had a more or less severe degree of thinness • Food intake below recommendation except animal proteins which was more than double the recommended amount Individual Activity: Read the BBC article in your workbook. Group discussion: Why is there a history of eating disorders within the ballet world? How could you change the mindset of the dancers and the public in order to promote healthier eating?