Download
1 / 34
340 likes | 375 Views
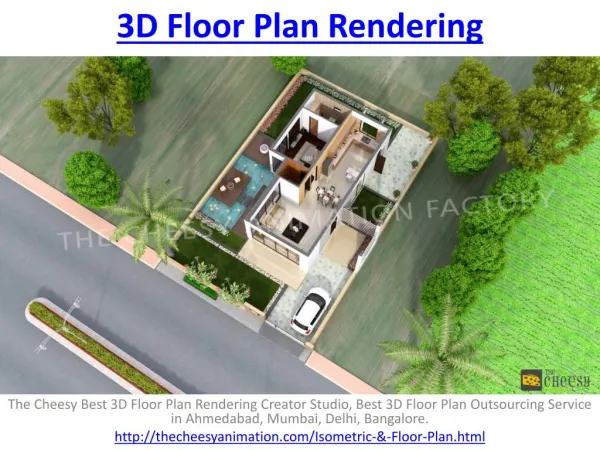
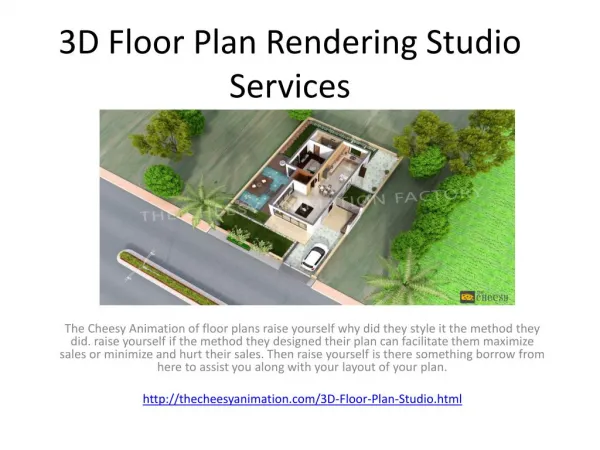
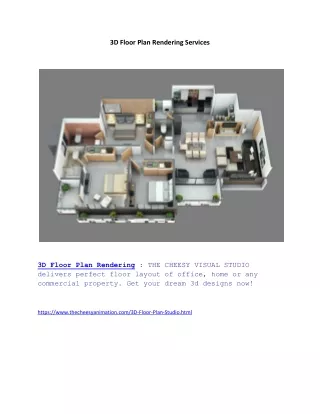
Offering floor screeding, plastering, and rendering services. Learn about materials, techniques, and tools used in this ancient craft.

E N D
FLOOR SCREEDING, PLASTERING AND RENDERING FLOOR SCREEDING, PLASTERING AND RENDERING
FLOOR SCREEDING, PLASTERING AND RENDERING A mixture of water, sand and cement forms floor screed – also known as ‘semi-dry.’ The minimum thickness required is 50mm. Once screeding is complete, walls can be rendered and plastered.
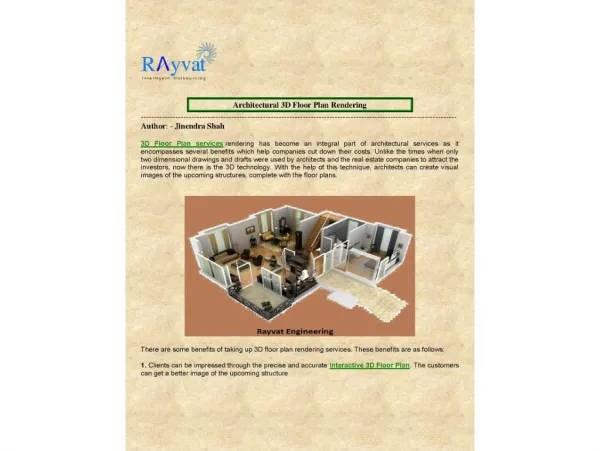
FLOOR SCREEDING, PLASTERING AND RENDERING Render is used to cover building walls. It can be used externally to repel driving rain, or to provide a decorative surface. Pigment (colour) may be added to render, so that painting is not needed once the render has set. Render can also be used internally. Render is formed by mixing water, sand and cement. Other types of render, including lime render also exist. In ancient times, horsehair was mixed with lime render to add strength. It is still used today in specialist building conservation work, such as in restoring old churches.
FLOOR SCREEDING, PLASTERING AND RENDERING Render, ready to be applied to a wall.
FLOOR SCREEDING, PLASTERING AND RENDERING Water is sprayed onto the wall to prevent moisture from being absorbed too quickly.
FLOOR SCREEDING, PLASTERING AND RENDERING Render is applied evenly to the surface.
FLOOR SCREEDING, PLASTERING AND RENDERING It is then ‘combed’ to provide a ‘key’ for the plaster coat.
FLOOR SCREEDING, PLASTERING AND RENDERING Plastering is an ancient craft which dates back at least 4,000 years. Examples of gypsum plaster work can be found in the pyramids of Egypt. Plastering requires few tools, but needs skilled labour to carry out the work.
FLOOR SCREEDING, PLASTERING AND RENDERING Plaster can be applied to either stud and plasterboard walls, or masonry walls. Stud walls are built from timber, to which plasterboard is fixed using plasterboard nails.
FLOOR SCREEDING, PLASTERING AND RENDERING Plasterboard is measured with a steel rule.
FLOOR SCREEDING, PLASTERING AND RENDERING It is then marked and cut using a straight edge and craft knife.
FLOOR SCREEDING, PLASTERING AND RENDERING Correctly sized plasterboard sheets can then be fitted to timbers to form a stud wall.
FLOOR SCREEDING, PLASTERING AND RENDERING Stud wall built, awaiting plastering. Insulation is sometimes placed in the wall cavity to either reduce sound transmission, or to help retain heat.
FLOOR SCREEDING, PLASTERING AND RENDERING Once water is mixed with plaster, the plaster will set. Raw materials should be stored in dry areas, where there is no risk of damage by water.
FLOOR SCREEDING, PLASTERING AND RENDERING Tools should be cleaned after use, and stored correctly. If looked after properly, tools will last many years.
FLOOR SCREEDING, PLASTERING AND RENDERING Plaster is mixed with water to form a smooth paste. All dry plaster is scraped off the side of the bucket, and put back into the mix.
FLOOR SCREEDING, PLASTERING AND RENDERING Plaster is mixed using a propeller mixer with the blades at an angle of 75º from the surface of the mix. The water should be clean with no contaminants, and the plaster should be mixed until a smooth, lump-free consistency is reached.
FLOOR SCREEDING, PLASTERING AND RENDERING Where right angles are formed, angle beads are fixed to plasterboard with nails. Angle beads should be made from either plastic or stainless steel to prevent corrosion.
FLOOR SCREEDING, PLASTERING AND RENDERING When masonry walls are built, angle beads are fixed using plaster ‘dabs.’
FLOOR SCREEDING, PLASTERING AND RENDERING Before plastering begins, a mixture of PVA glue and water is brushed on to existing plaster. This stops it drawing moisture from new plaster, which would cause cracks if the new plaster dried out too quickly.
FLOOR SCREEDING, PLASTERING AND RENDERING Plaster is spread evenly using a plastering trowel. Fresh plaster is contained in a bucket, and is held on a plasterer’s ‘hawk.’ These are shown on the next slide.
FLOOR SCREEDING, PLASTERING AND RENDERING Plasterer’s hawk and trowel.
FLOOR SCREEDING, PLASTERING AND RENDERING Plasterers sometimes have to work around obstructions, such as power sockets.
FLOOR SCREEDING, PLASTERING AND RENDERING Other items, such as ceiling roses for light switches also need to be worked around.
FLOOR SCREEDING, PLASTERING AND RENDERING Plasterboard will sometimes need repairing. A water and PVA glue mix is used to damp down the existing surface.
FLOOR SCREEDING, PLASTERING AND RENDERING Holes are the filled with plaster until a smooth finish is formed.
FLOOR SCREEDING, PLASTERING AND RENDERING Walls can be built from metal stud as an alternative to timber. Plywood may be fixed behind plasterboard to provide fixing points for fittings. Metalwork can be fixed to either concrete floor slabs and soffits (ceilings,) or directly to block walls as shown on the next slide.
FLOOR SCREEDING, PLASTERING AND RENDERING Large open areas can quickly be made into several individual areas using metal stud partitioning.
FLOOR SCREEDING, PLASTERING AND RENDERING ‘Tape and jointing’ provides an alternative to wet plaster. Plasterboard sheets are fixed to metal studs, and a tape forms a joint where the two sheets meet. The tape is held in place with a compound which is smoothed once dry.
FLOOR SCREEDING, PLASTERING AND RENDERING A second coat of compound is then applied. Once dry, the surface is painted.
FLOOR SCREEDING, PLASTERING AND RENDERING Large areas can be covered quickly using the tape and jointing method.
FLOOR SCREEDING, PLASTERING AND RENDERING Mouldings are sometimes used between walls and ceilings. A mitre is placed on the moulding to form a 45º angle, and the mould is cut to the required length.
FLOOR SCREEDING, PLASTERING AND RENDERING Once fixed, the moulding providing a finish between walls and ceilings.