DNR Engine Numbers and Reflective Striping
210 likes | 343 Views
This guide provides detailed instructions for installing DNR engine numbers and reflective striping on vehicles. It covers the preparation steps, necessary materials, measurement techniques, and the application process to ensure a long-lasting installation. Learn about proper surface cleaning, stripe placement, and removal of air bubbles for optimal adhesion. Whether you're working on front or rear striping, this resource has you covered to maintain visibility and comply with safety standards.

DNR Engine Numbers and Reflective Striping
E N D
Presentation Transcript
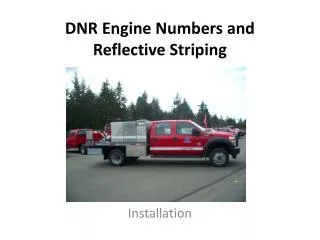
DNR Engine Numbers and Reflective Striping Installation
Installation • DNR striping is manufactured via a PC and plotter in a thin emulsion, that if properly applied, will last for years. • Stripe locations are measured and delineated with masking tape • Spraying soapy water or glass cleaner on the area, the stripe is applied and moved into place the same process used to install DNR logo decals. • Light pressure with a wet squeegee is used to remove any air trapped been the stripe and the engine. Once complete the outer cover is removed.
BEFORE YOU BEGIN • Do not begin this project if you are not familiar with the techniques to accurately locate and install striping. • Move the vehicle indoors the night before to bring the vehicle to room temperature. • All dirt, grease and wax must be removed from the car surface. Failure to take this step may result in the decal not sticking to the vehicle surface.
BEFORE YOU BEGIN • To ensure that the stripe is properly stuck to the transfer tape covering before installing it, take the squeegee application tool and press firmly over the whole surface of the face of the stripe while it is still laying flat.
Required Items squeegee, masking tape, glass cleaner or spray solution, trim knife or razor blade, measuring tape or ruler.
Make sure you have striping necessary for each engine. • 2- 2 ½”bumper engine numbers front and back • 2- 4” E-XXX Front transverse box • 4” DNR on the back left box and 3” Fire in the right rear box for rear visibility. • 4” Reflective striping on the front and rear doors, on the rear deck boxes • 4”X6” stripe in the inside driver door panel.
Measure your location • Measure your stripe location and mark with masking tape.
Apply the stripe • Place the stripe on the desired location • Place a strip of masking tape at one end of the stripe, as this will hold the end of the stripe while installing. • Working from that end to the other, slowly peel back the release paper 1/2 way down and spray the body surface with a fine mist of soapy water solution. • With a squeegee, apply the stripe to the body panel working from the center of the stripe outward.
Applying the stripe • Once all air is removed the pull off the outer transfer tape covering, carefully pulling parallel to the surface of the vehicle. • Any small air pockets can be easily removed by first placing a small needle hole in the bubble. Then moisten the squeegee edge with water and slide the squeegee along the surface of the stripe where the bubble is, working the air towards the hole. The squeegee must be kept wet when using it on the strip once the protective transfer tape is removed during installation.
Striping the boxes • Since all engines are configured the same, use the same striping for all models • Unroll the 4 inch striping from the roll, allow 1 to 1.5 inches to wrap around the edge of each door. • Measure and locate striping with the lower edge even with the rear railing, about 8” above the deck surface. Tape the end. • Use the spray, and squeegee the stripe to remove all bubbles.
Striping the boxes • Once the outer transfer tape is removed, the stripe is cut with the trim knife or razor blade and the overlap is affixed around the door radius.
Overhead Numbers • Overhead as centered to the top and located along the forward edge of the lid.
Rear reflective stripes • Mount DNR on left box, and FIRE right box, each 1” below the spotlight mount and centered.
Rear Reflective Engine Numbers • engine numbers come as one unit. Split and locate on rear bumper outside of reflectors
Front Reflective stripes • The 2012 and 2013 HS have a narrow surface to install the engine number. Trim 1/8” from the top and boot to fit these models. • Split the engine number and mount of the drivers side bumper.
Cab Striping • Ford and Chevrolet Cabs- Striping is located directly under the kick panel radius approximately 13” above the lower door edge. • International Cab- Striping is located to line up with the deck rail, approximately 10.5 inches above the lower edge
Cab Striping • The DNR Fire stripe is cut so the words can be centered on the door of every model. • Locate the strip at the base of the radius. • Leave and extra inch to overlap the door to the inside. • The DNR logo is also centered on the door panel over the stripe
Cab Striping • Cut the rear door Stripe from the four inch stripe roll, leaving enough material to overlap the door on each end.
Cab Striping • Cut a separate piece to overlap the rear of the cab.