
5-4 画像の表示 (1)複数画像の表示 A.手順
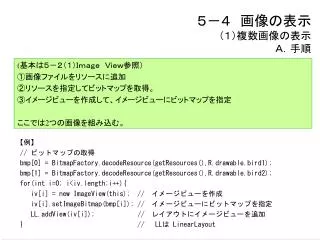
5-4 画像の表示 (1)複数画像の表示 A.手順. ( 基本は5-2(1)Image View参照) ①画像ファイルをリソースに追加 ②リソースを指定してビットマップを取得。 ③イメージビューを作成して、イメージビューにビットマップを指定 ここでは 2 つの画像を組み込む。. 【 例 】 // ビットマップの取得 bmp[0] = BitmapFactory.decodeResource(getResources(),R.drawable.bird1);

5-4 画像の表示 (1)複数画像の表示 A.手順
E N D
Presentation Transcript
5-4 画像の表示(1)複数画像の表示A.手順5-4 画像の表示(1)複数画像の表示A.手順 (基本は5-2(1)Image View参照) ①画像ファイルをリソースに追加 ②リソースを指定してビットマップを取得。 ③イメージビューを作成して、イメージビューにビットマップを指定 ここでは2つの画像を組み込む。 【例】 // ビットマップの取得 bmp[0] = BitmapFactory.decodeResource(getResources(),R.drawable.bird1); bmp[1] = BitmapFactory.decodeResource(getResources(),R.drawable.bird2); for(int i=0; i<iv.length;i++){ iv[i] = new ImageView(this);// イメージビューを作成 iv[i].setImageBitmap(bmp[i]); // イメージビューにビットマップを指定 LL.addView(iv[i]); // レイアウトにイメージビューを追加 } // LLは LinearLayout
B. 関連するクラス 【android.graphic.BitmapFactory クラス】 Bitmap decodeResource 指定したリソース、IDからビットマップ (Resource rs, int id) オブジェクトを作成。 【android.content.ContextWrapper クラス】 Resources getResource() リソースを取得。 【android.view.ImageView クラス】 ImageView(Context c) 指定したコンテキストでイメージビューを作成。 Void setImageBitmap(Bitmap bmp) ビットマップオブジェクトを設定。
C. プログラム例 【注】 あらかじめdrawable-hdpi に 2画像をコピーしておくこと。 ここでは、bird1.gif, bird2.gif を コピーした例を示す。 package jp.eclipse.image; import android.app.Activity; import android.os.Bundle; import android.graphics.*; import android.view.*; import android.widget.*; public class MultiImageDTActivity extends Activity { /** Called when the activity is first created. */ Bitmap[] bmp = new Bitmap[2]; ImageView[] image = new ImageView[2]; @Override public void onCreate(Bundle savedInstanceState) { super.onCreate(savedInstanceState); LinearLayout LL=new LinearLayout(this); LL.setOrientation(LinearLayout.HORIZONTAL); LL.setGravity(Gravity.CENTER); setContentView(LL); bmp[0]=BitmapFactory.decodeResource(getResources(), R.drawable.bird1); bmp[1]=BitmapFactory.decodeResource(getResources(), R.drawable.bird2); for(int i=0;i<image.length;i++) { image[i]=new ImageView(this); image[i].setImageBitmap(bmp[i]); LL.addView(image[i]); } } }
D. 実行例 2つの画像が表示されている。(Java 1.6で動かすこと)
(2)イメージ画像の切り替えA.手順 複数の画像をビュー上で切り替えることで、絵が動いているようにみえる。 (前出(1)を変更して作成) ① ActivityにRunnable を実装 ② 「ボールの移動」と同様、Run を一定時間遅延させて実行する。
B. プログラム例(1) 【注】 あらかじめdrawable-hdpi に 2画像をコピーしておくこと。 ここでは、bird1.gif, bird2.gif を コピーした例を示す。 package jp.eclipse.anime; import android.app.Activity; import android.os.Bundle; import android.os.Handler; import android.content.*; import android.graphics.*; import android.view.*; // Runnable を実装 public class Anime01Activity extends Activity implements Runnable { /** Called when the activity is first created. */ AnimationView v; Handler h; Bitmap[] bmp=new Bitmap[2]; float x, y; int nid; @Override public void onCreate(Bundle savedInstanceState) { super.onCreate(savedInstanceState); bmp[0]=BitmapFactory.decodeResource(c.getResources(), R.drawable.bird1); bmp[1]=BitmapFactory.decodeResource(c.getResources(), R.drawable.bird2); requestWindowFeature(Window.FEATURE_NO_TITLE); v=new AnimationView(this); setContentView(v); h = new Handler(); h.postDelayed(this,10); }
プログラム例(2) public void run(){ nid = 1 - nid; v.invalidate(); h.postDelayed(this,10); } public void onDestroy(){ super.onDestroy(); h.removeCallbacks(this); } class AnimationView extends View{ public AnimationView(Context c) { super(c); nid=0; x=100; y=100; } protected void onDraw(Canvas c){ super.onDraw(c); setBackgroundColor(Color.WHITE); c.drawBitmap(bmp[nid], x, y, null); } } }
C. 実行例 2つの画像が交互に表示されるので、 鳥が羽ばたいているように見える。 (Java 1.6で動かすこと)
(3)背景画像と画像の移動A.手順 前出(2)を変更して作成 ① 鳥の画像の他に背景画像ファイルをリソースに追加 ② 1回ごとにX座標を減ずる。負になったら右端のX座標に移す。 ③ 背景と鳥を描画する。
B. 関連するクラス 【android.graphic.Canvas クラス】 int getWidth() キャンバスの幅 int getHeight() キャンバスの高さ void drawBitmap(Bitmap b, ビットマップの部分的な描画 Rect src, Rect dst, Paint p)src : ビットマップ側の範囲 dst : キャンバス側の範囲
C. プログラム例(1) package jp.eclipse.anime02; import android.app.Activity; import android.os.Bundle; import android.os.Handler; import android.content.*; import android.graphics.*; import android.view.*; // Runnable を実装 public class Anime02Activity extends Activity implements Runnable{ /** Called when the activity is first created. */ AnimationView v; Handler h; Bitmap[] bmp=new Bitmap[2];Bitmap backBmp; float x, y, dx; int nid; @Override public void onCreate(Bundle savedInstanceState) { super.onCreate(savedInstanceState); bmp[0]=BitmapFactory.decodeResource(c.getResources(), R.drawable.bird1); bmp[1]=BitmapFactory.decodeResource(c.getResources(), R.drawable.bird2); backBmp=BitmapFactory.decodeResource(c.getResources(), R.drawable.backsample); requestWindowFeature(Window.FEATURE_NO_TITLE); v=new AnimationView(this); setContentView(v); h = new Handler(); h.postDelayed(this,10); }
プログラム例(2) public void run(){ nid = 1 - nid; x += dx; v.invalidate(); h.postDelayed(this,10); } public void onDestroy(){ super.onDestroy(); h.removeCallbacks(this); } class AnimationView extends View{ public AnimationView(Context c) { super(c); nid=0; x=300; y=100; dx=-10; } protected void onDraw(Canvas c){ super.onDraw(c); int wd = c.getWidth(); int hd = c.getHeight(); Rect dst = new Rect(0,0,wd,hd); int ws = backBmp.getWidth(); int hs = backBmp.getHeight(); Rect src=new Rect(0,0,ws,hs); c.drawBitmap(backBmp, src, dst, null); // 背景画像表示 if(x<0) x = wd; c.drawBitmap(bmp[nid], x, y, null); // 鳥の画像表示 } } }
D. 実行例 鳥が背景画像の前を羽ばたきながら左方向に移動する。 (Java 1.6で動かすこと)
(4)画像の回転A.手順 マトリックスで変換行列を指定する ① 回転する画像と静止する画像(動きの相対関係を明確にするため)をリソースに追加 ② 変換行列に回転を指定する。 ③ 回転したビットマップを作成する。 ④ 回転した図形を描画する。なお、回転した結果は元の画像より大きくなるので、 描画開始位置を調整する。 元の画像 回転した結果の 画像範囲 回転した結果
B. 関連するクラス 【android.graphic.Matrix クラス】 boolean postRotate(int a) 指定した角度(度:Degree)を設定する。 【android.graphic.BitmapFactory クラス】 Bitmap createBitmap(Bitmap bmp, 指定したビットマップ、X座標位置、Y座標 int x, int y, int w, int h, 位置、幅、高さのビットマップオブジェク Matrix m, boolean filter) トを変換行列 m を用いて生成する。
C. プログラム例(1) package jp.eclipse.animation; import android.app.Activity; import android.os.Bundle; import android.os.Handler; import android.content.*; import android.graphics.*; import android.view.*; // Runnableを実装 public class Anime03Activity extends Activity implements Runnable { /** Called when the activity is first created. */ AnimationView v; Handler h; Bitmap bmp1, bmp2; Matrix m; @Override public void onCreate(Bundle savedInstanceState) { super.onCreate(savedInstanceState); requestWindowFeature(Window.FEATURE_NO_TITLE); bmp1=BitmapFactory.decodeResource(this.getResources(), R.drawable.fan1); bmp2=BitmapFactory.decodeResource(this.getResources(), R.drawable.fan2); m=new Matrix(); v=new AnimationView(this); setContentView(v); h = new Handler(); h.postDelayed(this,10); }
プログラム例(2) public void run(){ m.postRotate(10); v.invalidate(); h.postDelayed(this,10); } public void onDestroy(){ super.onDestroy(); h.removeCallbacks(this); } class AnimationView extends View{ public AnimationView(Context c) { super(c); } protected void onDraw(Canvas c){ super.onDraw(c); setBackgroundColor(Color.WHITE); c.drawBitmap(bmp2,180, 80, null); Bitmap tmp = Bitmap.createBitmap(bmp1,0, 0, bmp1.getWidth(), bmp1.getHeight(), m, true); // 回転画像で大きくなった分だけ移動する。 float f=(tmp.getWidth()-bmp1.getWidth())/2; c.drawBitmap(tmp,200-f,100-f, null); } } }
D. 実行例 ファンの形だけが回転している。 (Java 1.6で動かすこと)
(4)画像の拡大・縮小A.手順 ソースとディスティネーションの矩形を指定する方法でも可能だが ここではマトリックスで拡大・縮小を行う方法について示す。 ① 拡大・縮小する画像をリソースに追加 ② 変換行列にスケールを指定する。 ③ 拡大・縮小したビットマップを作成する。 ④ 描画する。
B. 関連するクラス 【android.graphic.Matrix クラス】 void postScale 指定した角度を設定する。 (float sx, float sy) sx : X方向スケール sy : Y方向スケール 【android.graphic.BitmapFactory クラス】 Bitmap createBitmap(Bitmap bmp, 指定したビットマップ、X座標位置、Y座標 int x, int y, int w, int h, 位置、幅、高さのビットマップオブジェク Matrix m, boolean filter) トを変換行列 m を用いて生成する。
C. プログラム例(1) package jp.eclipse.scale; import android.app.*; import android.os.Bundle; import android.graphics.*; import android.view.*; import android.view.View.OnClickListener; import android.view.View.*; import android.widget.*; public class ScaleActivity extends Activity { /** Called when the activity is first created. */ ImageView img; Button b1,b2,b3; Bitmap bmp; @Override public void onCreate(Bundle savedInstanceState) { super.onCreate(savedInstanceState); LinearLayout LL=new LinearLayout(this); LL.setOrientation(LinearLayout.HORIZONTAL); setContentView(LL);
プログラム例(2) b1=new Button(this); b1.setText("通常");LL.addView(b1); b2=new Button(this); b2.setText("拡大");LL.addView(b2); b3=new Button(this); b3.setText("縮小");LL.addView(b3); bmp=BitmapFactory.decodeResource(getResources(), R.drawable.bird1); img=new ImageView(this); img.setImageBitmap(bmp); LL.addView(img); b1.setOnClickListener(new b1ClickListener()); b2.setOnClickListener(new b2ClickListener()); b3.setOnClickListener(new b3ClickListener()); }
プログラム例(3) class b1ClickListener implements OnClickListener{ public void onClick(View v){clickProc(1.0F,1.0F);} } class b2ClickListener implements OnClickListener{ public void onClick(View v){clickProc(2.0F,2.0F);} } class b3ClickListener implements OnClickListener{ public void onClick(View v){clickProc(0.5F,0.5F);} } public void clickProc(float sx, float sy){ Matrix m=new Matrix(); m.postScale(sx,sy); Bitmap bmp2=Bitmap.createBitmap(bmp,0,0, bmp.getWidth(),bmp.getHeight(),m,true); img.setImageBitmap(bmp2); } }
D. 実行例 「拡大」「縮小」ボタンをクリック すると拡大・縮小される (Java 1.6で動かすこと)
(5)クリッピング(キャンバスのくりぬき)A.手順(5)クリッピング(キャンバスのくりぬき)A.手順 ① 複合図形(Path)を指定する ② Pathをクリッピング(Clipping)する(くりぬき) ③ キャンバスにビットマップを描画する。
B. 関連するクラス 【android.graphic.Canvas クラス】 void clipPath(Path p) パスをクリッピングする。 P : pathインスタンス その他(Canvasクラス) void clipRect(Rect/RectF r) void clipRect(int/float x1, int/float y1, int/float x2, int/float y2)
C. プログラム例(1) package jp.eclipse.Clip; import android.app.Activity; import android.os.Bundle; import android.content.Context; import android.content.res.Resources; import android.graphics.*; import android.util.AttributeSet; import android.view.*; import android.widget.*; public class ClippingActivity extends Activity { /** Called when the activity is first created. */ Bitmap bmp=null; myView mv; @Override public void onCreate(Bundle savedInstanceState) { super.onCreate(savedInstanceState); LinearLayout LL= new LinearLayout(this); LL.setOrientation(LinearLayout.HORIZONTAL); LL.setGravity(Gravity.CENTER); setContentView(LL);
プログラム例(2) bmp= BitmapFactory.decodeResource(getResources(), R.drawable.backsample); mv=new myView(this); LL.addView(mv); } class myView extends View{ public myView(Context context) { super(context); } protected void onDraw(Canvas c){ super.onDraw(c); c.drawColor(Color.WHITE); Path path =new Path(); path.addCircle(250,250, 100, Path.Direction.CW); path.addRect(100, 300, 400, 700, Path.Direction.CW); c.clipPath(path); Paint paint=new Paint(); c.drawBitmap(bmp,20,20,paint); } } }
D. 実行例 クリッピング している様子