Download

1 / 5
0 likes | 4 Views
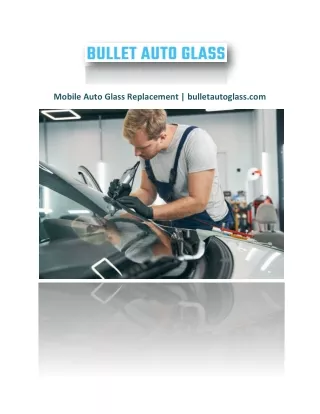
Donu2019t wait on windshield chips. Our rapid repair service strengthens the glass, enhances visibility, and helps you avoid costly replacements later.

E N D
Windshield replacement looks simple from the customer’s seat. The old glass comes out, new glass goes in, and a technician tapes the edges. But the part you don’t see—the chemistry and technique behind the sealant—decides whether that windshield will keep water out, hold steady in a crash, and cure properly through a winter morning or a summer heatwave. When you search for an Auto Glass Shop Near Me or compare quotes for auto glass replacement near me, you’re not just buying glass. You’re paying for a safe bond between the body of your car and a structural panel that helps your airbags work and your roof resist a rollover. That bond is the sealant. I’ve stood in hot shops and cold driveways, from July in Phoenix to January in Duluth, and I’ve watched good and bad replacements unfold. The difference usually comes down to process and patience. If the shop understands primers, cure times, glass prep, and the realities of weather, that windshield will outlast your lease. If they skip steps, you’ll be back with wind noise, water trails on the dash, or worse, a safety system that doesn’t perform when you need it most. Why the Sealant Matters More Than the Glass Brand Windshields are laminated glass; rear and quarter windows are often tempered. Most reputable glass, even from aftermarket suppliers, is close to OEM spec. Yet I’ve replaced high-end OEM glass that leaked because of rushed urethane work, and I’ve installed aftermarket glass that sealed and stayed quiet for years. The sealant is the bridge between vehicle and glass, and it does heavy lifting: it bonds, it insulates, and it acts as a structural member in a crash. That’s not marketing gloss. Modern urethane adhesives can deliver tensile strengths in the thousands of PSI. They’re formulated to stick to painted metal and ceramic frits auto glass shops greensboro on glass, flex with body movement, and resist UV. Done right, the bond helps keep the windshield in place so the passenger airbag can deploy properly off it. Done wrong, a hard stop or a minor collision can dislodge the glass enough to compromise safety systems. Urethane, Butyl, and Why Old Tricks Don’t Belong on New Cars You might hear old-timers talk about butyl tape. It had a long run in the carburetor era: easy to work with, immediate tack, no special primers. But it’s not structural. You could press on a butyl-set windshield corner and see the glass squirm. That was fine in 1985; it isn’t fine on a vehicle designed with the windshield as part of the safety cage. Automotive glass replacement today hinges on moisture-curing polyurethane, commonly called urethane. It comes in different viscosities and cure profiles. Some are fast-cure, offering a safe drive-away time in about an hour under warm, humid conditions. Others need a few hours, sometimes longer, to reach a conservative safety threshold. Every tube has a technical data sheet, and a good technician actually knows what it says rather than guessing. If a shop tells you it’s safe to drive “right away” without checking cure time against weather conditions and glass type, that’s a red flag. Surface Prep: Where Leaks and Squeaks Begin I’ve seen technicians swap a windshield in under an hour and leave a car with a smile. I’ve also seen those same cars return with a streak of water on the A-pillar trim after the first rain. The difference? Prep. Removing the old windshield leaves behind a bead of cured urethane. Good practice is to trim that bead to a uniform thin layer, often around 1–2 millimeters above the pinch weld. That remaining film is gold—it’s the best primer you can ask for, because urethane bonds amazingly well to itself. Grinding the pinch weld to bare metal is usually a mistake unless there’s rust; exposed steel needs epoxy primer from the body side, and that’s body shop territory, not something you can fake with a quick spray. The glass side needs equal attention. Most windshields arrive with a black ceramic border called frit and, often, a bonding area the manufacturer expects you to treat. Clean doesn’t mean shiny; it means free of silicone, oils, and dust. A lint-free wipe and the right cleaner matter. Touching the bonding area with bare hands can leave enough skin oil to weaken a bond, especially if the primer is sensitive. The pros wear gloves. They swap rags often. They don’t set the new glass face-down on a dusty pad and then wonder why a corner lifted a week later. Primers: Not Paint, Not Optional The primer step is where many cheap jobs cut corners. Primers do three things. First, they promote adhesion between urethane and the bonding surfaces. Second, they seal tiny scratches in the frit or painted pinch weld to prevent corrosion
under the bead. Third, some formulations include UV blockers that protect the urethane from sunlight creeping around the edge of the glass. Different urethanes require different primer systems. Some are “primerless to glass” in lab conditions, and that’s fine if the glass is pristine and the climate is perfect. On a dusty jobsite or a mobile call in winter, relying on primerless bonding is wishful thinking. The smart move is to follow the adhesive maker’s system: their glass cleaner, their activator, their primer, and their urethane, applied in the sequence and open times they specify. That last bit—open time—matters. Primers often need a few minutes to flash before the urethane bead goes down. Too soon and solvents get trapped. Too late and the surface loses its chemical tack. A technician who watches the clock here is doing it right. The Bead: Height, Shape, and Why the Tip Matters The urethane bead isn’t frosting on a cake; it’s a gasket and a structural joint. The bead has to be tall enough and shaped correctly so the glass compresses into it and makes full contact without starving the bond. Most guns use V-notched tips that create a triangular profile. The angle at which the bead is laid and the tip size are adjusted to the vehicle design. Some cars need a stepped or “picture frame” bead with extra material at corners or around camera brackets. In summer heat, urethane flows easily and can slump. In winter, it’s thick and can rope or trap air. Experienced techs warm cartridges to a consistent temperature and keep the gun moving at a steady pace. They overlap starts and stops so there are no gaps. They never join the bead with a dry butt joint; they feather the ends into each other to avoid pinholes. A single pinhole can become a whistle on the highway or a slow leak during a storm. Setting the Glass: Precision Beats Muscle You’ll see more suction cups in a glass shop than in a diner kitchen. There’s a reason: clean set points and even pressure prevent smearing the bead or pulling primer off the frit. Good shops use setting tools that index the glass so it lands in the right spot the first time. Pushing the glass around after it touches the bead is a great way to tear a primer film or create uneven squeeze-out. Once the glass is in, the tape you see on the outside is more about keeping the windshield from sliding on fresh urethane than holding it in. It’s a temporary aid while the sealant grabs. Some cars don’t need tape if the bead profile and spacers are correct, but you’ll often see a strip or two for peace of mind. Cure Time and Drive-Away Reality Customers ask how soon they can drive. The honest answer is: it depends on the adhesive system, glass size, vehicle structure, air temperature, and humidity. Moisture-cure urethanes need water in the air to react. On a muggy day at 75°F, a quality fast-cure urethane might reach a conservative minimum in an hour. On a dry winter morning at 30°F, it could be three to six hours. Some cold-weather products include accelerators or are formulated for lower temps, but there’s always a safe drive-away time backed by testing. That time isn’t up for negotiation. I’ve had fleet managers push for a vehicle to go out early. The answer stays no. The stakes are too high. If the windshield contributes to airbag support and the bead hasn’t reached the required modulus, the bag can blow the glass forward. For daily drivers, this is rare, but the standard has to hold across use cases. A reputable auto glass replacement shop explains the wait and documents it on the work order. Aftercare: Gentle First Day, Smarter First Week New urethane bonds continue to strengthen for days. You don’t need to baby the car, but a few habits help. Don’t slam doors for the first 24 hours; the pressure wave can ripple through the cabin and find a weak spot in the bead. Leave the blue tape on until the tech says it can come off. Avoid high-pressure car washes for a couple of days. If you see a thin line of squeeze-out, don’t poke at it. It’s part of the bead system, and trimming it too early can open a pathway for water. Modern cars with cameras and sensors behind the glass often need calibration after the windshield is replaced. Some vehicles allow static calibration in the shop with targets; others require a dynamic drive at specific speeds and distances. Shops that do a lot of these replacements either have the equipment in-house or partner with a facility that does. Make sure calibration is on the invoice if your vehicle requires it—if it isn’t, your lane-keep or emergency braking might be off by a critical margin.
Mobile Service Versus In-Shop Replacement There’s nothing wrong with mobile auto glass replacement. I’ve done great work in office parking lots and residential driveways. The trick is matching the conditions and the adhesive to the day. Wind can kick dust into the bonding area. Cold soaks the car and makes urethane sluggish. Rain is a showstopper unless you have a canopy and sidewalls. If a mobile tech says they can do it in the rain without shelter, that job is headed toward a comeback visit. Shops have controlled environments: stable temperatures, clean benches, better lighting, and more tools at hand. If you live in a place with extreme weather, or if your vehicle has ADAS sensors that need calibration, an in-shop job is often better. That said, for basic auto glass repair like a chip or small crack in a windshield, mobile service is convenient and perfectly effective. The key is honesty about conditions and the willingness to reschedule rather than force a bad setup. What to Ask When You Search “Auto Glass Shop Near Me” You don’t need to be a chemist to vet a shop. A few targeted questions reveal whether the team respects the sealant process and your time. Keep it short and straightforward. Which urethane brand and specific product do you use, and what’s the stated safe drive-away time for current weather? Do you use the full adhesive system—cleaner, activator, and primer—recommended by that manufacturer for my vehicle? If there’s rust at the pinch weld, how do you handle it? Do you coordinate with a body shop if necessary? Will my ADAS features be recalibrated after the replacement, and is that done in-house or with a partner? Do you warranty against leaks and wind noise, and for how long? You want confident, specific answers. If the person on the phone says “we use whatever the distributor sends” or “you can drive immediately,” keep shopping. Weather, Geography, and Real-World Adjustments I’ve glued windshields in desert heat where the bead skinned over before we set the glass. The fix was simple: pre-stage the set, shade the work area, and use a slightly wider tip to maintain a live surface. In mountain towns, dawn temperatures started below freezing. We warmed the cartridges in a controlled cabinet, ran a space heater inside the car for twenty minutes, and used a winter-rated urethane. The result was clean squeeze-out and a bond that passed a hose test on the spot. Humidity plays a sneaky role. Too low, and cure slows. Too high, and the surface can skin while the core lags, which is usually fine but can fool you into thinking it’s ready sooner than it is. Timers and hygrometers in the shop help, but you also develop a feel. The bead’s sheen changes as it cures. Pressing with a gloved fingertip tells you nothing; it only smudges the evidence. The competent answer is to trust the adhesive data sheet and the calendar more than your finger. The Cost Conversation: Where the Money Goes A proper auto glass replacement isn’t cheap, but most of the cost isn’t the glass. It’s labor time, adhesive systems, calibration, and the overhead of training and equipment. Insurance often covers windshield replacement with a low deductible, especially on comprehensive policies, because they’d rather pay for a safe install than deal with water damage, corrosion, or liability later. Beware of quotes that beat the field by a wide margin. The easiest way to slash cost is to buy bargain urethane or skip primers. A few dollars saved at the tube can cost hundreds in callbacks. Shops that take pride in their work carry recognized adhesive brands and list them on your invoice. That transparency matters. Chips, Cracks, and When Repair Makes Sense Not every hit needs a new windshield. A clean bull’s-eye or star break under the size of a quarter, away from the edge and outside the driver’s line of sight, can often be stabilized with resin. A good auto glass repair preserves the original factory bond, which is ideal. The resin fills micro-fractures and keeps dirt and moisture out. You’ll still see a faint scar, but the structural integrity is restored enough to stop the crack from spreading. Edge cracks, long runners, and damage in the sensor or camera sweep area usually call for replacement. The decision isn’t just cosmetic; it’s about safety and the realities of calibration. An experienced tech will explain the trade-offs
without pushing you toward the pricier option unless it’s justified. Common Failure Modes and How They Start Most problems I’ve diagnosed trace back to one of a handful of mistakes. Water at the A-pillar after rain often means a bead gap where the technician lifted and repositioned the glass. Wind noise that grows with speed can be a small void at the top center where the roof flexes. A tiny rust bloom on the pinch weld edge a year later points to missed primer or a scratched paint surface that wasn’t sealed. Any of these can be prevented by clean prep, proper primer use, and a no- reposition rule after first contact. There’s also the “wavy glass” complaint, which is almost never adhesive-related. That’s a glass quality issue and, while rare among reputable suppliers, it happens. A seasoned shop inspects the windshield before install, checks optical distortion in the driver’s field, and sends flawed panels back rather than saddling you with an annoyance you’ll notice every sunny afternoon. ADAS, Cameras, and the Hidden Complexity at the Top of the Glass Cameras and sensors live close to the bond line on many cars. A millimeter of set height can move a camera’s viewpoint enough to affect calibration. That’s why glass manufacturers add locator blocks and specify bead height. Technicians use setting blocks and spacers so the glass rides at the right altitude. Too low and the trim rubs. Too high and the cowl gaps. The urethane bead isn’t a cushion you can fudge; it’s the engineered element that defines position as well as adhesion. After the glass is in, calibration isn’t optional. A car might not throw a code if it’s only slightly off, but the steering assist could ping-pong more between lane lines or the auto-braking might detect late. I’ve watched dynamic calibrations fail twice on a windy day and pass on the third try after the breeze died. Conditions matter. So does the patience to repeat the process until it lands inside spec. Choosing Between OEM and Aftermarket Glass People ask if OEM glass guarantees a better outcome. Sometimes it does, especially for vehicles with complex head-up displays or acoustic laminates tuned to the cabin. Aftermarket glass quality ranges from excellent to mediocre, and reputable distributors carry the good stuff. The adhesive process remains the same. If a shop insists you must buy OEM for a car that doesn’t require it, ask why. If you have a luxury model with a curved windshield and infrared coatings, OEM may be the right call. If you drive a common SUV, a top-tier aftermarket pane will likely perform just as well. The decision can also come down to lead times. If the vehicle is down and OEM is backordered, a quality aftermarket windshield installed with the right adhesive system gets you back on the road without sacrificing safety. What a Good Shop Experience Feels Like When you bring your car to a solid auto glass replacement shop, the handoff is calm and methodical. The service writer checks your VIN for sensor packages, walks the glass around the car to note existing dings or trim issues, and confirms whether you need a ride or a waiting area. The technician explains the drive-away time, weather considerations, and any special aftercare. If there’s rust at the pinch weld, they show you a photo and talk options rather than burying it under a bead and hoping you don’t notice later. The install bays are tidy. You see cartridges in warmers, primer bottles with fresh seals, gloves on hands, and lint-free wipes used once and tossed. The tech dry-fits the windshield to confirm alignment. The bead is uniform and continuous. When the job wraps, they water-test, wipe the interior, and seat the wipers correctly. It shouldn’t feel rushed. When to Walk Away I’ve turned down jobs on windy, sandy lots because the risk to the bond wasn’t worth a fast buck. You should feel free to walk away if a mobile tech proposes a rainy-day replacement without proper shelter, or if a shop can’t answer basic adhesive questions. If you hear “we don’t need primer,” or “we’ll grind to metal and shoot a little paint,” press pause. Surface integrity under the bead is everything. Once corrosion starts, it creeps, and the fix requires removing the glass and doing bodywork the right way.
Bringing It Back to Your Search Typing auto glass replacement near me into a phone is easy. Finding a place that treats sealant like the safety component it is requires a little more homework. Let a couple of conversations guide you. The shop that respects cure times, follows the adhesive maker’s system, calibrates your sensors, and documents the process is the one you want. Whether you end up with OEM or quality aftermarket glass, whether you choose in-shop or mobile service, the adhesive fundamentals don’t change. Proper sealant use isn’t a bonus. It’s the job. If you’re already seeing a leak or hearing a whistle after a recent replacement, don’t wait it out. Any reputable auto glass shop near me should pressure-test with a smoke machine or a water probe and find the void. Repairs range from trim adjustments to bead injections to full re-bonds. The sooner they address it, the less chance water has to find metal and start trouble you won’t see until it’s a bigger bill. A Quick Road-Test Routine After Replacement Drive at neighborhood speeds with climate control off and windows up, listening for new wind noises around the A-pillars and roofline. On a dry day, work up to highway speed and hold steady for a minute, then pass a box truck to see if buffeting creates a whistle. At home, use a gentle hose flow along the top edge and corners while a friend watches inside for any trace of moisture. Test wiper operation across the full sweep; if they chatter or lift, ask the shop to adjust arm tension or blade angle. Verify any ADAS alerts behave normally; if lane-keep nudges feel different, ask whether calibration was performed and documented. The above isn’t a stress test. It’s a friendly shakedown that can catch small issues while the job is fresh in everyone’s mind. Final Thoughts From the Bench Good auto glass work feels almost invisible. That’s the point. A windshield that doesn’t creak, a sensor that sees straight, a cabin that stays dry in a thunderstorm—those are the quiet wins you get when a shop prioritizes adhesive science and clean technique. If you’re picking between two quotes from an Auto Glass Shop Near Me, favor the one that explains their sealant process without jargon and respects the time it takes to do it right. Auto glass replacement isn’t a commodity when it comes to safety, and the sealant is the line between a tidy install and a costly redo. When the bond is right, everything else falls into place.