Download
1 / 54
550 likes | 685 Views
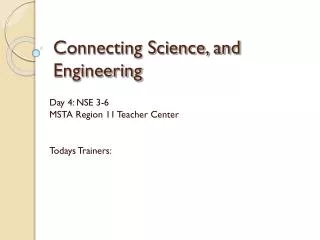
Connecting Scientific Inquiry, Nature of Science, and Engineering . Day 4: NSE 3-6 MSTA Region 11 Teacher Center Today’s Trainers: Gillian Roehrig and Selcen Guzey. Connecting Scientific Inquiry, Nature of Science, and Engineering. Goals

E N D
Connecting Scientific Inquiry, Nature of Science, and Engineering Day 4: NSE 3-6 MSTA Region 11 Teacher Center Today’s Trainers: Gillian Roehrig and Selcen Guzey
Connecting Scientific Inquiry, Nature of Science, and Engineering Goals 1. Teachers will explore scientific inquiry and magnetism 2.Teachers will explore environmental engineering through oil spills 3. Teachers will consider modeling and representations in connection with magnetism and oil spills.
Behavior of Magnets and Magnetic Materials The purpose of this laboratory investigation is for you and your group to explore how magnets and magnetic objects behave Record observations from Demo #1 What generalizing statement/law can we make? Like poles repel and opposite poles attract
Behavior of Magnets and Magnetic Materials What kinds of materials does a magnet affect? Record observations from Demo #2 What generalizing statement/law can we make? Materials that are attracted to a magnet are called ferromagnetic Iron and Nickel are ferromagnetic materials
Behavior of Magnets and Magnetic Materials How do you make a magnet? Testing “rubbed nails” • Place one end of the bar magnet over one end (tip or head) of an unrubbed nail and rub in one direction only to the other end. Then lift the magnet away from the nail and repeat the process a few times, always rubbing in the same direction.
Behavior of Magnets and Magnetic Materials Are rubbed nails the same as magnets? Test behavior of rubbed nails Experiment # 1 Place a rubbed nail on the floater, making sure that other rubbed nails and the magnet are far away. Spin the floating rubbed nail gently, and watch it for at least half a minute until it seems to settle down. Repeat this two or three times.
Behavior of Magnets and Magnetic Materials Experiment #2 Systematically test interactions of rubbed and unrubbed nails.
Behavior of Magnets and Magnetic Materials Record your observations
Behavior of Magnets and Magnetic Materials Based on your observations in Experiments #1 and #2, indicate which of the following statements is supported by the evidence. • A rubbed nail is a ferromagnetic material and behaves like a magnet. • A rubbed nail is a ferromagnetic material but does not behave like a magnet. • An unrubbed nail is a ferromagnetic material and behaves like a magnet. • An unrubbed nail is a ferromagnetic material but does not behave like a magnet.
Behavior of Magnets and Magnetic Materials • What are the different “kinds” of magnets that you can make from rubbing a nail? • What are the different ways that you can make each of these “kinds” of magnets? Draw sketches in your notebook. N S
Behavior of Magnets and Magnetic Materials What are two different ways that you can rub your nail with a magnet so that the pointed end becomes the North Pole and the head end becomes the South Pole?
Behavior of Magnets and Magnetic Materials • What are two different ways that you can rub your nail with a magnet so that the head end becomes the North Pole and the pointed end becomes the South Pole?
Behavior of Magnets and Magnetic Materials The purpose of this laboratory investigation is for your group to come up with a model that can help explain your observations. How can we explain our observations in terms of a model of magnetism? Draw pictures with a written explanation of your model S N After rubbing Before rubbing
Behavior of Magnets and Magnetic Materials Your model should: • Make sense to you • Account for both the experimental observations you made previously • Guide you in making predictions about what would happen in experiments that you had not yet done.
Behavior of Magnets and Magnetic Materials If predictions based on your model are confirmed by new experiments, you do not need to modify your model. However, if your new experimental observations differ from the predictions based on your model, then you need to modify your model. You continue this process until you have a model that can account for a wide range of phenomena.
Behavior of Magnets and Magnetic Materials Use your model to predict what might happen in a new situation Imagine that you rubbed your nail and then cut the nail in half. Sketch what your model predicts the inside of each of the two halves would look like
Behavior of Magnets and Magnetic Materials Based on your model, make the following predictions about what would happen if you were to bring the North Pole of a rubbed nail near each end of the two half nails. The model predicts that the North Pole of a rubbed nail will _____ the flat end of the head piece half nail. The model predicts that the North Pole of a rubbed nail will _____the cut end of the head piece half nail. The model predicts that the North Pole of a rubbed nail will _____the cut end of the point piece half nail. The model predicts that the North Pole of a rubbed nail will _____the pointed end of the point piece half nail.
Behavior of Magnets and Magnetic Materials Test your predictions. • Prepare two rubbed nails so their pointed ends are North Poles. Ask your instructor to cut one rubbed nail in half. • Place the head piece of the half nail on the floater. Bring the North Pole of the second rubbed nail near the two ends of the floating half nail. Record Observations • Repeat with the pointed half nail. Record Observations
Behavior of Magnets and Magnetic Materials How did your observations compare with your predictions based on your original model? Do you need to modify your original model? Draw and share your revised model S N After rubbing Before rubbing
Behavior of Magnets and Magnetic Materials Irion Filings Experiment Part I: • Slide a rubbed nail’s pointed end to colored tip of the compass needle. What happens to the colored tip of the compass needle? • Now turn the nail around and slide its’ head toward the colored tip. What happens to the colored tip of the compass needle? • Now repeat this with unrubbed nail. • Compare that behavior with the interaction of a compass with the rubbed nail.
Behavior of Magnets and Magnetic Materials Part II: • Describe what happens to the compass needle when you slide the rounded end of the test tube filled with iron filings toward colored tip of the compass. • Turn the test tube around and slide its taped end toward the compass. Describe what happens to the compass needle. • Is the test tube behaving like a magnet? Describe your evidence for your answer.
Behavior of Magnets and Magnetic Materials Part II • Rub the test tube. Slide the end of the magnet along the test tube AND observe what happens to the iron filings. • Slide the rubbed test tube toward the compass, and bring it toward the compass. Record how it interacts with the compass needle. • Shake the test tube, and record how the test tube interacts with the compass again
Lesh Translation Model Lesh & Doerr (2003)
A Slick Solution: Cleaning an Oil Spill • EiE unit on Environmental Engineering • For today- • No story • Could do students without curricula
Environmental Engineering • In your group, brainstorm: • What is environmental engineering? • Application of science and engineering principles to improve the environment (air, water, land resources) in order to provide healthy air, water, and land for habitation and to remediate polluted sites. • Involves: • Waste water management • Air pollution control • Recycling • Radiation protection • Industrial hygiene • Environmental sustainability • Public health • Knowledge of environmental engineering law
Tests of Environmental Engineers • Environmental engineers do a variety of tests to learn about soil and water in a particular area. Including: • Tests for heavy metals, salts, nitrates, etc. • Soil: Carbon to Nitrogen ratio (C:N) • High ratio can mean N deficiency in plants • Leads to poor plant growth or yellow/brown leaves • Test pH levels in soil and water • pH is scale of how basic or acidic something is • 0 = highly acidic; 7 = neutral; 14 = highly basic • Most organisms can survive in a range of pH levels, but not the extremes.
Engineering Design Challenge • There has been an accidental oil spill in the river. In teams, you are going to work for an environmental engineering firm to design a way to clean this oil spill so that it has the least impact on the ecosystem. • Guiding question: • How might an oil spill affect an ecosystem and what are some materials, tools, and methods we can use to clean it?
Our Ecosystem • Components: • Sun • River • Algae • Green plants • Of our components: • Who are the producers in our food web? Consumers? Decomposers? • After being assigned roles, get together with your like organisms and discuss your role in the ecosystem. • Complete the back of your card. • Insects • Adult salmon • Small fish • Bacteria • Bears • Deer • Gulls
Modeling the Ecosystem • You are going to create a model that shows how different parts of this ecosystem are connected and important to one another. • Each group of students with the same role will share where they get their energy from. • State “I am a ______. I get my energy from ______.” • We will use the orange yarn to represent these connections. Our recorder will add these to the chart.
Is there anything else in our ecosystem that you need to survive? • More ecosystem web connections. • Our model shows a very small fraction of the actual number of things that exist in an ecosystem. • What kinds of connections does our ecosystem web show us?
Oil Spill!!!! • Imagine the oil is spilling into the river: • What do you predict will happen to all of the things in our ecosystem? • Will some things be affected more than others? Which ones and why? • Will everything be affected at the same time? • Consider our web: • Where does the problem of the oil spill start? • What do you think will be affected first in our ecosystem after the oil is spilled in the river?
We are affected! • All river dwellers sit down to show that you are affected. • If you are seated, give a light tug on your ribbons and yarn. • If you felt this tug, sit down. • Now you who just sat down tug lightly. • Keep going until tugs don’t affect standing organisms.
Engineering Design Challenge • There has been an accidental oil spill in the river. In teams, you are going to work for an environmental engineering firm to design a way to clean this oil spill so that it has the least impact on the ecosystem. • Guiding question: • How might an oil spill affect an ecosystem and what are some materials, tools, and methods we can use to clean it?
Methods to clean an oil spill • What are some of the ways that we might be able to clean up an oil spill in our river system? • Consider this – have you ever cleaned up another spill or mess? What did you do? Do you think any of these methods might work here? Why or why not? • Our focus: • Boom method • Removal method
Testing the Materials • Boom materials: • How will you know if the materials make a good boom? • How to test the boom material: • Place plastic container with oil/water on white paper (to easily see oil) • Gently place boom material into the cup so that it is surrounding the floating oil • Time 30 seconds – then sketch placement of oil and boom and fill in observation section. • Use new container of oil/H2O for each material • Store used boom near the used cup
Testing the Materials • How to test the removal material: • Use new container of oil/H2O for each material • Place plastic container with oil/water on white paper (to easily see oil) • Gently touch a single material to the surface of the H2O where the oil is. If using square material, hold 2 opposite corners of material in fingers. Touch flat surface to the oil. • Time 1 second – then sketch placement of oil and fill in observation section. • Keep used material to the side of the used cup
Testing the materials • Report out – record Class Data on sheet 3-17 • Reflection: • What are your top 3 choices of materials? Why? • What materials would you NOT choose? Why? • What ideas do you have to improve cleaning the oil spill? • Did any one material remove all of the oil?
Engineering Design Challenge • There has been an accidental oil spill in the river. In teams, you are going to work for an environmental engineering firm to design a way to clean this oil spill so that it has the least impact on the ecosystem.
Engineering Design • What is a process? • A series of steps used to meet a goal or accomplish something. • What is technology? • Anything that people design to solve a problem or meet a need. • Is your oil spill cleaning process a technology? • It is a technology, because we design it to help us solve our oil pollution problem.
Engineering Design • How will you know if your design is successful? • Do you think it is possible to remove all of the oil? • How much do you think it costs to clean a real oil spill?
Evaluating our designs • Cost score: • You have a budget of $20,000,000. • See top of sheet 4-8 for costs of materials, etc. • Use bottom of sheet 4-8 to find the cost score • Shore score: • After you have followed your clean up process, you will take one sheet of brown paper bag and gently press it along the shore where the water meets the gravel. • If there are any traces of oil on your paper bag, you receive 5 points for your shore score. If there is no oil on the bag, then you receive a score of 0.
Evaluating our designs • Ecosystem impact score: • Use the Oil Detection Sheet (4-11) cut along dark dotted lines, folded along outside light dotted lines. • Gently touch the grid to the surface of the water so that the entire grid hits the water – then gently remove it. • Use the Oil Evaluator Tool (OET) – in each square locate the largest spot of oil. Determine the smallest circle on the OET. This is the points for each square. • Sum the points from each square together for your Ecosystem Impact Score. • Add all scores together (Record on 4-6)
Design your process • Two parts to your design- • What materials/tools you will use to remove the oil, and how much of each material/tool you will use. • The order in which you will use the materials or tools to contain and/or remove the oil • Make sure to brainstorm lots of ideas before deciding on your final design. • Use the plan sheet (4-5) to detail your design. (Do not TEST yet!) • Transfer your cost score to sheet 4-6
Test your process • Get the materials for your oil spill (river bank, materials needed to clean up, etc.) • Follow the steps of your oil spill cleaning procedure exactly. • Figure out your Shore Score with the paper bag touching the rocks along the waterline. • Use the Oil Detection Sheet to determine your Ecosystem Impact Score. • Sum your overall score. • Look at the Impact Score Calculator to determine how your ecosystem will be impacted by your clean-up efforts.