Essential Tips for Enhancing Your Photography Skills
390 likes | 519 Views
Discover valuable tips for taking better photos, including using your flash effectively, getting closer to your subjects, and working on composition. Learn how to transfer images to your computer, utilize applications like Picasa and Photoshop, and recover deleted photos with ease. Protect your memories by organizing your digital files and keeping backups on various media, such as CDs, DVDs, and hard drives. Whether you're a beginner or an experienced photographer, these insights will elevate your photo-taking experience.

Essential Tips for Enhancing Your Photography Skills
E N D
Presentation Transcript
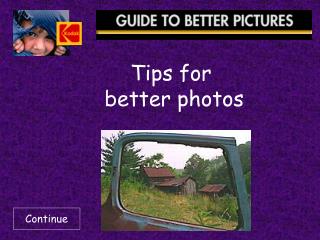
Tips For Taking Better Photos • Use your flash.
Tips For Taking Better Photos • Use your flash.
Tips For Taking Better Photos • Use your flash.
Tips For Taking Better Photos • Use your flash.
Tips For Taking Better Photos • Use your flash.
Tips For Taking Better Photos • Use your flash.
Tips For Taking Better Photos • Use your flash. • Get closer to your subjects.
Tips For Taking Better Photos • Use your flash. • Get closer to your subjects.
Tips For Taking Better Photos • Use your flash. • Get closer to your subjects. • Work on composition.
Tips For Taking Better Photos • Use your flash. • Get closer to your subjects. • Work on composition.
Tips For Taking Better Photos • Use your flash. • Get closer to your subjects. • Work on composition.
Tips For Taking Better Photos • Use your flash. • Get closer to your subjects. • Work on composition. • Take a lot of pictures!
How do I get the images to my computer? • Internal Card Readers • Many computers today come with card readers built in. • Can be added to a computer with an open bay.
How do I get the images to my computer? • External Card Readers • Camera connected via USB • USB / FireWire dedicated card readers • Printers / Multifunction devices
How do I get the images to my computer? • WiFi • Some newer cameras have built in WiFi. • Camera phones. • WiFi SD cards
Share Via E-mail or Web Pages • You can share photos with family and friends through email • Most photo programs have an email function. • Many will optimize the image for you.
Share Via E-mailor Web Pages • You can also share your images via a web page. • Many programs like Picasa, Kodak EasyShare, Snapfish let you post online galleries. • Blogs are another way to share your images.
What Applications Should I Use? • Free applications I’ve used …
What Applications Should I Use? • Programs you pay for…
I just Deleted all my photos! • Image Recovery • Don’t Panic! • Stellar Photo Recovery • MediaRECOVER 4.0
Digitizing Prints & Film • Send them to a lab. • Scan them yourself. • Use your digital camera to copy prints.
Using a Lab • Advantages • Saves you time in the long run. • At the best labs, trained technicians inspect and correct each scan. • Disadvantages • May take a couple of months to get your completed order. • Small risk of losing you photos and film. • It will cost you some hard earned money. On average $0.35 per scan.
The Process • Organize you prints, negatives and slides. • Estimate, roughly, how many of each you have. • Fill out the order form. • Prepay required amount. • Pack you materials up and ship them as per the lab’s instructions.
The Process • Preview your scans and determine which are keepers. • Pay the final tally. • Your materials show up at your doorstep.
Some Recomendations • ScanCafe.com • DigMyPics.com • FotoBridge.com
Scan Your Own • You need a flatbed scanner for prints. • Transparency adapter needed to scan negatives and slides. • Lots of hard drive space. • Even more patience!
For Prints • Color or Grayscale. • Scan should have, at least, the dimensions of the original. • Minimum dpi should be 300. • Example: A 4x6 inch print should be scanned at 4x6 inches with a resolution of 300 dpi.
For Slides and Negatives • Negative or Transparency. • Scan film at 100% of frame size. • Resolution for 35mm film should be 2000 - 3000dpi. • This will give you the option of making prints from the scan of 8x10 easily.
How Do I Keep My Photos Safe? • Burn to CDs/DVDs • Keep photos on media cards • Use an incremental backup system • Copy to multiple Hard drives • Use a RAID 5 system.
CDs / DVDs • Advantages • Inexpensive • Easy to store. • Reasonably stable. • Disadvantages • Slowest of the medias • Limited storage. • Will degrade over time.
Media Cards • Advantages • Your images are already on the card. • Writes fast. • Solid state, no moving parts. • Very stable. • Disadvantages • Relatively expensive. • Limited storage. • Small size can make it hard to keep track of. • You need a card reader to access the card.
Hard Drives • Advantages • Least expensive per MB. • Huge amounts of storage. • Very fast read / write speeds. • Disadvantages • Fairly fragile. • Moving parts can breakdown. • Some need external power.