Download
1 / 3
30 likes | 34 Views
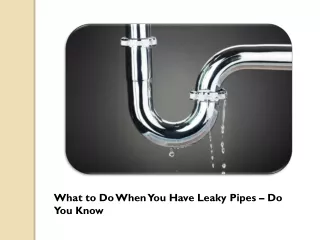
Donu2019t ignore that leaking faucet in your kitchen or bathroom All those wasted drops of water add up, and the solution can be simple for even newbieu2019s.

E N D
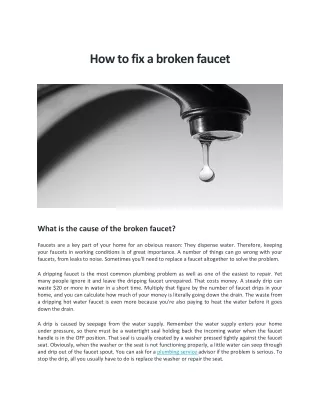
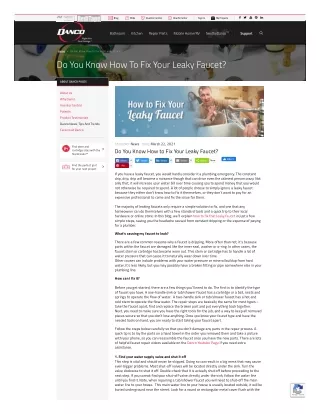
Blog FAQs Inventor Central How To Center Sign In My Projects Bathroom Kitchen Repair Parts Mobile Home/RV NextbyDancoTM Support Home » Do You Know How To Fix Your Leaky Faucet? Do You Know How To Fix Your Leaky Faucet? ABOUT DANCO PAGES About Us Why Danco Inventor Central Patents Product Testimonials Danco News, Tips And Trends Careers At Danco CATEGORY: News DATE: March 22, 2021 Do You Know How to Fix Your Leaky Faucet? Find stem and cartridge sizes with the StemFinder™ Like 0 0 0 0 0 New Find the perfect part for your next project 0 If you have a leaky faucet, you would hardly consider it a plumbing emergency. The constant drip, drip, drip will become a nuisance though that can drive even the calmest person crazy. Not only that, it will increase your water bill over time causing you to spend money that you would not otherwise be required to spend. A lot of people choose to simply ignore a leaky faucet because they either don’t know how to fix it themselves, or they don’t want to pay for an expensive professional to come and fix the issue for them. The majority of leaking faucets only require a simple solution to fix, and one that any homeowner can do themselves with a few standard tools and a quick trip to their local hardware or online store. In this blog, we’ll explain how to fix that leaky faucet in just a few simple steps, saving you the headache caused from constant dripping or the expense of paying for a plumber. What’s causing my faucet to leak? There are a few common reasons why a faucet is dripping. More often than not, it’s because parts within the faucet are damaged like the inner seal, washer or o-ring. In other cases, the faucet stem or cartridge has become worn out. This stem or cartridge has to handle a lot of water pressure that can cause it to naturally wear down over time. Other causes can include problems with your water pressure or mineral buildup from hard water. It’s less likely, but you may possibly have a broken fitting or pipe somewhere else in your plumbing line. How can I fix it? Before you get started, there are a few things you’ll need to do. The first is to identify the type of faucet you have. A one-handle sink or tub/shower faucet has a cartridge or a ball, seats and springs to operate the flow of water. A two-handle sink or tub/shower faucet has a hot and cold stem to operate the flow water. The repair steps are basically the same for most types – take the faucet apart, find and replace the broken part and put everything back together. Next, you need to make sure you have the right tools for the job, and a way to keep all removed pieces secure so that you don’t lose anything. Once you know your faucet type and have the needed tools on hand, you are ready to start taking your faucet apart. Follow the steps below carefully so that you don’t damage any parts in the repair process. A quick tip is to lay the parts on a hand towel in the order you removed them and take a picture with your phone, so you can reassemble the faucet once you have the new parts. There are lots of helpful faucet repair videos available on the Danco Youtube Page if you need extra assistance. 1. Find your water supply valve and shut it off This step is vital and should never be skipped. Doing so can result in a big mess that may cause even bigger problems. Most shut-off valves will be located directly under the sink. Turn the valve clockwise to shut it off. Double-check that it is actually shut off before proceeding to the next step. If you cannot find your shut-off valve directly under the sink, follow the water line until you find it. Note, when repairing a tub/shower faucet you will need to shut-off the main water line to your house. This main water line to your house is usually located outside, it will be buried underground near the street. Look for a round or rectangular metal cover flush with the Privacy - Terms
grass or sidewalk. If you need help turning off the main water line, call your local city and they can assist. Blog FAQs Inventor Central How To Center Sign In My Projects 2. Expose the handle screw by removing the index button Once you are sure that the water to your faucet is turned off, you can begin taking apart the faucet to find out what’s causing the problem. In order to remove the inner mechanisms (stem or cartridge) in the faucet, you need access to the handle screw. This is generally covered by a decorative index button typically labeled with an “H” or a “C” to indicate hot or cold water. Use a flathead screwdriver to gently pry the index button off to get access to the handle screw. If you cannot find the index button, research the brand and style online for specific instructions from the manufacturer. When you have access to the handle screw, use a screwdriver to slowly and carefully loosen the screw. It is vital that you do NOT strip it. Once the handle screw is removed, place it to the side and remove the handle to expose the inner mechanisms. Bathroom Kitchen Repair Parts Mobile Home/RV NextbyDancoTM Support 3. Closely inspect the inner mechanisms Take a close look at the inner mechanisms, sometimes there is a cam-nut or adjustable ring (ring cap) underneath the handle for a ball assembly, you should discover if it is loose or not. Tighten it with a pair of needle-nosed pliers, then check to see if this fixes the leak. Sometimes, a simple tightening of the cam nut or adjustable ring is all you need to repair a leaky faucet. 4. Remove the faucet stem, cartridge or ball assembly and inspect for worn down or broken parts If tightening the cam-nut or adjustable ring did not fix the leak, or if your faucet has a stem or cartridge mechanism, then you need to remove the cartridge or stem that’s located under the handle to see if there is a problem. If you have a ball assembly, use a wrench to loosen the cam- nut or adjustable ring (ring cap), turning it counter-clockwise and remove the ball, seats & springs. If you have a stem or cartridge mechanism, then check to see if there is a screw that holds the stem or cartridge in place, if so, then remove the screw and pull out the stem or cartridge. To remove most stems, use a stem removal tool or shower valve socket wrench set to unscrew counter-clockwise. Once the ball, stem or cartridge is removed, you need to inspect it closely for damage. The washer at the bottom of the stem or cartridge can wear out over time and will need to be replaced to repair the leak. The retainer ring on a ball assembly may also be damaged so take a close look at that as well. 5. Find replacement parts If you are unable to determine the exact ball assembly, stem or cartridge due to damage you can use the handy New Danco Leaky Faucet AI Part Finder Tool. With the new AI Tool you can find the right part to fix your leaky faucet by taking a picture of the old part with your phone camera or you can upload a picture from your laptop or computer. Upon knowing the what ball assembly, stem or cartridge you need you can select the store or online retailer to purchase the needed replacement. Once you have the correct replacement parts, you can reassemble the ball assembly, stem or cartridge. Applying a thin layer of plumber’s putty to the bottom of the stem or cartridge will help create a tight seal and help the parts move easier for added protection against leaks. Replace the screw with care, and do not strip them or you may not get a proper seal. 6. Reassemble the faucet Once you’ve replaced the damaged pieces, you can reattach the handle, handle screw and index button Now, your leak should be fixed. Before you turn the water valve back on, you need to turn your faucet handle to “on” , and then turn the valve back on. Let the water run until all of the air is out of the pipes. At this point, you will be able to tell if the leak is fixed, or if you have other issues somewhere else in your water line. At Danco, we understand that every properly functioning faucet contributes to the overall efficiency of your home. With a wide selection of faucet repair & replacement parts, we provide you with stems, cartridges, supply lines, and other faucet repair components to keep the unseen parts of your faucet in perfect working condition. ? Disqus' Privacy Policy 0 Comments Danco Login 1 Sort by Best Recommend t Tweet f Share Start the discussion… LOG IN WITH OR SIGN UP WITH DISQUS ? Name Be the first to comment. ✉ ⚠ d Subscribe Add Disqus to your site Do Not Sell My Data
Blog FAQs Inventor Central How To Center Sign In My Projects Other posts you might like Bathroom Kitchen Repair Parts Mobile Home/RV NextbyDancoTM Support CATEGORY: News What Hair Catcher Is Right for Your Drain? Washing your hair will keep it clean and lustrous while preventing... CATEGORY: News 4 Simple Tips to Prevent Clogged Drains (and Save Money!) No one likes clogged drains. At best, a clogged drain means... CATEGORY: News Danco Has a New Look! Continuous innovation is a foundational ethos for us here at Danco.... READ MORE READ MORE READ MORE Get maintenance reminders sent to your inbox. Leave it to us to remember for you. SIGN UP TODAY Shopping Tools Bathroom Tub/Shower Sink Faucet Toilets/Bidets About Danco About Us Why Danco Inventor Central Patents Product Testimonials Danco News, Tips And Trends Careers Find your Perfect Part Stem Finder Tool 2727 Chemsearch Blvd. Irving, TX 75062 Support Contact Us Installation Instructions How To Center Plumbing 101 Warranty Information Proposition 65 Kitchen Sink Faucet Aerators & Adapters 800.523.5135 For the Pros Danco Brands Find a Sales Rep Repair Parts Faucet Repair Components Supply Lines Download Catalog Where to Buy Retailers Follow Us International Canada Mexico Mobile Home/RV Bathroom Kitchen HVAC & Repair Parts 2021 Danco Incorporated. All Rights Reserved. © Privacy Policy Terms & Conditions Sitemap