Download
1 / 10
100 likes | 232 Views
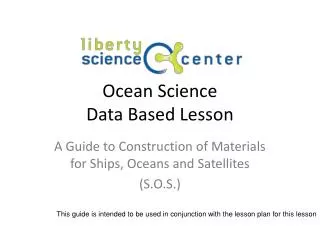
Ocean Science Data Based Lesson. A Guide to Construction of Materials for Ships, Oceans and Satellites (S.O.S.). This guide is intended to be used in conjunction with the lesson plan for this lesson.

E N D
Ocean ScienceData Based Lesson A Guide to Construction of Materials for Ships, Oceans and Satellites (S.O.S.) This guide is intended to be used in conjunction with the lesson plan for this lesson
This document is not a lesson plan. It is intended only to provide instruction for creating the custom models the S.O.S. lesson requires. • Introduce students to real time data • Provide students with a visual aid when first teaching about data. • Leave students with skills to interpret real time data and false color images. Once built, the models can be reused. This lesson is intended for use in informal education settings. Lesson Goals
Needed Construction MaterialsFor a class of 30 students make six models • 6 blocks of stiff foam (found in hardware store with home insulation products) Cut to size 13” by 16” by 5” • 6 pieces of 13” by 16” sized poster board • Roll of Duct tape • Electric drill with 5/8” sized bit (use safety goggles and dust mask) • 3/16” Screw Punch • Large format laminator • One 9 mL test tube to test fit • Large format color printer for images • Package of circular Velcro fasteners • Color Coastal Map trimmed to size • Razor knife and replacement blades • White glue to adhere map to poster board
Ships, Oceans, and Satellites (S.O.S.) To start with a piece of stiff foam that is 13” by 16” and about 5 inches thick: trim and layer foam board sheets as needed. Use white craft glue to attach foam sheets together if they are layered. Plan to use 1 board (as prepared above) per 4-5 students. Cover the edges of each foam board with duct tape to prevent students from “picking” at the foam. In this picture is Styrofoam insulation foam, however polystyrene or polyurethanemay be easier and less messy to work with.
Ships, Oceans, and Satellites (S.O.S.) Sketch out a 1” by 1” grid on the top of the foam to use as a guide for drilling holes. The next step can produce a dust of pulverized foam, wear a dust mask and work in an appropriate area for this activity. Use a 5/8” sized bit to drill evenly spaced holes in the foam through the center of each grid square. Holes should be a depth that can accommodate a 9 mL test tube so that its top rests flush with the top of the foam. Be aware that if you use Styrofoam, the drilling will produce bits of highly static sensitive foam.
Ships, Oceans, and Satellites (S.O.S.) Create a map that fits over the top of the foam. Draw a 1” by 1” grid on a piece of 13” X 16” poster board (blue color optional) to mirror the grid in the foam holding test tubes. Print a colored map of the coastline, and trim it to just the land. Glue the map to the poster board. Laminate the map to make it water resistant. Make sampling holes with 3/16” punch in the center of each grid square. These holes should be large enough to insert a thin pipette, but not large enough to peek through and see what’s under it.
Ships, Oceans, and Satellites (S.O.S.) Secure the map in place with Velcro fasteners. During lesson preparation or cleanup, detach the map to insert/remove colored test tubes, and then reapply.
Ships, Oceans, and Satellites (S.O.S.) 80 F – Red 75 F – Orange 70 F – Yellow 65 F – Green 60 F – Blue 55 F - Purple Create a matching map worksheet for students to record their data on. Include a key/scale on the student worksheet. The State of New Jersey and location of Liberty Science Center is highlighted on our worksheet map to help students orient themselves.
Ships, Oceans, and Satellites (S.O.S.) 80 F – Red 75 F – Orange 70 F – Yellow 65 F – Green 60 F – Blue 55 F - Purple Develop a reasonable Sea Surface Temperature (SST) data set to use with the lesson. This example is roughly based off of a mid-September composite for the East Coast sea surface temperatures. This image illustrates the colors of test tubes to be place at each location. There are 30 test tubes to potentially sample in this example, which is a course resolution of data.
Ships, Oceans, and Satellites (S.O.S.) 80 F – Red 75 F – Orange 70 F – Yellow 65 F – Green 60 F – Blue 55 F - Purple • Through interpolation, an SST map similar to this one could be created during the lesson. • Have a complete SST like this available to show students to discuss the various assumptions that were used to create it. • Water bodies of the same temperature are connected. • When temperature changes are observed between points, the range of temperatures in between is present.