Download
1 / 104
1.04k likes | 1.06k Views
Learn to use Alice program for creating animations. Step-by-step guide to selecting background, saving world, adding objects & characters, and managing positions in 3D environment. Helpful tips for beginners.

E N D
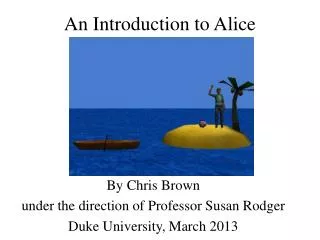
An Introduction to Alice This is a modification of the Shark Attack Introduction to Alice written by Teddy Ward in 2013 By David Yan, Erin Taylor, and Alex Boldt Duke University Under the direction of Susan Rodger June 2015
“Begin at the beginning," the King said, very gravely, "and go on till you come to the end” - Lewis Carroll, Alice in Wonderland
Hello! I’m Alice, and I’m going to teach you how to use the Alice program. With Alice, you can make your own animations, using tons of different characters.
Part 1: Creating a Scene • Our first step is to choose a background. • When you open Alice, a box will pop up that has six different choices of background. It looks like the box to the right. • Select the waterbackground, because our world will be on an island. • Click on waterand then click Open.
Saving your world • Before we do anything else, let’s save our world. You should also always do this before you close out of Alice. • Click on Fileat the top left-hand corner of your screen, and then click on Save World.
Saving your world • In the box that pops up, name your world island, and save it in a place that you will be able to find again, such as in a folder on your Desktop.
Saving your world • Also, while you’re working on your Alice world, this box will pop up about every 15 minutes. • You should always click Save right now. This way, if Alice crashes, or if your computer crashes, you will have backups of your world and will not lose all of your work!
The Viewer • The viewer lets you view what your world looks like: • The arrows move the camera. DO NOT touch them for now as it’s hard to get the camera back to the original camera view
Adding objects to your world • Now, we will add some objects to the world. • Just below the picture of your empty water world, there is a small green button that says Add Objects. • Click on this button.
Adding objects to your world A new screen will appear, on which there is a large selection of objects below the water screen that you can add into your world. This is called the Local Gallery. Each folder of objects in the gallery has a different theme.
Adding objects to your world • Find the Environments folder in the gallery – you may have to scroll to the right a bit. • Scroll to the right again until you see the Island. • Click on the Island. • On the box that pops up, click Add instance to world. • The islandwill appear in the center of the ocean screen.
Adding objects to your world The island will take up most of your viewer, which will cause problems when we want to add more objects in a minute To fix this, click and drag the island around the viewer until it looks like the picture on the left
The Undo button is your friend! • What if you make a mistake, like accidentally clicking on the ocean and moving it? Or what if your island “jumps” offscreen? • You can click on the Undobutton above the object tree to undo the last thing you did. • Use this button whenever you mess up, or want to get rid of something you just did.
Adding a character to your world Anyway, we’re going to add a person to our world now. Click Local Galleryabove the pictures of objects to go back to the main gallery of objects. Scroll to the right until you see a folder called people. Click on it.
Adding a character to your world • Click your favorite person from the gallery and then click add instance to world. • Don’t spend too long choosing a person!
Positioning the objects • Click and drag your character into the middle of the island as shown. We’ll get him/her unstuck from the sand in a second.
Positioning the objects • Look at the right side of your screen. • There is a group of buttons with faces on them that are used to position objects. • We want to have our person stand on the island, so click Move objects up and down (the 2nd one) • Click on your character, hold, and move your mouse up until his/her feet just touch the sand. • Bonus: move the island down into the water a little bit (move the character down again, too)
The Object Tree • When you add objects to your world, they will appear in a list on the left of your screen, called the Object Tree. • You should see both your island and your character there • If you want, right clickon your character’s name, select rename, and type any name you want. I renamed mine “heroine.”
Object Parts • Some objects have parts. • For example, if you click on the plus mark next to the island in your object tree, you’ll see that the palm tree and its fronds and coconuts are all objects in your world • These are fixed in position, unless you move them with methods.
Object Parts • Right click on coconut1, choose methods, move, down, other…, and then a calculator will pop up for input.
Object Parts • Type 2.25 into the calculator, and when you press okay one of the coconuts will fall to the ground. • Turning, rotating, and moving object parts is a good way to make more complex animations look more realistic! • Note: “move” may detach a part from its object but “turn” and “roll” may move parts without detaching them
Adding objects to your world • Now return to the Local Gallery. • Scroll over to the Vehiclesfolder and click on it. • Scroll over to Rowboat and add that to your world. Your world should look like this:
Positioning the objects • Now move the rowboat to the front left of the island using the first three buttons in that group on the top right • Click Move objects freely (the 1st one)to move it around • Click Move objects up and down(the 2nd one) to lower it into the water • Click Turn objects left and right(the 3rd one) to align it with the shore
Nice job setting up the scene! Now we’re going to learn about the camera! (If you have extra time, add more scenery! Use the Ocean folder in the local gallery to add shells, fish, etc. Don’t add a shark just yet, though )
Part 2: The Camera • A Dummy camera is like a camera tripod – it saves the location of your camera view. This way, if you move your camera around, you can always get back to a certain position by moving to a dummy camera location. • Look to the right side of your screen, and find a gray button under your object positioning buttons labeled more controls
The Dummy Camera • More buttons will appear after you click more controls. • Click on the button that says drop dummy at camera. It will seem like nothing happens, but don’t worry, and only click the button one time.
The Dummy Camera • Once you have clicked this button, a folder will appear on your object tree labeled Dummy Objects. • If you click on the plus sign next to the Dummy Objects folder, a list of your dummy camera positions will appear. • Right now, there is only one position, called dummy.
The Dummy Camera • Whenever you add a dummy camera position, you should rename it so that you know which position it is. • Right click on dummy in the object tree, and then choose rename. Type in STARTview. • Similarly, change the folder name Dummy Objects to CameraViews • You should add a dummy at your starting camera position is whenever you start a new Alice world.
Moving the Camera • Now that we have a dummy camera set up, we can move the camera freely without losing our place. • There are three sets of arrows beneath the scene that move the camera.
Moving the Camera The first set moves the camera up, down, left, and right. The second set moves it forward and backward and turns it from left to right. The last set rotates the camera up and down.
Moving the Camera • Click and hold the left arrow in the second groupto turn the camera left until the island is out of the picture • Dragging your mouse farther from the arrows moves the camera faster • Be sure not to move the camera too far up or down
The plot thickens… • Click Add Objects, and navigate to the “Ocean” gallery • Click and drag a sharkup to the window to add it to this part of the world
The plot thickens… • Move the shark using the positional buttons so that it’s half in the water and roughly facing the island • Click more controls, then drop dummy at camera so that we have this view saved • Rename this dummy camera “SHARKview” in the object tree
Moving the Camera • To restore the camera, right click on camera in the object tree • On the menu that pops up, choose methods, then camera set point of view to, then CameraViews, then STARTview.
Finishing Setup • Now just click Done (in green) towards the bottom right!
Now that we are done setting up our camera, we can start to animate the characters in the world!
Part 3: Methods • The large beige rectangle in the center of your screen is called the Method Editor. Right now, it is blank.
Methods • The method editor is where you can make your characters do things. • Your characters already know how to do certain things. • These are some of the things that your character already knows how to do. To find this list, click on your character’s name in the object tree. Then look below the object tree at the box that says details, and click on the methodstab. This list will appear.
Methods • To program your character to do something, click on one of these methods, hold down your mouse, and drag and drop it into your method editor. Let’s try dragging in say to start. Select other…to be able to choose what we want he/she to say. Then type something like “Hey! Welcome to my island!” and press okay. Becomes…
Methods • Now press the Play button in the upper left-hand corner of the screen to watch your AMAZING program in action!!!!! • Okay. That was pretty boring. Let’s spice things up by teaching our character to do a backflip • Notice that there is no method for backflip created yet!
Methods • To teach your character new things, you can combine methods that he/she already knows into new methods. • Make sure you have clicked on your character in the object tree. Then, go to the methods for your character and click create new method.
Backflip Method • In the box that pops up, type backflip, then click OK. • You should see a new tab appear in your method editor called heroine.backflip(heroine will be replaced by your character’s name). This is the space where you will program the backflip.
Backflip Method • Drag heroine moveinto the method editor • Select up, then 1 meter • Drag another movebelow this, but this time select down then1 meter.
Backflip Method • To finish the flip, drag in turn between the two movements (a green line should appear when you’re between them) • Choose backward, then 1 revolution (all the way around) • Now your character will move up, flip, and then move down
Backflip Method • Your code should look like this:
Events • Now that we have written a method, we’ll use an eventto see it in action. • The event editor is found in the top right-hand corner of your screen. • Events are used to tell our program when it should call our methods. This is the event editor
Events • You’ll see that when the world starts (when you press Play), your world does world.my first method. • Click where it says world.my first method, and change it to your character > backflip. • Now when you press in the upper left, your character will do a backflip!
Backflip Method • Depending on how tall your character is, he/she might have hit his/her head on the ground. To fix this, click 1 meter next in the move up command, and choose other… Try typing 2 in the calculator that comes up to start. • Be sure to adjust the move down command, too.
Backflip Method • Finally, to make have our character say “Hey! Welcome to my island!” and then do the backflip, select the world.my first method tabagain • Drag in backflip from your character’s list of methods.