Download
1 / 52
540 likes | 732 Views
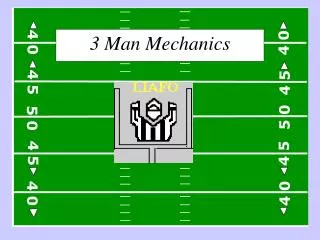
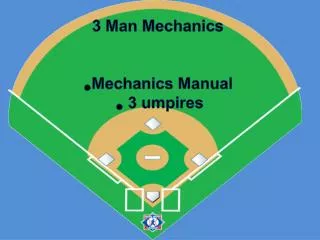
3 Man Mechanics Mechanics Manual 3 umpires. Equipment Inspection.

E N D
3 Man Mechanics • Mechanics Manual • 3 umpires
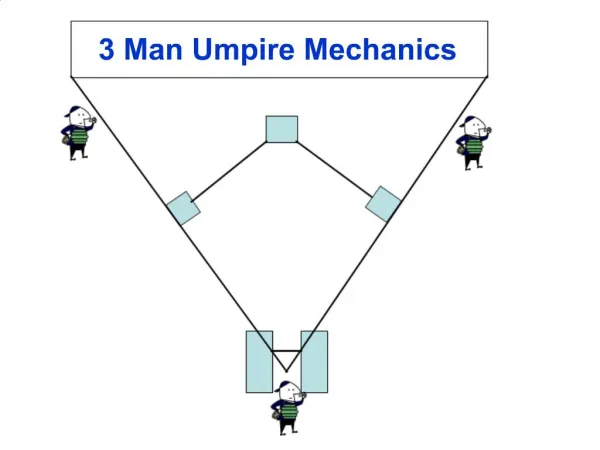
Equipment Inspection • Only in a 3 man crew, the plate umpire and the base umpire nearest to the dugout will inspect the equipment in that dugout. The remaining umpire will take a position 45 feet from home plate on the foul line opposite that dugout while observing all dugout activity. Then the same procedure will be applied to the other dugout activity. Then the same procedure will be applied to the other dugout utilizing the other base umpire. U3 U1 U2
5 minutes prior to the start of the start of the game U1 conducts pre-game conference Both teams shall remain in their dugouts/bench or bullpen area until pre-game conference has concluded • Discussion: • Verify Line-Up Cards (Home team 1st) • Check if using designated hitter • Ask if using speed-up rules • Verify players are legally equipped • Discuss ground rules-home team coach should inform unless playing on a neutral site, then U1 will explain the ground rules. • Make sure coach’s ground rules do not violate any book rules. U3 U2 Pre Game Conference C C U1
8 U2 and U3 Position yourself between the bases about 10-15 feet in the outfield grass. Relax. 9 7 6 4 U2 5 3 1 Offensive Team U3 U1 Walk down the foul line towards the defensive team and encourage to hustle on if needed. Move back closer to the coaches area and be able to supply another ball if needed Defensive Team 2 Between Innings U1
U2 and U3 Position yourself about 10-15 feet in the outfield grass on the side that you will return to. 8 7 9 2 6 4 5 U3 3 1 3 1 U2 C U1 Should go to the 45 foot line of the offensive team. Defensive Conference or Pitching Change B 2 U1
No Runners on base • Ground balls • Fly balls to the outfield
Signals: U1: Number of Outs U2&U3 ready 8 7 9 6 4 5 3 U2 U3 1 Whomever the fielder is facing at the time of the play will be responsible for the catch/no catch decision. If the fielder is not facing either umpire at the time of the play, the responsibility of the call will be with the nearest umpire. OUT! B No runners on base. Foul ball left side 2 U1
Signals: U1 number of outs U2 and U3 ready 8 7 9 5 4 6 3 U2 U3 1 No runners on base. Ground ball to the infield. Left side B 2 U1
Signals: U1 number of outs U2 and U3 ready 8 7 9 5 4 6 3 U2 U3 1 B 2 Bunt to the catcher U1
Signals: U1 number of outs U2 and U3 ready 8 7 9 6 4 5 3 U2 U3 1 B No runners on base. Ground ball to the infield. Right side 2 U1
Signals: U1 number of outs U2 and U3 ready 8 7 9 4 6 5 3 U2 U3 1 B No Runners On Ground Ball Double 2 U1
8 U2 Fly ball area. Center field straight in, back and all the way to the 1st base foul line. U3 fly ball area. If the center fielder moves left all the way to the 3rd base foul line. 7 9 6 4 5 3 1 U2 U3 B 2 Fly ball coverage U1
Signals: U1 number of outs U2 and U3 ready 8 7 9 U3’s fly ball area 6 4 5 3 U3 U2 1 B No runners on Fly Ball Triple Left Side 2 U1
Signals: U1 number of outs U2 and U3 ready 8 9 7 U2’s fly ball area 6 4 5 3 U2 1 U3 No runners on fly ball triple Right side B 2 U1
Runner on first base • Groundballs and fly balls to the outfield
8 Runner on 1st base U3 is inside in a direct line between home and the edge of the mound 7 9 6 4 U3 5 1 1 3 U2 2 U1
Signals 8 U1: Number of Outs Everyone: Rotates 7 9 4 6 U3 5 1 U2 1 3 Ground ball to infield left side, double play B 2 U1
8 U3 has LF to his left CF to his right U2 Has Center Field In, back & all the way to the 1st base foul line 7 U1 has LF To 3B Line 9 6 4 U3 5 3 1 U2 1 B 2 Fly ball coverage with runner on 1st U1
Signals U1: number of outs Everyone: rotates 8 7 9 U1’s Catch 6 4 5 U3 1 U2’s tag U2 1 3 B Fly ball left field caught 2 U1
Signals U1: number of outs Everyone: rotates 8 7 9 U1’s Catch 6 4 U3 5 U2 1 U2’stag 1 3 B Fly ball left field not caught 2 U1
Signals U1: number of outs Everyone: rotates 8 U2’s Catch Area 9 7 6 4 U3 5 1 U2 1 U3’s tag 3 Fly ball right field not caught B 2 U1
Signals U1: number of outs Everyone: rotates 8 New from 2007 When the ball is hit on the border line of the coverage area, the field umpire may use either a verbal or visual signal to communicate to the plate umpire that the base umpire has the responsibility of the catch. If the plate umpire is certain that the ball is in his coverage area he should use a verbal signal to communicate to the base umpire that he will take the responsibility for the catch / no catch. This is used anytime the base umpire is in C or F or the other base umpire is in B or E and the ball his hit on the border line of his coverage area and the plate umpires coverage area. 7 9 6 4 U3 5 1 U2 1 3 Fly ball left center field caught B 2 U1
Signals U1: number of outs Everyone: rotates 8 7 U3’s Catch Area 9 6 4 U3 5 U2’s Tag 1 3 1 U2 B U1 Fly ball left center field caught 2
Signals U1: number of outs Everyone: rotates 8 7 U3’s Catch Area 9 4 6 U3 5 3 U2’s Tag U2 1 1 Fly ball left center field Not caught B 2 U1
Signals U1: number of outs Everyone: rotates 8 7 9 6 4 5 U3 1 U2 1 3 B 2 Ground ball to the outfield U1
Runner on second base Ground balls and fly balls to the outfield
8 Runner on 2nd base U2 is inside a direct line between home and the edge of the mound 9 7 6 4 1 U2 5 3 1 U3 B 2 U1
Signals U1: number of outs, staying home U2 & U3 Stay 8 9 7 6 1 4 U2 5 3 1 U3 B 2 Ground ball left side U1
Signals U1: number of outs, staying home U2 & U3 Stay 8 9 7 U3’s catch area U2’s Tag 6 4 1 U2 5 3 1 U3 B 2 Fly ball left-center U1
Runner on third base • Ground balls and fly balls to the outfield
Signals U1: number of outs and staying home U2: staying home and going out reminder U3: slide and going out reminder 8 7 9 6 4 5 3 U2 U3 1 1 B 2 Ground ball to the infield U1
Signals U1: number of outs and staying home U2: staying home and going out reminder U3: slide and going out reminder 8 U2’s catch area 9 7 6 4 5 3 U2 1 U1’s tag U3 1 B 2 Fly ball right side U1
Signals U1: number of outs and staying home U2: staying home and going out reminder U3: slide and going out reminder 8 9 7 U3’s fly ball area 6 4 5 3 U1’s tag 1 U2 1 U3 B 2 Fly ball left side U1
Runners at 1st and 2nd • Ground balls and fly balls
Signals 8 U1 number of outs and staying home Less than 2 outs, double tag, infield fly, 2 outs timing play U2 & U3 Slide 9 7 6 4 1 U3 5 3 1 2 U2 B 2 Ground ball to the infield U1
Signals 8 U1 number of outs and staying home Less than 2 outs, double tag, infield fly, 2 outs timing play U2 & U3 Slide 9 7 6 4 1 U3 5 3 1 2 U2 B 2 Ground ball to the outfield U1
Signals 8 U1 number of outs and staying home Less than 2 outs, double tag, infield fly, 2 outs timing play U2 & U3 Slide 9 7 U2’scatcharea 6 U3’s tag 4 1 U3 5 3 1 U2 U3’s Tag 2 B Fly Ball to the Outfield Right Side Not Caught 2 U1
Signals 8 U1 number of outs and staying home Less than 2 outs, double tag, infield fly, 2 outs timing play U2 & U3 Slide 9 7 U1’s Catch U3’s Tag 6 4 1 5 3 U3 1 U2 U2’s Tag 2 B Fly Ball to the Outfield LF Line, Caught 2 U1
Signals 8 U1 number of outs and staying home Less than 2 outs, double tag, infield fly, 2 outs timing play U2 & U3 Slide 9 7 U2’s Catch Area 6 U3’s Tag 4 1 5 3 U3 1 U2 U3’s Tag 2 B Fly Ball to the Outfield RF Line Not Caught 2 U1
Runners at 2nd and 3rd • Ground Balls and Fly Balls
Signals 8 U1 number of outs and staying home 2 outs timing play U2 & U3 Stay 9 7 6 4 2 U2 3 5 1 U3 1 B 2 Ground ball to the outfield U1
Signals 8 U1 number of outs and staying home 2 outs timing play U2 & U3 Stay 9 7 U1’s Catch 6 U2’s Tag 4 2 U2 3 5 1 U3 U3’s Tag 1 B Fly Ball to the Outfield RF Line Caught 2 U1
Signals 8 U1 number of outs and staying home 2 outs timing play U2 & U3 Stay 9 7 U3’s Catch Area 6 4 U2’s Tag 2 U2 3 5 1 U3 U1’s Tag 1 B Fly Ball LF Line Caught 2 U1
Runners at 1st and 3rd • Ground Balls and Fly Balls
Signals 8 U1: Number of Outs All Rotate 9 7 U1’s Catch 6 4 3 5 U3 1 U2 U1’s Tag 1 U2’s Tag 2 B Fly Ball LF Line Caught 2 U1
Signals 8 U1: Number of Outs All Rotate 9 7 U3’s Catch Area 6 4 U3 3 5 1 U2 U1’s Tag 1 U2’s Tag 2 B Fly Ball Left-Center Field Caught 2 U1
Signals 8 U1: Number of Outs All Rotate 9 7 6 4 U3 3 5 1 U2 1 2 B U1 Pauses and makes sure R1 touches home plate Ground Ball to Left-Center Field 2 U1
Signals U1: Number of Outs All Rotate 8 9 7 U2’s Catch Area 6 4 U3 3 5 1 U2 U1’s Tag 1 U3’s Tag 2 B U1 pauses and makes sure R1 touches home plate Fly ball to Center Field Not Caught 2 U1
Bases Loaded • Ground Balls and Fly Balls
Signals U1: Number of Outs, Staying Home With 2 outs, timing play Less than 2 outs infield fly U2 & U3 Slide & Infield fly 8 9 7 U2’s Catch Area U3’s Tag 6 4 2 U3 3 5 1 U1’s Tag U3’s Tag U2 1 3 B Fly Ball to Center Field Not Caught 2 U1