Download

1 / 2
0 likes | 2 Views
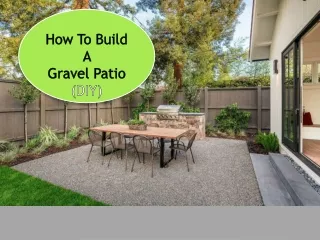
DIY Paver Patio: Everything You Need To Know To Build One

E N D
How to Build Patio of Stone Easy Patio Plans & Install Guidelines Building a patio is no easy task- but it’s also one of the best upgrades you can make. Even a small and simple patio could form the foundation for a small seating area. Use graph paper to create a to-scale plan of your patio. Or, for an even easier approach, try an online floor planning tool (there are many free options) to create an ideal layout. Once you’ve got your stone set in the trenches, you’re ready to finish the patio! Simply wheel the gravel to the stone edge, dumping the gravel over the side and into the patio. How much does it cost to build a patio? By aligning the edge of the end stones with this string, you'll ensure that your installation starts square. Once you’ve designed your paver patio, mark the area using stakes and string or a garden hose to outline the shape. Be sure to consider any slope for water drainage, as you don’t want water pooling on your new patio. Contact Us Clear View Builders Email: info@clearviewbuildersinc.com Phone: +19164205862 4913 https://vimeo.com/clearviewbuildersinc Rio Linda Blvd Sacramento, California, United States 95838 House Hunters If you had all the time in the world, you could go with a less expensive, non-rapid setting mix, but you’d still be looking at almost $200.Wait a minimum of 24 hours before moving onto the next step.We assembled our patio from used street pavers that we bought from a brickyard. Apply a 4 to 5-inch layer of three-quarter-inch crushed stone. Then, mist it with water to settle it into a smooth, firm surface. Over time, refill any low spots to maintain the patio. Yet another option is fieldstone, the rocks removed from the soil when land is cleared. Though truly distinctive when installed properly, its finished surface is much rougher than flat stones like slate and bluestone. DIY Patio Ideas to Transform Your Backyard Finally, saw the stakes so that they are flush with the top edges of the form. This will be necessary for the screeding process later on. If that’s not possible, you may want to jump-start the project by hiring an excavator with a skid loader and dump truck to dig the hole and haul away the dirt. One and a half tons of gravel there cost me just $160 – a fraction of the price had I bought it at a hardware store or nursery! Had I known that I could buy gravel for so cheap, I would have finished out my backyard ages ago. Concrete slabs are the most economical choice for a solid ground patio floor, costing around $3 to $8 per square foot on average. Gravel is a little less, about $1 to $4 per square foot, but you’ll need to refill it from time to time, which can add up over time. These lightweight structures are essentially tents with four posts. They can be found at home centers everywhere and online and only take a few minutes to set up. These super- simple patio shade options are affordable and can be moved wherever you want shade. For custom patios, Quikrete WalkMaker forms provide an innovative solution. They can mimic patterns like brick, slate, and stone in concrete. Here, we’ll go through some simple ways to add patio space on a tight budget. Drive stakes into the corners of the patio area and adjust the area as needed. Remove all weeds, grass, roots, and topsoil from the area. After excavating, you will need to compact the earth if necessary and add a layer of gravel or crushed rock on top. Typically, this base layer should be about 4 inches (10 cm) deep.


![Steps to Create A Stamped Concrete Patio [Infographic]](https://cdn5.slideserve.com/9942095/slide1-dt.jpg)