Download
1 / 2
20 likes | 209 Views
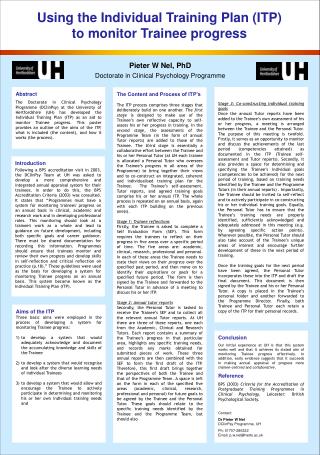
Using the Individual Training Plan (ITP) to monitor Trainee progress. Pieter W Nel, PhD Doctorate in Clinical Psychology Programme. Abstract

E N D
Using the Individual Training Plan (ITP) to monitor Trainee progress Pieter W Nel, PhD Doctorate in Clinical Psychology Programme Abstract The Doctorate in Clinical Psychology Programme (DClinPsy) at the University of Hertfordshire (UH) has developed the Individual Training Plan (ITP) as an aid to monitor Trainee progress. This poster provides an outline of the aims of the ITP, what is included (the content), and how it works (the process). Stage 3: Co-constructing individual training goals Once the annual Tutor reports have been added to the Trainee’s own assessment of his or her progress, a meeting is arranged between the Trainee and the Personal Tutor. The purpose of this meeting is twofold. Firstly, it serves as an opportunity to monitor and discuss the achievements of the last period (competencies attained) as documented in the ITP (Trainee self-assessment and Tutor reports). Secondly, it also provides a space for determining and specifying the Trainee’s individual goals (competencies to be achieved) for the next period of training, based on training needs identified by the Trainee and the Programme Tutors (in their annual reports) . Importantly, the Trainee should be invited to self-reflect and to actively participate in co-constructing his or her individual training goals. Equally, the Personal Tutor has to ensure that the Trainee’s training needs are properly identified, sufficiently acknowledged and adequately addressed in this meeting (e.g. by agreeing specific action points). Wherever possible, the Personal Tutor should also take account of the Trainee’s unique areas of interest and encourage further development of these in the next period of training. Once the training goals for the next period have been agreed, the Personal Tutor incorporates these into the ITP and draft the final document. This document is then signed by the Trainee and his or her Personal Tutor. A copy is placed in the Trainee’s personal folder and another forwarded to the Programme Director. Finally, both Trainee and Personal Tutor each retain a copy of the ITP for their personal records. The Content and Process of ITP’s The ITP process comprises three stages that deliberately build on one another. The first stage is designed to make use of the Trainee’s own reflective capacity to self-assess his or her progress in training. In the second stage, the assessments of the Programme Team (in the form of annual Tutor reports) are added to those of the Trainee. The third stage is essentially a collaborative effort between the Trainee and his or her Personal Tutor (at UH each trainee is allocated a Personal Tutor who oversees the Trainee’s progress in all areas of the Programme) to bring together their views and to co-construct an integrated, coherent and individualised training plan for the Trainee. The Trainee’s self-assessment, Tutor reports, and agreed training goals comprise his or her annual ITP. The whole process is repeated on an annual basis, again with each ITP building on the previous one(s). Stage 1: Trainee reflections Firstly, the Trainee is asked to complete a Self Evaluation Form (SEF). This form requires the trainees to reflect on their progress in five areas over a specific period of time. The five areas are: academic, clinical, research, professional and personal. In each of these areas the Trainee needs to state their views on their progress over the specified past period, and then move on to identify their aspirations or goals for a specified future period. The form is then signed by the Trainee and forwarded to the Personal Tutor in advance of a meeting to discuss his or her ITP. Stage 2: Annual tutor reports Secondly, the Personal Tutor is tasked to receive the Trainee’s SEF and to collect all the relevant annual Tutor reports. At UH there are three of these reports, one each from the Academic, Clinical and Research Tutors. Each report contains a summary of the Trainee’s progress in that particular area, highlights any specific training needs, and records any marks obtained for submitted pieces of work. These three annual reports are then combined with the SEF to form the first draft of the ITP. Therefore, this first draft brings together the perspectives of both the Trainee and that of the Programme Team. A space is left on the form in each of the specified five areas (academic, clinical, research, professional and personal) for future goals to be agreed by the Trainee and the Personal Tutor. These goals should relate to the specific training needs identified by the Trainee and the Programme Team, but should also Introduction Following a BPS accreditation visit in 2003, the DClinPsy Team at UH was asked to develop a more comprehensive and integrated annual appraisal system for their trainees. In order to do this, the BPS Accreditation Criteria (2003) was consulted. It states that “Programmes must have a system for monitoring trainees' progress on an annual basis in clinical, academic and research work and in developing professional roles. This monitoring should look at a trainee's work as a whole and lead to guidance on future development, including both specific goals and career guidance. There must be shared documentation for recording this information. Programmes should ensure that trainees monitor and review their own progress and develop skills in self-reflection and critical reflection on practice (p.18).” These guidelines were used as the basis for developing a system for monitoring Trainee progress on an annual basis. This system became known as the Individual Training Plan (ITP). • Aims of the ITP • Three basic aims were employed in the process of developing a system for monitoring Trainee progress: • to develop a system that would adequately acknowledge and document the accumulating knowledge and skills of the Trainee • to develop a system that would recognise and look after the diverse learning needs of individual Trainees • to develop a system that would allow and encourage the Trainee to actively participate in determining and monitoring his or her own individual training needs and Conclusion Our initial experience at UH is that this system works well and that it achieves its stated aim of monitoring Trainee progress effectively. In addition, early evidence suggests that it succeeds in making annual appraisal of progress more trainee-centred and collaborative. Reference BPS (2003) Criteria for the Accreditation of Postgraduate Training Programmes in Clinical Psychology. Leicester: British Psychological Society. Contact: Dr Pieter W NelDClinPsy Programme, UH Ph: 01707-286322Email: p.w.nel@herts.ac.uk
Title Goes Here Title Goes Here Title Goes Here Title Goes Here Title Goes Here Author’s Name/s Goes Here, Author’s Name/s Goes Here Address/es Goes Here, Address/es Goes Here Introduction First… Check with conference organisers on their specifications of size and orientation, before you start your poster eg. maximum poster size; landscape, portrait or square. The page size of this poster template is A0 (84x119cm), portrait (vertical) format. Do not change this page size, MIU can scale-to-fit a smaller or larger size, when printing. If you need a different shape start with either a landscape (horizontal) or a square poster template. Bear in mind you do not need to fill up the whole space allocated by some conference organisers (eg. 8ftx4ft in the USA). Do not make your poster bigger than necessary just to fill that given size. Notes about graphs… For simple graphs use MS Excel, or do the graph directly in PowerPoint. Graphs done in a scientific graphing programs (eg. Sigma Plot, Prism, SPSS, Statistica) should be saved as JPEG or TIFF if possible. For more information see MIU. Printing and Laminating… Once you have completed your poster, bring it down to MIU for printing. We will produce a A3 size draft print for you to check and proof read. The final poster will then be printed and laminated. Note: Do not leave your poster until the last minute. Allow at least 5 working days before you need to use it. Simply highlight this text and replace. Cost… For poster-printing and laminating charges contact to MIU Captions to be set in Times or Times New Roman or equivalent, italic, between 18 and 24 points. Left aligned if it refers to a figure on its left. Caption starts right at the top edge of the picture (graph or photo). Captions to be set in Times or Times New Roman or equivalent, italic, between 18 and 24 points. Right aligned if it refers to a figure on its right. Caption starts right at the top edge of the picture (graph or photo). Captions to be set in Times or Times New Roman or equivalent, italic, 18 to 24 points, to the length of the column in case a figure takes more than 2/3 of column width. Aim How to use this poster template… Simply highlight this text and replace it by typing in your own text, or copy and paste your text from a MS Word document or a PowerPoint slide presentation. The body text / font size should be between 24 and 32 points. Arial, Helvetica or equivalent. Keep body text left-aligned, do not justify text. The colour of the text, title and poster background can be changed to the colour of your choice. Results Importing / inserting files… Images such as photographs, graphs, diagrams, logos, etc, can be added to the poster. To insert scanned images into your poster, go through the menus as follows: Insert / Picture / From File… then find the file on your computer, select it, and press OK. The best type of image files to insert are JPEG or TIFF, JPEG is the preferred format. Be aware of the image size you are importing. The average colour photo (13 x 18cm at 180dpi) would be about 3Mb (1Mb for B/W greyscale). Call MIU if unsure. Do not use images from the web. • Method Tips for making a successful poster… • Re-write your paper into poster format ie.Simplify everything, avoid data overkill. • Headings of more than 6 words should be in upper and lower case, not all capitals. • Never do whole sentences in capitals or underline to stress your point, use bold characters instead. • When laying out your poster leave breathing space around you text. Don’t overcrowd your poster. • Try using photographs or coloured graphs. Avoid long numerical tables. • Spell check and get someone else to proof-read. Conclusion For more information on: Poster Design, Scanning and Digital Photography, and Image / file size. Contact: Medical Illustration UnitPrince of Wales Hospital Ph: 9382 2800Email: miunsw@unsw.edu.auWeb: http://miu.med.unsw.edu.au Captions to be set in Times or Times New Roman or equivalent, italic, between 18 and 24 points. Right aligned if it refers to a figure on its right. Caption starts right at the top edge of the picture (graph or photo). Captions to be set in Times or Times New Roman or equivalent, italic, between 18 and 24 points. Left aligned if it refers to a figure on its left. Caption starts right at the top edge of the picture (graph or photo). Acknowledgements Just highlight this text and replace with your own text. Replace this with your text. Captions to be set in Times or Times New Roman or equivalent, italic, 18 to 24 points, to the length of the column in case a figure takes more than 2/3 of column width.