Download
1 / 9
90 likes | 255 Views
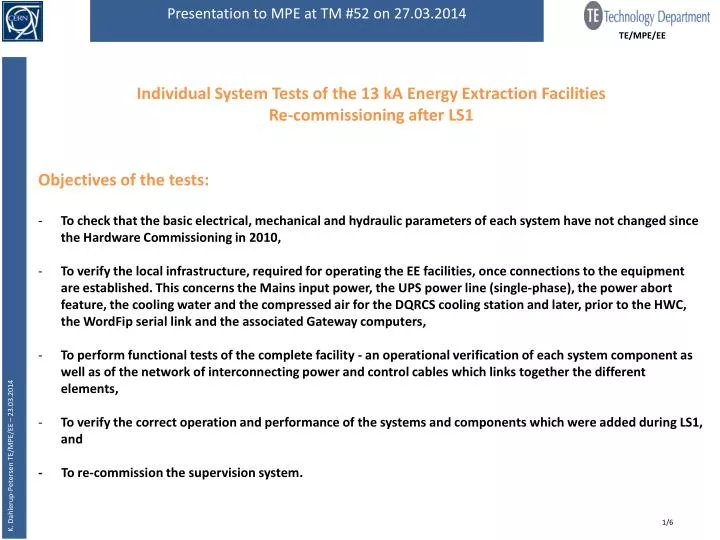
Presentation to MPE at TM #52 on 27.03.2014. TE/MPE/EE. Individual System Tests of the 13 kA Energy Extraction Facilities Re-commissioning after LS1 Objectives of the tests:

E N D
Presentation to MPE at TM #52 on 27.03.2014 TE/MPE/EE • Individual System Tests of the 13 kA Energy Extraction Facilities • Re-commissioning after LS1 • Objectives of the tests: • To check that the basic electrical, mechanical and hydraulic parameters of each system have not changed since the Hardware Commissioning in 2010, • To verify the local infrastructure, required for operating the EE facilities, once connections to the equipment are established. This concerns the Mains input power, the UPS power line (single-phase), the power abort feature, the cooling water and the compressed air for the DQRCS cooling station and later, prior to the HWC, the WordFip serial link and the associated Gateway computers, • To perform functional tests of the complete facility - an operational verification of each system component as well as of the network of interconnecting power and control cables which links together the different elements, • To verify the correct operation and performance of the systems and components which were added during LS1, and • - To re-commission the supervision system. K. Dahlerup-Petersen TE/MPE/EE – 23.03.2014 1/6
Presentation to MPE at TM #52 on 27.03.2014 TE/MPE/EE • The different test campaigns shall be applied in the following order: • 1. HVQ -with PC disconnected and safety measures applied at DFBA and at • the PC connection, supposing that the cooled cables are connected at the • EE side . • 2. Functional Tests (no dc current through the system) using a dummy quench • loop source. Local controls through dedicated Labview application similar • to ‘QPSExpert’ and communication link to the DQAMS – RS232. • 3. IST with SC at DFBA-side of cooled cables. PC connected. Performed with dc • currents up to 13 kA - with separate interlock line to PC. • In odd points replaced by testing at 600 A. • 4. Participation in the thermal validation (heat) runs, 13 kA, min. 10 - 12 hours • - where applicable (P4L, P6R+L, P8R+L). • 5. Hardware commissioning with participation of QPS experts in CCC and two • field teams for tunnel interventions. All energy storage related verifications • can only be performed at this final phase of testing. K. Dahlerup-Petersen TE/MPE/EE – 23.03.2014 1/6
Presentation to MPE at TM #52 on 27.03.2014 TE/MPE/EE • CONDITIONS REQUIRED TO START AND TO PERFORM THE IST: • A. The Extraction Facilities: • Prior to the start of the tests all elements and components of the system under test must be installed in their final position and be configured with the appropriate and agreed functions and parameters, regardless if they belong to the original systems or were added during LS1. • The interconnections will depend on the type of test. • Specifically for the HVQ tests to ground and between poles the conditions required for beginning the tests are: • -The control, monitoring and data acquisition systems of the facility shall be mounted and properly working. This will be Labview-based for the IST campaigns and Gateway-based for the HWC. In both cases the interface will be the same DQAMS controller. • -The two 2000 mm2 water-cooled cables must be connected to the busway (DQSBW). • -The extraction absorbers (DQRB/DQRQ) must be connected at the level of the busway. Only exception is during the insulation test between poles for which at least one of the power cables to the DQR’s must be disconnected. • -The two water cooling circuits (DQR/DQRCS and DQSBW/13 kA cables) must be filled. • -The demineralised water in the DQSBW circuit must have been circulated for at least 2 weeks prior to the tests in order to remove by filtering the conductive impurities -mainly from the flexible hoses installed across the switches. • -All instrumentation must be mounted and connected. K. Dahlerup-Petersen TE/MPE/EE – 23.03.2014 1/6
Presentation to MPE at TM #52 on 27.03.2014 TE/MPE/EE • Further verifications: • The powering of the DJPC’s and the interface module (crate DQSIM) from the UPS feeding the rack shall be checked and validated (no powering from the mains). • The DJRB/DJRQ powering and controls cabinets, however, must be powered from the Mains. • INFRASTRUCTURE: • During the complete IST test period nominal operating conditions are required for: • - The mains electrical distribution system (‘Canalis’ / ‘NormaBar’ verified by EN/EL prior to our tests) • - The UPS network (verified by EN/EL after refurbishment) • - Demineralised water distribution and flow. Ventilation in the location of the tests. • - The local ‘FanCoil’ air cooling inside the DQSQ enclosures. • - The auxiliary FPA loop for test purpose (with ~ 50 mA current source) • - Supervision systems based on NI-boards • - WiFi • For the HWC: • - The QPS Quench loop • - WoldFIPand Gateways • - Ethernet • - Control from CCC consoles, use of the ‘QPSExpert’ tool. K. Dahlerup-Petersen TE/MPE/EE – 23.03.2014 1/6
Presentation to MPE at TM #52 on 27.03.2014 TE/MPE/EE • C. Access Conditions and safety systems • Access shall be managed through IMPACT (ADAMS). • The test area shall be fenced off. Local signs must clearly indicate that tests are ongoing. • For the tests requiring powering from the power converters with a short-circuit established between the (disconnected) cable lugs at the level of the DFBA the tunnel area around the DFBA shall be patrolled, a guard will be placed at this point and access will be prohibited during the tests. • The condemnation/authorisation procedure and service of EN/MEF/COL be used. • All personal safety systems must be operational and correctly used by the members of the test team. • All intervening specialists must have succeeded the electrical safety course and obtained an electrical safety certificate, issued by the MPE group leader. • Prior to powering and/or HV application the ‘Test Authorization’ from G. Pastor, must be in the possession of the test team. K. Dahlerup-Petersen TE/MPE/EE – 23.03.2014 1/6
Presentation to MPE at TM #52 on 27.03.2014 TE/MPE/EE THE TEST PROCEDURES: HVQ Procedure 1. Insulation between poles. Performed with DQR’s and Snubber Capacitors disconnected. Applied voltage: 3.0 kVDC, 2 mins. for dipole systems, 1 kVDC, 2 mins. for quadrupole systems. Measured insulation resistance > 1 MΩ. Procedure 2. Insulation to ground. Performed with DQR’s and Snubber Capacitors connected. Applied voltage: 3.0 kVDC, 2 mins. for dipole systems, 1 kVDC, 2 mins. for quadrupole systems. Both pos. and neg. polarity. Measured insulation resistance > 3 MΩ. 2. FUNCTIONAL TESTS Procedure 1. Switch signal interconnection test. Through manual switch activation and verification of state change in acquisition. Individually for each of the eight switches (A1, A2, B1, B2, C1, C2, D1, D2). Procedure 2. Over-current functional tests. Branch by branch, by manual activation of the four >I relays. Verification of correct information at the Labview application. Procedure 3. Power supply failure simulation– separately in each DJPC switch driver module. Subsequent removal of the +5.4 Vdc power source, followed by the tri-volt +5.4 V , +/-15 V supply. Identification of power abort and state change indication in the Labview acquisition. K. Dahlerup-Petersen TE/MPE/EE – 23.03.2014 1/6
Presentation to MPE at TM #52 on 27.03.2014 TE/MPE/EE Procedure 4: LV power supply failure simulation in the Interface Module. State change on acquisition. Procedure 5: Power supply failure simulation inside DQR controls modules (DJRB/DJRQ). Verify failure indications over-temperature and fan failure. Procedure 6: Provocation of flow restriction in secondary DQRB/DQRQ cooling circuits –through valve closing. Verification of loss of power permit with inhibit of re-closing, but no switch release. Procedure 7: Interrupting the water flow to the DQS busway . Verifiction of switch release and loss of power permit. Procedure 8: Simulation of an over-voltage across the DQR through use of aux. DC supply. Verification of the appearance of abort, and subsequent switch release at 5 V. Procedure 9: Simulation of a DQR over-temperature. Through disconnection of the X1 connector on the extraction resistor units. Verification of closing blockage. Procedure 10: Simulation of fan failure. After adjustment of the comparator voltage on the ‘Measuremment’ board and volountary disconnection of one cooling fan. Verification of fan failure indication on the acquisition. Procedure 11: Simulation of fan overload. Through opening of the associated circuit protection relay. Verification of appearnce of message on acquisition. K. Dahlerup-Petersen TE/MPE/EE – 23.03.2014 1/6
Presentation to MPE at TM #52 on 27.03.2014 TE/MPE/EE Procedure 12: Provoke a cable disconnection, separately in each switch controller module (DJPC). Removal of SK53/SK63 and verify appearance of message on acquisition. Procedure 13: Measurement of dipole switch release delays, odd end, even end. Switch release through interlock. Check opening times on acquisition. 350 ms (odd end), 580 ms (even end). Procedure 14: Spurious branch openings without current in system: Remove the holding current to the two switches of the same branch, e.g. SK9, module 1 and SK9, module 2. Subsequently, interrupt the holding current of one more switch. Verify complete opening of all branches. Repeat this exercise for all combination of branches. POWERING TESTS IN SHORT-CIRCUIT CONFIGURATION WITH CURRENT IN MAIN CIRCUIT Procedure 1: Polarity Checks for combination ‘holding coil’ and ‘pulsed breaker coil’. With all switches closed the fast-release cable connections are opened for 7 out of the 8 breakers, leaving only one breaker in fast-release mode. With a current of 600 ADC in the main circuit, used for monitoring purpose, an abort shall be provoked and the main current through the only branch in fast-release mode shall be monitored. The correct polarities of the two release systems are confirmed by the complete absence of re-bouncing of the main current. The exercise shall be repeated in the remaining 7 locations. Procedure 2: Opening tests – with the snubber capacitors connected. With 1 kA in the Main circuit an abort is provoked in order to monitor the opening of all eight breakers simultaneously. Process timing shall be registered and the opening delays shall be measured. K. Dahlerup-Petersen TE/MPE/EE – 23.03.2014 1/6
Presentation to MPE at TM #52 on 27.03.2014 TE/MPE/EE Procedure 3: Repetition of Procedure 2 at 5 kA and 13 kA. Procedure 4: Static Branch Verifications with current in main circuit (13 kA). Ramp to 13 kA with ramp rate of 10 A/s, with one branch open. Verify current carrying capability at ultimate current of the three remaining branches. Procedure 5: Repeat this experiment with one of the three remaining branches. Procedure 6: Dynamic Branch Verifications with current in the main circuit (1 kA). Ramp to 13 kA with 10A/s. Then remove the ‘holding coil current’ in one branch. Check the capability of the three remaining branches to carry the ultimate current. Repeat this exercise with the remaining three branches. Procedure 7: Test of slow-opening at 13 kA. Remove the fast pulse connectors to prevent fast opening (SK7 – 10 – 13 – 16). Send abort and monitor the discharge pulse. Procedure 8: Same procedure as no. 7, however, with all fast release connections mounted. Monitor the opening process. Procedure 9: Verify the correct monitoring of the DQR thermocouples at room temp. for air temperature measurement. Use multimeter with cold junction. K. Dahlerup-Petersen TE/MPE/EE – 23.03.2014 1/6