ILS14A
ILS14A. Intelligent Lectern Systems BV www.intelligentlecterns.com. Agenda. Product Overview Name of Each Part Components Specifications Controller Main, Notebook Interface, Control Panel Controller Back Panel Controller Connection Controller Connection Layout Operation Instruction


ILS14A
E N D
Presentation Transcript
ILS14A Intelligent Lectern Systems BV www.intelligentlecterns.com
Agenda Product Overview Name of Each Part Components Specifications Controller Main, Notebook Interface, Control Panel Controller Back Panel Controller Connection Controller Connection Layout Operation Instruction Trouble Shooting
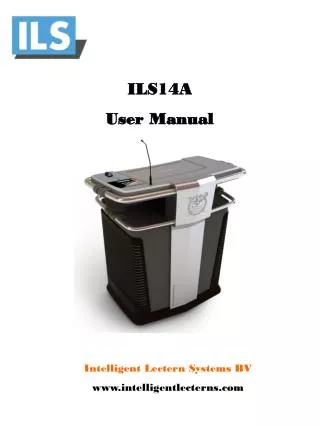
Product Overview Intelligent Podium • Sliding Cover • Easy Open/Close Smooth wheels (move & lock)
Controller Main NOTEBOOK Interface 7” LCD Control Panel
Controller Back Panel ⓕ ⓖ ⓐ ⓑ ⓓ ⓔ ⓒ ⓗ ⓘ ⓚ ⓙ ⓛ ⓜ ⓝ ⓞ ⓟ ⓠ ⓢ ⓐ A/V OUT : Video & Sound Output port. Connect to Projector & Amplifier.ⓑ A/V INPUT : Connect DVD, VCR , Visualizer, etc. ⓒ Mic. Input: Connect MIC 1, MIC 2. (MIC1 supports 12V phantom power) ⓓ TOUCH : Connect LCD touch key.ⓔ POWER CONTROL: To control external devices power & screen elevation.ⓕ AC Out: Security function port. If USB KEY is pulled out, all connected devices go off.ⓖ AC In : Supplies power to control AC Out and 220V Devices (screen, elevation).ⓗ PC Sound: PC’s speaker port is connected to IN port, mic port is connected to OUT.ⓘ Notebook Sound : Notebook speaker port is connected to IN, MIC port is connected to OUT.ⓙ USB : USB from monitor is to Tablet, AUX port is used to expand at PC.(see configuration) Others are selector ports of PC and Notebook. Each one connects to PC and Notebook.ⓚ LAN : Selector port of Notebook and PC. Main LAN cable is connected to LAN IN, others are connected to PC and Notebook’s internet port.ⓛ IR Control : A port to output IR signal which was input.ⓜ PROJECTOR : RS-232 port to control projector. (connected to projector)ⓝ CONTROL : Port used when to control by PC. (Connected to PC byRS - 232)ⓞ PC POWER : PC power control port (Connected to PC’s power port)ⓟ RGB distributor : Distribute RGB signal and output images to monitor and projector (selector function included)ⓠ KEY Control : Port connected to key buttonⓡ Power: 19V 3.16A.
Controller Connection ☞ Notebook Interface Rear Panel ☞ Notebook Interface Front Panel
Electric Light AMP DVD Player LCD Touch Key Motorized Screen Projector MIC VTR ⓐ ⓑ ⓓ ⓔ ⓕ ⓒ ⓖ ⓗ ⓘ ⓚ ⓙ ⓛ ⓜ ⓝ ⓞ ⓟ ⓠ ⓢ Tablet Monitor Laptop Interface DVD Player PC TV Projector (RS-232c) Wireless MIC Desktop Visualizer Controller Connection Layout
Operation Instruction ♦ System Press START : projector screen – projector lift down; projector on expand to other external devices: reading light, fan, airco, etc. Press END : screen and elevator up, projector turned off. ♦ Desktop PC LCD Menu, press PC button. * At initial power input, PC mode will be automatically set. ♦ Notebook LCD Menu, pressNOTE button. Connect Notebook power adaptor, RGB Cable,USB, SOUND IN / OUT, LAN cable to respective sockets podium topInternet, sound, pen function are automatically converted. * To use tablet writing on the notebook, you must install tablet driver on notebook. To switch back to main computer, press PC button.
IR Learn mode • ♦ The Controller can save remote control’sinput signal and do the control. • ♦ How to program • - Television MENU on LCD: press IR Learn button, controller panel LED turns on. ( Program Ready Status) • - Press desired key on the LCD. • - Press remote controlsignal for that key on the controller main set. • - Upon the desired button input completed, LED will flicker. • - In case of wrong input, LEC will flicker fast. Then, input again. • ♦ How to connect • - 4 Channels exist on "IR Control Out" port at the back of the controller • Connect IR cable to the desired channel, and fix to the IR receiver of the device • Upon pressing the button, when there is no response, there is input error, • or the light emitting position of the cable is not correctly matched with the • light receiving part of the device. In this case, follow the procedure again.
☞ IR Learning 2 3 5 2 3 5 In order to input IR Learninginto Controller, PC RS-233 port and Controller’s control RS-232 port should be connected by direct cable. AMC – 6000LTCP / IP Port PC ♣ How to input < RS-232 Port > < PC Windows activation screen > ♦ Sequence • To input, at first, copy vb6ko.dll file in the folder into System32 folder, and install Vbruntimes. (If not installed, errors occur.) • 2. Next, execute Protocol Input and set COM PORT. Set it after checking PC’s port number. • 3. Press Open button, Program Input LED is lighted. • 4. On Window screen, pressON/OFF button. • Press Remote control’sON/OFF button to the direction of Controller’s IR Receiver. • If correctly input, LED flashes 3 times. If incorrect, LED flashes promptly 3 times. • Input other buttons same as above procedure. • When all input is completed, use IR Cable to connect to Controller’s IR Port, and place it near to the IR Receiver which you want to control.
☞ Projector Protocol Input 2 3 5 2 3 5 In order to input Projector protocol into Controller, PC RS-233 port and Controller’s control RS-232 port are connected by direct cable. < RS-232 Port > PPA - 6000 PC ♣ How to input ♦ Sequence • To input, at first, copy vb6ko.dll file in the folder into System32 folder, and install Vbruntimes. • (If it is not installed, error occurs.) • 2. Next, execute Protocol Input and set COM PORT. Set it after checking PC’s port number. • If you press OPEN button, COM PORT opens. If PORT setting is wrong, error message • is displayed. In this case, enter device manager and recheck port before resetting. • 4. Select wanted Projector. • If you press next protocol button, matching LED flashes. As it is the status the protocol is being • input, do not press other button, and wait until the LED stops flashing. If other button is pressed • by error, the next button input can not be made. In this case, connect the power again and • proceed input. • 6. After all input completed, press CLOSE button to close COM PORT.
Trouble Shooting Problem Check Points No Power • Power cord connected ? • Podium Power switch is ON ? • Monitor power is connected ? • Consent switch is ON ? No Image • Is the PC select switch on the upper control panel properly selected ? • Input device cable is correctly connected ? • Tablet Monitor’s VGA Input is corrected connected ? • Output device cable is corrected connected ? Strange Color • Check if Computer cable pin is bent or broken. • Check Tablet Monitor’s brightness and contrast. Microphone not works • Check Transmitter battery. No Sound • Check if volume control is set at minimum. • Computer Input/Out is correctly connected ? • Being set to Notebook, internal Voice Input/Output is not made.