Download
1 / 5
50 likes | 187 Views
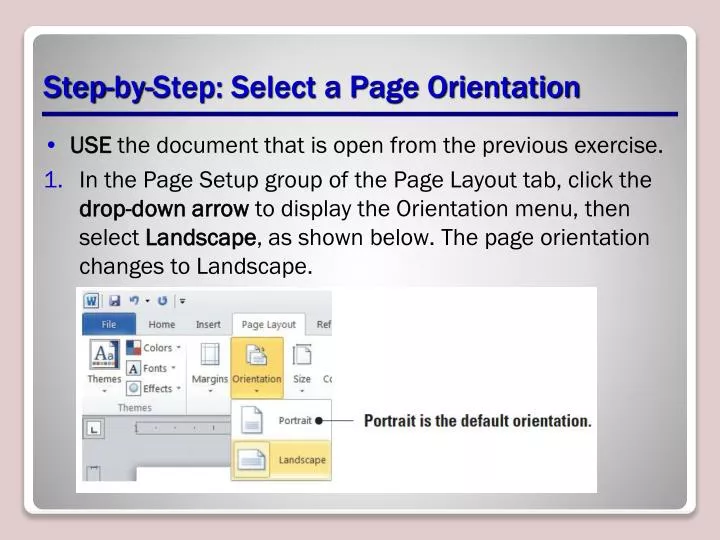
Step-by-Step: Select a Page Orientation. USE the document that is open from the previous exercise. In the Page Setup group of the Page Layout tab, click the drop-down arrow to display the Orientation menu, then select Landscape , as shown below. The page orientation changes to Landscape.

E N D
Step-by-Step: Select a Page Orientation • USE the document that is open from the previous exercise. • In the Page Setup group of the Page Layout tab, click the drop-down arrow to display the Orientation menu, then select Landscape, as shown below. The page orientation changes to Landscape.
Step-by-Step: Select a Page Orientation • Click the File tab, then Print, to preview the document in Backstage view. On the right side of the pane, the document displays in landscape. • SAVE document as draft1_proposal in the lesson folder on your USB flash drive. • LEAVEthe document open to use in the next exercise.
Step-by-Step: Choose a Paper Size • USE the document that is open from the previous exercise. • In the Page Setup group of the Page Layout tab, click the drop-down arrow to display the Orientation menu, then select Portrait. The orientation is changed back to portrait from the previous exercise. • From the Page Setup group of the Page Layout tab, click the drop-down arrow to display the Size menu, then select Legal, as shown on the next slide. Word provides preset document sizes or you can customize the paper size by clicking the More Paper Sizes button.
Step-by-Step: Choose a Paper Size • On the File tab, click Print to preview your document in Backstage view. On the right side of the pane, the document displays in portrait orientation and legalsize. It is good practice to preview your document before printing to ensure the text will print correctly.
Step-by-Step: Choose a Paper Size • Click the Page Layout tab, then click the drop-down arrow to display the Size menu; next, select Letter. Notice that while in Backstage view, you can access the tabs on the ribbon. • SAVEdocument as draft2_proposal in the lesson folder on your USB flash drive. • LEAVEthe document open to use in the next exercise.