Download
1 / 26
260 likes | 486 Views
Emergency Response American Red Cross Instructor: Joel Bass MS ATC. 1995 USDOT First Responder Curriculum. Suctioning. Video (Suctioning) Steps for Suctioning Turn head to side or roll body if head, neck, or back injury suspected Open victim’s mouth

E N D
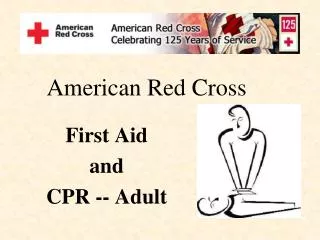
Emergency ResponseAmerican Red Cross Instructor: Joel Bass MS ATC 1995 USDOT First Responder Curriculum
Suctioning • Video (Suctioning) • Steps for Suctioning • Turn head to side or roll body if head, neck, or back injury suspected • Open victim’s mouth • Measure distance of insertion (earlobe to corner of mouth) • Insert suction device into back of mouth • Suction for no more than 15 seconds at a time. • Devices are both manual and mechanical
Airways • Video (Airway Insertion) • There are two types of airways: • Oropharyngeal (Oral airway) • Nasopharyngeal (Nasal airway) • Airways are used only on victims who do not begin to gag when the airway is inserted.
Inserting An Oral Airway • Select airway or proper size. • Victim’s earlobe to corner of mouth • Open victim’s mouth • Insert airway with curved end along roof of mouth • Advance airway gently until resistance is felt. • Rotate airway ½ turn • Flange should rest on lips.
Inserting a Nasal Airway • Select airway of proper size • Measure from victim’s earlobe to tip of nose • Lubricate nasal airway (K-Y jelly) • Insert nasal airway into right nostril with bevel toward middle of nose • Advance airway gently, until flange rests on nose.
Skill Practice: Suctioning and Airway Insertion • Bring your skill sheets to the practice area • Find a partner • Use manikins • You must wear gloves
Resuscitation Masks • Video (Using a Resuscitation Mask) • Resuscitation masks can be used for breathing and nonbreathing victims. • It reduces the possibility of disease transmission.
Criteria for a Resuscitation Mask • Transparent, pliable • One-way valve • 15 mm or deliver supplemental oxygen • Able to withstand extreme temperatures • Easily assembled and used
Using a Resuscitation Mask • Tilt head back • Lift jaw • Open mouth • If you suspect a head or spine injury, lift the jaw but do not tilt the head back
Skill Practice: Resuscitation Mask • Bring your skill sheets to the practice area • Find a partner • Use manikins • Begin with the initial assessment • You must wear gloves
Bag Oxygen reservoir bag One-way valve Mask Bag-Valve-Mask (BVM) Resuscitator • Video (Using a Bag-Valve-Mask) • The BVM has four pieces • The bag, which is self –inflating • The valve (one-way) • The Mask • Reservoir
Skill Practice: Bag-Valve Mask • Bring your skill sheets to the practice area • Find a partner • Use manikins • Begin with the initial assessment • You must wear gloves
Pressure Regulator Flow meter Oxygen Cylinder Supplemental Oxygen • Video (Oxygen Delivery) • Supplemental Oxygen Delivery System Components • Oxygen cylinder • Pressure regulator to reduce pressure • Flow meter to control amount of oxygen delivered (lpm)
Oxygen Tank Setup • Clear the cylinder valve by turning it clockwise. • Insert the gasket into the cylinder opening • Make sure regulator is for oxygen use. • Seat the three prongs on the regulator inside the cylinder. • Hand tighten the screw until the regulator is snug • Turn the flow meter clockwise to desired flow.
Precautions During Oxygen Delivery • Do not operate around flames/sparks. • Do not stand cylinder upright • Do not use grease/oil/petroleum products to lubricate • Check oxygen flow before placing delivery device on victim.
Skill Practice: Oxygen Delivery • Bring your skill sheets to the practice area • Find a partner
Cardiovascular System Review • Consists of the heart, blood, and blood vessels • Works with the respiratory system • The heart is located behind the sternum
The Heart • The heart has four chambers • Most arteries carry oxygen-rich blood away from the hear to cells • Most veins carry oxygen-poor blood from the cells to the lungs • The beat you feel with each contraction is called the pulse • The coronary arteries supply the heart with blood
Heart Attack • Have you ever observed a victim who was showing signs and symptoms of a heart attack? • Video (Recognizing a Heart Attack)
Signs and Symptoms of Heart Attack • Persistent chest pain or discomfort • Breathing difficulty • Changes in pulse rate • Pale, bluish, or moist skin • Nausea, vomiting • Sweating • General ill appearance
Care for Heart Attack • Stop victim’s activity • Have victim rest in a comfortable position • Summon more advanced medical personnel. • Be calm and reassuring • Monitor breathing, and pulse, look for changes in victim’s appearance/behavior. • Administer supplemental oxygen if it is available and you are trained.
Controllable Risk Factors for Cardiovascular Disease • Smoking • Diet high in fat • High blood pressure • Obesity • Lack of regular exercise
Assignments • Reading Assignment: Review Chapter 7 - 10 • Complete the Healthy Lifestyles Awareness Inventory in Appendix B (Turn in at the beginning of class)