Download
1 / 3

E N D
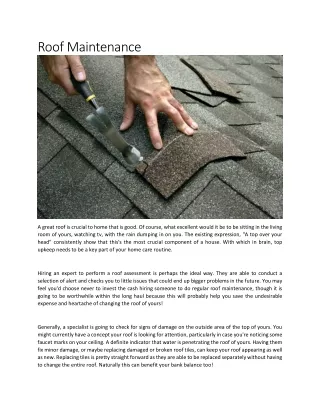
Implementing Asphalt Shingle Roofing Being a starter, strip by cutting the tabs off a tile with a roofing blade. Then cut 6 inches off one end. Placing the trimmed shingle on the roof with the cut sides overlapping the rake (edge) and also eave (base by 1/2 to 3/4 inch. Nail the roof shingles on the roof with four galvanized roofing nails, located 3 to 4 inches from the eaves. Cut the tabs off an additional roof shingles and also placed the full length on the roof. Butt it against the initial tile and accomplish in place with galvanized roofing nails spaced 12 inches apart. Proceed cutting and also mounting along the roof until you have actually mounted the starter strip from one side to the other. Put a roof shingles on the roof to ensure that the lower side overlaps the cutter apron at the eaves no more than 3/4 inch. Procedure from the side for the roof to the top of the tile and snap a chalk line this range from the side along the entire roof. Do not use red chalk due to the fact that red pigment will discolor roofing product. Apply the initial shingle of the very first program. Begin at the edge as well as begin with a full shingle. Position the tile to overhang the eaves as well as rake sides by 3/4 inches. Nail the roof shingles in position with 4 nails.
Once the first roof shingles is on, transfer to the first tile of the 2nd program. This aids align the shingles effectively and means you do not need to move across the roof for every single shingle. Cut 6 inches off completion of a shingle. Line up the bottom side of the roof shingles with the top of the intermediaries in the very first tile. Accomplish in position according to the producer's directions. With 2 shingles in position, begin the 3rd training course. Cut 12 inches off the end of a tile. Line up the edge with the side of the roof, and straighten the bottom with the top of the cutouts in the tile listed below. Nail in place continue up the roof to the sixth program, cutting each shingle to be 6 inches narrower than the one listed below it. After the 6th program, you will use a complete length roof shingles along the side of the roof. • Return the reduced side of the roof to reach the area next to the 1st shingle you mounted. Butt a full-length roof shingles next to it and also accomplish in position. Work your means up the roof, toenailing a solitary full-length tile next tot each of the Asphalt Shingles already in place. After you've finished the 6th training course, nail a full-length roof shingles in place to start the 7th training course. Action as well as break a chalk line across the leading to see to it that the row is straight. Snap a line every 7 rows to make sure that you can remedy any type of mistakes before they obtain also significant. Continue working diagonally up and also across the roof. All the shingles are complete -size, other than those shingles so that each is 6 inches narrower than the one listed below. When the rake roof shingles is only 6 inches wide, begin the pattern over, applying a complete tile above it.