Photovoltaic MPPT Charge Controller (PMC 2 )
350 likes | 670 Views
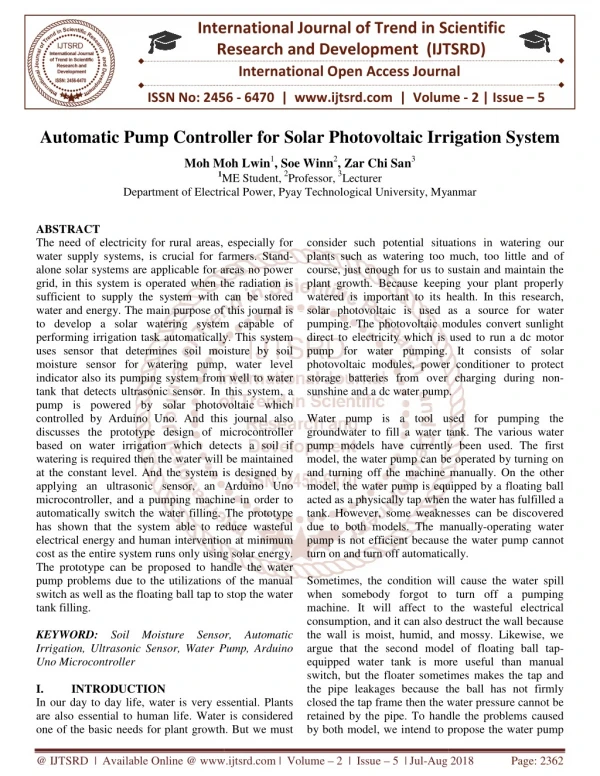
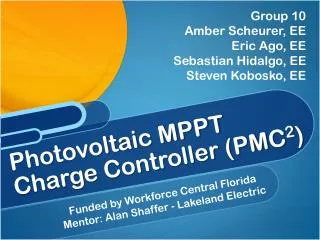
Group 10 Amber Scheurer, EE Eric Ago, EE Sebastian Hidalgo, EE Steven Kobosko, EE. Photovoltaic MPPT Charge Controller (PMC 2 ) . Funded by Workforce Central Florida Mentor: Alan Shaffer - Lakeland Electric. System Overview. MPPT Charge Controller. Inverter. Solar Array. Battery.

Photovoltaic MPPT Charge Controller (PMC 2 )
E N D
Presentation Transcript
Group 10 Amber Scheurer, EE Eric Ago, EE Sebastian Hidalgo, EE Steven Kobosko, EE Photovoltaic MPPT Charge Controller (PMC2) Funded by Workforce Central Florida Mentor: Alan Shaffer - Lakeland Electric
System Overview MPPT Charge Controller Inverter SolarArray Battery Wireless LCD Wireless We designed a charge controller that implements MPPT and demonstrates it in a fully functional stand-alone photovoltaic system.
Motivation andValue of Project • Maximize the cost return on investment for solar panels by using Maximum Power Point Tracking (MPPT) algorithms • LCD screen and wireless data transfer • Useful for testing, research, and maintenance • Potential for industrial scaling • Incorporate a charge controller system with one controller per panel
Goals • Charge controller has to be inherently low power • Utilize Maximum Power Point Tracking to increase efficiency • User/Researcher Friendly Design • LCD Screen • Wireless Data Transfer to Computer Station • Inexpensive
Specifications • Solar Panel delivers > 14 V • Total System Power Output > 200 W • 12 V Battery with > 30 Ah • Wireless range > 20 m • Approximately 90% Efficient
Micro Controller Battery Voltage Sensor Current Sensor Inverter Boost Buck PV Panel Current Sensor Voltage Sensor Charge Controller XBee XBee MCU Temp. Sensor Light Sensor Temp. Sensor LCD Screen
Solar Panel 47.3 in 20.8 in
Microcontroller ATmega328P 2.1 in • ArduinoBootloader • Open Source 2.7 in
Temperature Sensors XBee RX SCL SDA TX A3 ATmega 328P Current Sensors Irradiance Sensor A2 D2 A1 A0 Voltage Sensors PWM PWM LCD TX (D4) Buck-Boost Circuitry Microcontroller Peripherals
Current Sensor ACS711ELCTR-12AB-T 6 mm 4.9 mm
R2=10kΩ Vo R1=2.7kΩ Voltage Sensor Voltage Divider
Irradiance Sensor TSL235R-LF 19.46 mm 4.6 mm
Temp Sensor DS1624 9 mm 8.5 mm
Wireless Module 27.6 mm 24.3 mm
Wireless Subsystem Sensor Data
Battery Sun Xtender PVX-420T 8.05 in 5.18 in 7.71 in
Inverter Cobra CPI 880 3 in. 5.5 in 9 in.
H-Bridge Topology Buck-Boost DC/DC Regulator Single Inductor Buck/Boost Architecture Separate Buck and Boost Operating Modes Synchronous 4-Switch Operation for Higher Efficiency Wide Input Voltage Range: 4.5V to 40V Wide Output Voltage Range: 12V to 15V
Perturb and Observe Method MPP Pmax Power Voltage Vmp VOC
Battery Charging Stages • Bulk • Absorption • Float
LCD:LCD.printXbee:Serial.write Sensor Read:Battery Current Sensor Read:Battery Voltage Bulk Start Float orAbsorption I > I0 I < I0 Increase Voltage Decrease Voltage Adjust PWM Regulated Power Delivered to Battery
17.3 V 12.5 V 3.4 A 2.0 A