
Optimizing Project Management with Prolog: A Step-by-Step Guide
Enhance your project management skills using Prolog with this detailed guide. In Week One, focus on a single project each day, logging into the Project Portfolio Manager. Learn to update project statuses, descriptions, and crucial details. As you progress into Week Two, communicate effectively with your project team via email and set up systems to streamline email management, ensuring all correspondence is documented in Prolog. Follow clear steps to create project directories and enrich your database with essential contacts.

Optimizing Project Management with Prolog: A Step-by-Step Guide
E N D
Presentation Transcript
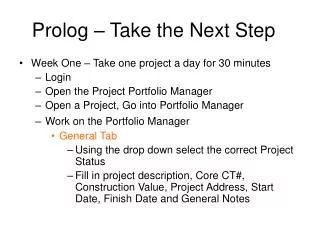
Prolog – Take the Next Step • Week One – Take one project a day for 30 minutes • Login • Open the Project Portfolio Manager • Open a Project, Go into Portfolio Manager • Work on the Portfolio Manager • General Tab • Using the drop down select the correct Project Status • Fill in project description, Core CT#, Construction Value, Project Address, Start Date, Finish Date and General Notes
Prolog – Take the Next Step • Week One (continued) – Take one project a day for 30 minutes • Next continue work in the Portfolio Manager • Miscellaneous Tab • Check the drop down items for Delivery System, Type of Project, Type of Facility, City/Town project is located in. • Check that the correct Project Group is selected, and check the name of any Associate PM or APM who is helping on the project. • Fill in the Agency and Agency contacts. • Fill in the names of Key Project Team members.
Prolog – Take the Next Step • Week One (continued) – Take one project a day for 30 minutes Next continue work in the Portfolio Manager • Project Details Tab • Fill in the Legal Company Names and Addresses for those Firms which you have Contracts with.
Prolog – Take the Next Step • Week Two – Take one project a day for 30 minutes • Send an Email to your Project Team on each of your Projects • Using your Outlook Email, send an email to your project team on each project and instruct them to start sending a copy (CC:) of all emails to the project’s email address. See a sample email on the next page!
Prolog – Take the Next Step A Subject will assist in locating Information later in Prolog, by using the Find Feature in Prolog
Prolog – Take the Next Step • Week Two (Continued) – Take one project a day for 30 minutes • In Portfolio Manager for the project • Click on the Messaging tab to see the project email address
Prolog – Take the Next Step • Week Two (Continued) – Take one project a day for 30 minutes • In order to receive project Email: • Step 1 - Click on the Tools button • Step 2 - Click on the Messaging button • Step 3 - Click on the Mailbox button • Step 4 - Click on the Get Project Mail button and a screen like the one boxed out in orange will open and any email awaiting on the email server will be downloaded into our Prolog files.
Prolog – Take the Next Step Step1 Step 4 Step 2 Step 3
Prolog – Take the Next Step • Write rules in Outlook to forward all project related emails to the Prolog Project email address to include the emails that already exist in your email inbox. See the next page on how to do so. • Note: This will prove very helpful in projects that have more than one Project Manager…the emails will stay with the project email account, not the present or past PM!
Prolog – Take the Next Step • In Microsoft Outlook, select Tools – Rules and Alerts
Prolog – Take the Next Step Click on New Rule
Prolog – Take the Next Step • Click on Start from a Blank Rule
Prolog – Take the Next Step • Click on a condition
Type in the words That you want the Rule to check for
Step 2 Step 1 Step 3 Step 4 Step 5
Check boxes Click on Finish
Prolog – Take the Next Step • Create Project Directory in Contacts for each Project. • Work with your Group Secretary to add companies and contacts to the Prolog Company and Contact Database. • If you give your group secretary a list of all of the people associated with the project, she can put those people into the database if they are not present and then link them to each of the projects.
Prolog – Take the Next Step • Once the project directory is built within your project contacts tab, that directory will automatically open up whenever the forms and letters are utilized within Prolog Make sure that you include DPW members of the team…PM, ADPM, APM, etc.