Download
1 / 19
310 likes | 1.31k Views
Isometric Projection Drawing. 6.1 Isometric projection. Isometric projection is a true representation of the isometric view of an object Isometric view is created by rotating the object 30 degree about horizontal axis. 6.2 Isometric projection: axes.

E N D
6.1Isometric projection • Isometric projection is a true representation of the isometric view of an object • Isometric view is created by rotating the object 30 degree about horizontal axis.
6.2Isometric projection: axes .The 3 axis meet at A,B form equal angles of 120 deg and they are called Isometric Axes .OA is vertical, OB is inclined at 30 degree to the right, OC is inclined at 30 degree to the left .Any lines parallel to these – Isometric Line .Any planes parallel – Isometric Planes
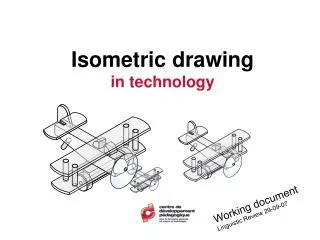
6.2Selection of Isometric Axes • Main purpose of isometric view is to provide a pictorial view which reveals as much detail as possible • Selection of principal edges is important • Figure shows different isometric views of the same block
6.3Non-isometric lines • Non-isometric lines are the lines that are not parallel to any of the iso-lines. • They are drawn by transferring the distance of X from multi-view to iso-view. L L L is orthogonal not equal to L in isometric
6.3Isometric angles & non-iso lines • Example of producing non-isometric lines. • The position of point Z is obtained in the isometric view, by transferring the distance of X and Y.
6.3Iso-circles and arcs • Isometric circles or iso-circle cannot be simply drawn using compass. • Any iso-circle may lie on either top plane, left (front) plane or right (profile) plane. • Iso-circle looks slightly oval and skewed.
6.3Producing Isometric Sketches • Isometric drawing starts with isometric sketches. • Begin with defining isometric axis. • Begin sketch by extending axes – vertical lines, 30deg left & right.
6.3Producing Isometric Sketches • Sketch an isometric ‘box’. • Sketch the view on each faces, starting with isometric lines. • Add in non-iso lines and other details • Darken all visible lines.
6.3Iso-circles and arcs: sketch • Sketching iso-circle is simpler than drawing. • Create isometric square, each side=diameter. • Find the centre point and midpoints of each side. • Use the construction lines and point to sketch each quarter of the circle.
6.3Sketching isometric cylinder • Start by drawing the bounding box. • The front end of the cylinder is sketched using the previous technique. • The far end of the cylinder is a partial iso-circle. Sketch until meeting the tangent with the two straight lines.
6.4Producing Isometric drawing • Read the orthogonal drawing carefully, • choose the best point where isometric axes meet to reveal as much detail as possible • draw an 'isometric box' enclosing the object • draw in light construction lines • draw arc & curves in thick, remove excess.. • line in 30 right lines • line in 30 left lines • line in vertical lines to complete the view
6.4Producing Isometric drawing • Read multi-view drawing given. • Determine front, side & top view. • Try to visualize how the object looks like. • Start with sketching, do not draw straight away. • If not sure, start with sketching an isometric box, enclosing the whole object. • You can label points, lines and surfaces on multi-view to help visualization.
6.4Producing Isometric drawing • You can start drawing, once you’re able to visualise how the object looks like, or finish sketching. • Start with drawing construction line – draw the iso-box, and fill up with other lines. • Line in (darken) arcs & circles. • Line in iso-lines. • Line in all other lines.
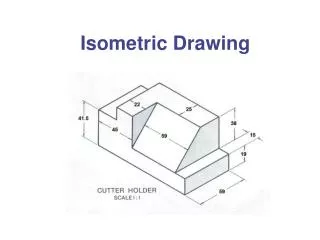
6.5Isometric dimensions • Although isometric drawing is not intended to transmit dimension, sometimes dimensions are placed to indicate the size. • Two types: