Download
1 / 80
820 likes | 1.11k Views
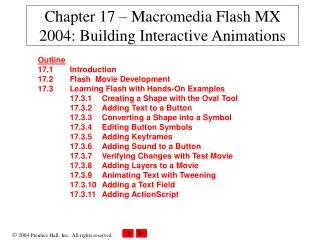
Chapter 17 – Macromedia Flash MX 2004: Building Interactive Animations. Outline 17.1 Introduction 17.2 Flash Movie Development 17.3 Learning Flash with Hands-On Examples 17.3.1 Creating a Shape with the Oval Tool 17.3.2 Adding Text to a Button

E N D
Chapter 17 – Macromedia Flash MX 2004: Building Interactive Animations Outline 17.1 Introduction 17.2 Flash Movie Development 17.3 Learning Flash with Hands-On Examples 17.3.1 Creating a Shape with the Oval Tool 17.3.2 Adding Text to a Button 17.3.3 Converting a Shape into a Symbol 17.3.4 Editing Button Symbols 17.3.5 Adding Keyframes 17.3.6 Adding Sound to a Button 17.3.7 Verifying Changes with Test Movie 17.3.8 Adding Layers to a Movie 17.3.9 Animating Text with Tweening 17.3.10 Adding a Text Field 17.3.11 Adding ActionScript
Chapter 17 – Macromedia Flash: Building Interactive Animations 17.4 Creating a Projector (.exe) File with Publish 17.5 Manually Embedding a Flash Movie in a Web Page 17.6 Creating Special Effects with Flash 17.6.1 Importing and Manipulating Bitmaps 17.6.2 Creating an Advertisement Banner with Masking 17.6.3 Adding Online Help to Forms 17.7 Creating a Web-Site Introduction 17.8 ActionScript 17.9 Web Resources
Objectives • In this tutorial, you will learn: • To learn Flash MX 2004 multimedia development. • To learn Flash animation techniques. • To learn ActionScript 2.0, Flash’s object-oriented programming language. • To create an animation that preloads objects into a Flash movie. • To add sound to Flash movies. • To embed a Flash movie into a Web page.
17.1 Introduction • Flash • Produce interactive, animated movies • Web-based banner advertisements • Interactive Web sites • Games • Web-based applications • Provides tools for drawing graphics, generating animation and adding sound and video • Tools for coding in its scripting language, ActionScript • Flash Player plug-in • Installed in a Web browser to play flash movies
17.2 Flash Movie Development • Start page • Contains a number of helpful options • Create From Template • Open a Recent Item • Creating blank Flash document • Click Flash Document under the Create New heading • Tools section • Contains tools that select, add and remove graphics from Flash movies • View section • Contains two tools that modify what portion of stage • Colors section • Provides colors for shapes, lines, and filled areas • Options section • Contains settings for the active tool
Layers Timeline Toolbox Main menu Panel windows Frames Help panel PropertyInspector Actions panel Stage 17.2 Flash Movie Development Fig. 17.1 Flash MX development environment.
Selection tool Subselection tool Lasso tool Line tool Text tool Pen tool Rectangle tool Oval tool Pencil tool Brush tool Free transform tool Fill transform tool Paint bucket tool Ink bottle tool Eraser tool Dropper tool Zoom tool Hand tool Stroke color Fill color Tool Options 17.2 Flash Movie Development Fig. 17.2 Flash MX Toolbox.
17.3 Learning Flash with Hands-On Examples • Open a new Flash movie file • Select New from the File menu • In the New Document dialog, select Flash Document under General tab and click OK • Choose Save As… from File menu • Movie options • Select Document Properties • Frame Rate • The speed at which movie frames display • Dimensions • Define size of movie as it displays on screen • Background Color • Stage color • Click Background Color box to select background color
General tab Templates tab 17.3 Learning Flash with Hands-On Examples Fig. 17.3 New Document dialog.
Background color Right click menu 17.3 Learning Flash with Hands-On Examples Fig. 17.4 Flash MX 2004 Document Properties dialog.
Hexadecimal color notation New background color Color selection eyedropper 17.3 Learning Flash with Hands-On Examples Fig. 17.5 Selecting a background color.
17.3.1 Creating a Shape with the Oval Tool • Flash creates shapes using vectors • Vectors are mathematical equations that define size, shape and color • Some graphics applications create raster graphics • Defined by areas of colored pixels • Oval • Stroke color • Color of a shape’s outline • Fill color • Color that fills the shape • Black and White button • Resets the stroke color to black and the fill color to white • Swap Colors • Switches the stroke and fill color
Stroke color No color Fill color Black and White Swap Colors 17.3.1 Creating a Shape with the Oval Tool Fig. 17.6 Setting the fill and stroke colors.
Keyframe 17.3.1 Creating a Shape with the Oval Tool Fig. 17.7 Keyframe added to the timeline.
17.3.1 Creating a Shape with the Oval Tool Fig. 17.8 Making multiple selections with the selection tool.
Stroke and fill color Stroke width Stroke style Selection width and height Selection location 17.3.1 Creating a Shape with the Oval Tool Fig. 17.9 Modifying the size of a shape with the Property Inspector.
Red radial gradient fill Gradient fills 17.3.1 Creating a Shape with the Oval Tool Fig. 17.10 Choosing a gradient fill.
17.3.2 Adding Text to a Button • Text tool • Adds text to Flash movies
Text (fill) color Italic Font type Font selector Font height Bold Text alignment Character Spacing Linked URL Character position Edit format options 17.3.2 Adding Text to a Button Fig. 17.11 Setting the font face, size, weight and color with the Property Inspector.
17.3.2 Adding Text to a Button Fig. 17.12 Adding text to the button.
17.3.3 Converting a Shape into a Symbol • Flash movie • Parent movie • A scene • Contains the entire movie including all graphics and symbols • Reusable movie elements • Graphics • Ideal for static images and basic animations • Buttons • Objects that perform button actions • Movie clips • Ideal for recurring animations • Movie explorer • Displays the movie structure
17.3.3 Converting a Shape into a Symbol Fig. 17.13 Selecting an object with the selection tool.
17.3.3 Converting a Shape into a Symbol Fig. 17.14 Creating a new symbol with the Convert to Symbol dialog.
Symbol list New Symbol Folder Create New Symbol Symbol Properties Delete symbol 17.3.3 Converting a Shape into a Symbol Fig. 17.15 Library panel.
17.3.3 Converting a Shape into a Symbol Fig. 17.16 Movie Explorer for ceoassist.fla.
17.3.4 Editing Button Symbols • Edit Symbols button • Four frames • Button states • Up state • Default state before user presses the button or rolls over with mouse • Over state • User rolls over the button with mouse • Down state • Plays when user presses a button • Hit state • Not visible when viewing the movie • Defines active area of the button
Main scene Active symbol Edit scene Edit symbols Return to main scene Zoom percentage Keyframes Current frame Button states 17.3.4 Editing Button Symbols Fig. 17.17 Modifying button states with a button’s editing stage.
Selected Over frame Frame options Insert Keyframe 17.3.5 Adding Keyframes Fig. 17.18 Inserting a keyframe.
17.3.6 Adding Sound to a Button • Flash imports sounds in the WAV (Windows), AIFF (Macintosh) or MP3 formats • Optimize as needed
Sound added to the Down frame Sound Sync 17.3.6 Adding Sound to a Button Fig. 17.19 Adding sound to a button.
Sound name Compression Preprocessing Sample rate Sound clip size and compression 17.3.6 Adding Sound to a Button Fig. 17.20 Optimizing sound with the Sound Properties dialog.
17.3.7 Verifying Changes with Test Movie • Published Flash movies • Shockwave Flash extension .swf • Select Test Movie from Control menu to export movie into the Flash Player
Over state Up state 17.3.7 Verifying Changes with Test Movie Fig. 17.21 GO button in its up and over states.
17.3.8 Adding Layers to a Movie • Insert Layer button • Places a layer named Layer 2 above the selected layer
Rename a layer by double clicking its name Insert a new layer Delete layer 17.3.8 Adding Layers to a Movie Fig. 17.22 Renaming a layer.
Center justify Right justify Left justify Full justify Alias text 17.3.8 Adding Layers to a Movie Fig. 17.23 Setting text alignment with the Property Inspector.
17.3.8 Adding Layers to a Movie Fig. 17.24 Creating a title with the text tool.
17.3.9 Animating Text with Tweening • Two methods to tween objects • Shape tweening • Morphs an object from one shape to another • Motion tweening • Moves objects around the stage • Can be applied to symbols or grouped objects
17.3.9 Animating Text with Tweening Fig. 17.25 Adding a keyframe to create an animation.
Motion tween 17.3.9 Animating Text with Tweening Fig. 17.26 Creating a motion tween.
Show Code Hints Add script item Debug Options Check Syntax Actions toolbox Reference stop action Script window Script Navigator View Options Action applied to frame 17.3.9 Animating Text with Tweening Fig. 17.27 Adding ActionScript to a frame with the Actions panel.
17.3.10 Adding a Text Field • Text field • Contains a string that changes every time the user presses the button
17.3.10 Adding a Text Field Fig. 17.28 Creating a text field.
Text type Variable name Line type 17.3.10 Adding a Text Field Fig. 17.29 Creating a dynamic text field with the Property Inspector.
17.3.11 Adding ActionScript • Add ActionScript to the button • Change the contents of the text field every time a user clicks the button
17.3.11 Adding ActionScript Fig. 17.30 Adding an action to a button with the Actions panel.
17.4 Creating a Projector (.exe) File with Publish • Publish Flash in two formats • Select Publish Settings… from File menu to open the Publish Settings dialog • Select Flash and Windows Projector checkboxes and uncheck all others • Click OK to enable the new settings • Select Publish from File menu
Windows Executable (.exe) Flash (.fla) Flash Player Movie (.swf) 17.4 Creating a Projector (.exe) File with Publish Fig. 17.31 Published Flash files.
17.5 Manually Embedding a Flash Movie in a Web Page • Add Flash movies to Web sites • object • Makes movie viewable in Internet Explorer • embed • Makes movie viewable in Netscape