Download
1 / 2
0 likes | 1 Views
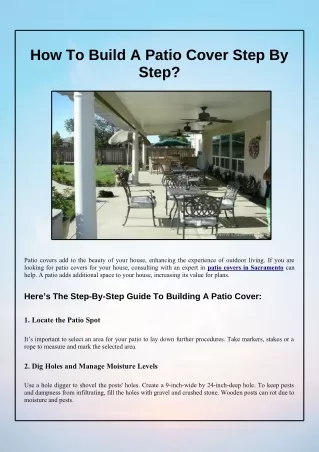
Is it Worth it to Build an Outdoor

E N D
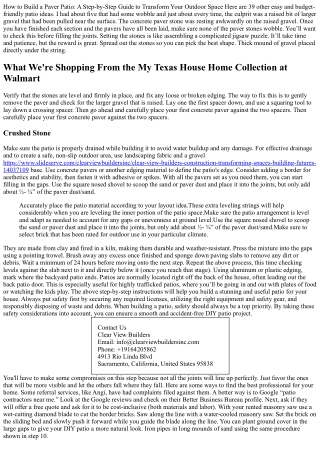
How to Build a Paver Patio: A Step-by-Step Guide to Transform Your Outdoor Space Here are 39 other easy and budget- friendly patio ideas. I had about five that had some wobble and just about every time, the culprit was a raised bit of larger gravel that had been pulled near the surface. The concrete paver stone was resting awkwardly on the raised gravel. Once you have finished each section and the pavers have all been laid, make sure none of the paver stones wobble. You’ll want to check this before filling the joints. Setting the stones is like assembling a complicated jigsaw puzzle. It’ll take time and patience, but the reward is great. Spread out the stones so you can pick the best shape. Thick mound of gravel placed directly under the string. What We're Shopping From the My Texas House Home Collection at Walmart Verify that the stones are level and firmly in place, and fix any loose or broken edging. The way to fix this is to gently remove the paver and check for the larger gravel that is raised. Lay one the first spacer down, and use a squaring tool to lay down a crossing spacer. Then go ahead and carefully place your first concrete paver against the two spacers. Then carefully place your first concrete paver against the two spacers. Crushed Stone Make sure the patio is properly drained while building it to avoid water buildup and any damage. For effective drainage and to create a safe, non-slip outdoor area, use landscaping fabric and a gravel https://www.slideserve.com/clearviewbuildersinc/clear-view-builders-construction-transforming-spaces-building-futures- 14037109 base. Use concrete pavers or another edging material to define the patio's edge. Consider adding a border for aesthetics and stability, then fasten it with adhesive or spikes. With all the pavers set as you need them, you can start filling in the gaps. Use the square nosed shovel to scoop the sand or paver dust and place it into the joints, but only add about ½- ¾” of the paver dust/sand. Accurately place the patio material according to your layout idea.These extra leveling strings will help considerably when you are leveling the inner portion of the patio space.Make sure the patio arrangement is level and adapt as needed to account for any gaps or unevenness at ground level.Use the square nosed shovel to scoop the sand or paver dust and place it into the joints, but only add about ½- ¾” of the paver dust/sand.Make sure to select brick that has been rated for outdoor use in your particular climate. They are made from clay and fired in a kiln, making them durable and weather-resistant. Press the mixture into the gaps using a pointing trowel. Brush away any excess once finished and sponge down paving slabs to remove any dirt or debris. Wait a minimum of 24 hours before moving onto the next step. Repeat the above process, this time checking levels against the slab next to it and directly below it (once you reach that stage). Using aluminum or plastic edging, mark where the backyard patio ends. Patios are normally located right off the back of the house, often leading out the back patio door. This is especially useful for highly trafficked patios, where you’ll be going in and out with plates of food or watching the kids play. The above step-by-step instructions will help you build a stunning and useful patio for your house. Always put safety first by securing any required licenses, utilizing the right equipment and safety gear, and responsibly disposing of waste and debris. When building a patio, safety should always be a top priority. By taking these safety considerations into account, you can ensure a smooth and accident-free DIY patio project. Contact Us Clear View Builders Email: info@clearviewbuildersinc.com Phone: +19164205862 4913 Rio Linda Blvd Sacramento, California, United States 95838 You'll have to make some compromises on this step because not all the joints will line up perfectly. Just favor the ones that will be more visible and let the others fall where they fall. Here are some ways to find the best professional for your home. Some referral services, like Angi, have had complaints filed against them. A better way is to Google “patio contractors near me.” Look at the Google reviews and check on their Better Business Bureau profile. Next, ask if they will offer a free quote and ask for it to be cost-inclusive (both materials and labor). With your rented masonry saw use a wet-cutting diamond blade to cut the border bricks. Saw along the line with a water-cooled masonry saw. Set the brick on the sliding bed and slowly push it forward while you guide the blade along the line. You can plant ground cover in the large gaps to give your DIY patio a more natural look. Iron pipes in long mounds of sand using the same procedure shown in step 10.


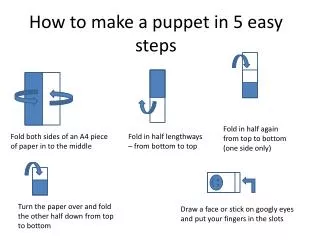


![Steps to Create A Stamped Concrete Patio [Infographic]](https://cdn5.slideserve.com/9942095/slide1-dt.jpg)