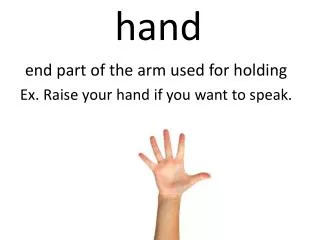
Download
1 / 7

E N D
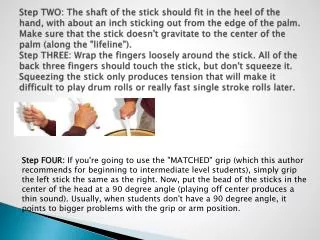
Step TWO: The shaft of the stick should fit in the heel of the hand, with about an inch sticking out from the edge of the palm. Make sure that the stick doesn't gravitate to the center of the palm (along the "lifeline").Step THREE: Wrap the fingers loosely around the stick. All of the back three fingers should touch the stick, but don't squeeze it. Squeezing the stick only produces tension that will make it difficult to play drum rolls or really fast single stroke rolls later. Step FOUR: If you're going to use the "MATCHED" grip (which this author recommends for beginning to intermediate level students), simply grip the left stick the same as the right. Now, put the bead of the sticks in the center of the head at a 90 degree angle (playing off center produces a thin sound). Usually, when students don't have a 90 degree angle, it points to bigger problems with the grip or arm position.
Check out perfect grip and playing position:1) His shoulders and elbows are relaxed.2) Forearms are horizontal to the floor.3) A firm but relaxed grip on the stick will ALL fingers4) Sticks at a 90 degree angle, meeting in the center of the drum.All ready for some serious head bashin'! Somebody buy that man a Pepsi!One great idea I've heard is to take a 50 cent piece (or a SKOAL can, for those of you who live in the South!) and trace a circle with a pencil or pen in the center of the drum. This will serve as a reminder to keep both sticks in the proper position. Many students get into the bad habit of playing with the sticks spread apart - usually producing different sounds from each hand.As I've mentioned before, I recommend that all beginning drum students start with the matched grip, mainly because it's sooo much easier to learn! (Think about it - do you want to spend all of your time worrying about where to put your fingers, or do you want to learn how to DRUM?)
If you want to learn the "traditional" grip, cause you saw some dude in CHURCH & it looked cool, you are more than welcome to do so by going to Part II. My biggest recommendation is that you get a real, LIVE private teacher to help you out. There are an ENDLESS number of ways you can screw up the traditional grip, but even a 4 year old can make a pretty good matched grip the first time they pick up a stick!...............
Getting off to a Great Start:Part II: The Left Hand Traditional Grip • Step 1: Start with the left hand down to the side fully relaxed. • Note that the hand has no tension and there is a natural curve to the fingers and wrist. Step Two: Place the stick in the "V" of the palm and thumb 2-4 inches from the butt of the stick. Nothing should have changed other than you are now holding a stick in your hand. Notice that the fingers and wrist are still very relaxed as they hold the stick.
Step 3: Place the pad of the thumb on the first knuckle of your index finger. Keep the middle finger relaxed and on the stick, the ring and pinky finger are just relaxed underneath the stick.Notice the wrist curve is still the same as when we started. Step 4: Bend at your elbow keeping the shoulder relaxed and put the stick into playing position. The stick should be resting just below the cuticle of the ring finger (in between the first knuckle and where the fingernail ends). The wrist is still very relaxed and there is no tension in the fingers. Left Hand Detail These next pictures show the detail of the grip
Notice that the index, ring and pinky finger have the same relaxed curve to them, keep them parallel. The middle finger is just relaxed on the stick. See here how there are no gaps in the fingers. The thumb has a relaxed curve as it touching the first knuckle of the index finger. Again, everything is totally relaxed and the wrist still has the natural curve to it.
See here how the thumb is on the first knuckle and on the "top" of the stick. You want your palm to be almost perpendicular to the playing position (90 degrees). Note also that the wrist still has the same curve to it as when we started.