Download
1 / 32
340 likes | 611 Views
Crime Scene Processing Series CRIME SCENE DIAGRAMMING New Mexico State Police Criminal Investigations Section Crime Scene Team. Learning Objectives. Understand the purpose for preparing a diagram Identify the information that must appear on a diagram

E N D
Crime Scene Processing Series CRIME SCENE DIAGRAMMING New Mexico State Police Criminal Investigations Section Crime Scene Team
Learning Objectives • Understand the purpose for preparing a diagram • Identify the information that must appear on a diagram • Demonstrate knowledge and proficiency in various methods of incident scene diagram
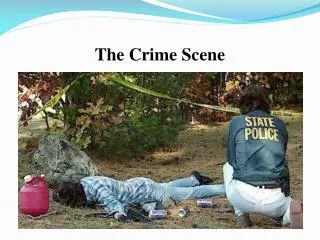
Why do a Crime Scene Diagram? • It establishes a permanent record of the scene • Associates evidence with the scene • Supplements photographs • Useful in orienting a person to the scene • Witnesses can look at a diagram without being prejudiced…you can’t show witnesses photos • Useful in Court • Easily blown-up for presentation • Not prejudicial to the jury
Why do a Diagram, cont. • The draw back of photos is that that they are a two- dimensional representation of a three dimensional object • Most photos distort the relationship of the photographed objects, causing items to appear closer or farther apart than they actually are • The sketch is a bird-eye view, which is hard to get with a camera
Methods • Grid (X/Y) Coordinates • Triangulation Coordinates • Polar Coordinates • Raw Measurements
Grid Method • The scene in divided into four quadrants • Each item is measured at right-angles from each axis • This is a great method because it is easy & efficient
Grid (X/Y) Method Y axis X axis (origin) The grid can also be expressed as north, south, east, and west measurements
Baseline Method • Place a single line, dividing the scene in half • Measure relative to the line • Alone the baseline • At a right-angle to the baseline • Great for a diagram where you have no fixed reference points
Incident: Bone Scatter, Death Investigation Location: Chavez County, NM Date: 3/3/07 Drawn by: R. Mathews Not to Scale REF. PT. 1 N: 32 degrees 41.292’ W: 105 degrees 13.951’ skull Leg bone torso North Leg bone N Arm bone Trees Arm bone Dry stream bed Ref. PT. 2 N: 32 degrees 41.317’ W: 105 degrees 14.003’ N
Triangulation Method • Straight line distance measured from two (2) reference points • The item of evidence will be at the intersection of the intersection of the two (2) arcs • This is a very accurate method of measuring
Polar Method • Straight line distance measured from a fixed reference point • Measure the distance from the reference point to the item of evidence • Document the line’s azimuth from the fixed reference point to the item of evidence • This is the best method for determining elevations above/below a fixed reference point
Polar Method North 12 ft @ 120 degrees 18 ft @ 100 degrees
Raw Measurements • The physical dimensions of a room/area • You should do this on every diagram to complement the main method of measurement • Width of roads • Distance from the victim’s hand to the gun • Overall dimensions of a room
Sketching the Crime Scene • Equipment • Measuring tapes, rulers • Hammer, nails, shop clamps • Laser range-finder • Graph paper and PENSILS (avoid using a pen) • GPS • Maps, blue-prints, aerial photos • Accident/crime scene templates
Sketching the Crime Scene • Its usually prepared in one of two ways • Bird’s-eye-view (straight down) • Elevation (cross section) • Try to maintain proportionality (scale) • Double-check your measurements to be sure that they are correct • Especially important if calculations will later be used • Bloodstain pattern analysis • Accident reconstruction • Shooting scene reconstruction
Sketching the Crime Scene • Crime scene diagram is similar to diagramming an auto accident with injuries • Use fixed reference points and reference lines • Diagram the location of all evidence, including the body • Diagram the location of the head and the feet if practical...otherwise, diagram the location of the center-of-mass • If you start a diagram & need to leave, make sure you pass on the responsibility to another person
Sketching the Crime Scene • Use the rough-draft to make a finished (court admissible) product • Hand-drawn is fine if you are a good artist • Use black ink and good paper • Use a template • Computer generated sketches are preferable • Can be easily reproduced without loss of quality • Can be easily blown-up or added to Power Point • Maintain the original, rough sketch • It is discoverable-just like your other field notes
Things to put in the Legend • Specific location of the scene • Address, GPS Coordinate, etc. • Date/Time • Case Number • Preparer • Scale (or scale disclaimer ) • Compass Orientation (North Arrow) • Evidence Numbers • Measurements