ROOT
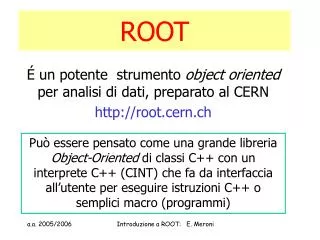
ROOT. É un potente strumento object oriented per analisi di dati, preparato al CERN http://root.cern.ch.

ROOT
E N D
Presentation Transcript
ROOT É un potente strumento object oriented per analisi di dati, preparato al CERN http://root.cern.ch Può essere pensato come una grande libreria Object-Oriented di classi C++ con un interprete C++ (CINT) che fa da interfaccia all’utente per eseguire istruzioni C++ o semplici macro (programmi) Introduzione a ROOT: E. Meroni
Concetti di Object Oriented • Classe: la descrizione di una “cosa” nel sistema • Oggetto: istanza di una classe • Metodi: funzioni per una classe Esempio: definizione di un istogramma: TH1F *h = new TH1F (“h”,”nome “,100,-2.8,1.8) • Classe: TH1F • Operatore: new (crea una zona di memoria) • h : puntatore alla zona di memoria • Metodo : h->Fill(xx) funzione che agisce sulle variabili della classe h->Draw() • istanza: h1,h2,… Introduzione a ROOT: E. Meroni
Cosa può fare ROOT ? Molte cose fra cui: • Istogrammi e fit • Grafici (2D, 3D) • I/O file : specialmente per istogrammi, Trees Introduzione a ROOT: E. Meroni
Analisi di dati istogramma fit funzione funzione Introduzione a ROOT: E. Meroni
Analisi di dati 2D Lego Plot sovrapposizione Introduzione a ROOT: E. Meroni
Analisi di dati grafico Introduzione a ROOT: E. Meroni
Come si usa ? Interfaccia dell’utente: • GUI: Browsers, Panels, Tree Viewer • Command Line interface: C++ interpreter CINT • Script Processor (C++ compiled C++ interpreted) • Per iniziare root • > root • Per uscire da root • root[0].q Introduzione a ROOT: E. Meroni
GUI di Base(Interfaccia grafica per l’utilizzatore) root[0]TBrowser *b= new TBrowser(“nome”); • Browsing and opening files GUI • Drawing histograms • Right click, left click, middle click • Draw Panel • Fit Panel • Adding Color and Zooming • Adding text and other objects • Dividing the canvas • Setting the log scale Introduzione a ROOT: E. Meroni
Displaying a Histogram Finestrella creata da TBrowser: Aprire un ROOT file che contiene istogrammi già precedentemente salvati Display di un istogramma La finestrella si chiama Canvas Introduzione a ROOT: E. Meroni
Basic Navigation by Clicking( con il mouse ) • Left Click • select the object • drag the object • resize the object • Right Click • context menu • class::name • methods • Middle Click • activate canvas • freezes event status bar Introduzione a ROOT: E. Meroni
Fitting, Coloring, and Zooming • Adding a gaussian fit • Coloring the histogram • Zooming/unzooming Introduzione a ROOT: E. Meroni
Adding Objects to the Canvas • The Editor • Adding an Arrow • Adding Text Introduzione a ROOT: E. Meroni
Dividing the Canvas • Create a new Canvas • Divide it in 2 • Draw two histograms. 1. Lego plot 2. LogY Introduzione a ROOT: E. Meroni
Comandi in linea Si usano le frecce per richiamare i comandi • Aprire e guardare un file • Disegnare istogrammi • Aggiungere un Fit • Aggiungere le barre di errore • Aggiungere colori Introduzione a ROOT: E. Meroni
Aprire un File • Open a file for reading root [] TFile *f= new TFile("Example.root") • Look at the contents of the file root [] f.ls() TFile** Example.root ROOT file TFile* Example.root ROOT file KEY: TTree myTree;1 Example ROOT tree KEY: TH1F totalHistogram;1 Total Distribution KEY: TH1F mainHistogram;1 Main Contributor KEY: TH1F s1Histogram;1 First Signal KEY: TH1F s2Histogram;1 Second Signal Introduzione a ROOT: E. Meroni
Definire e Disegnare una funzione root[] TF1*f1 = new TF1("f1","sin(x)/x",-2.,13.); root[] TCanvas *c1= new TCanvas("c1","funz",600,400); root[] f1->Draw(); Introduzione a ROOT: E. Meroni
Definire la finestrella Canvas root[] TCanvas *c1 =new TCanvas("c1",“nome",600,400) root[] c1->Divide(1,2) root[] c1->cd(1) root[] h1->Draw() root[] c1->cd(2) root[] h1->Fit(“gaus”) root[] h1->Draw() Introduzione a ROOT: E. Meroni
Fittinges: gaus root [] h1->Draw() root [] h1->Fit("gaus") root [] h1->SetFillColor(9) root [] h1->SetLineColor(2) root [] h1->Draw() Introduzione a ROOT: E. Meroni
Tipi di Comandi • CINT commands start with “.” • root[0].? • this command will list all the CINT commands • root[1].x [filename] • load [filename] and execute function [filename] • root[2].L [filename] • load [filename] • SHELL commands start with “.!” for example:root[3] .! ls Introduzione a ROOT: E. Meroni
Scripts o Macro • Un-named Script • Start with "{" and end with "}" • All variables are in the global scope • Named Script • C++ functions • Scope rules follow standard C++ • Function with the same name as the file is executed with a .x Parameters Introduzione a ROOT: E. Meroni
Scripts Examples • Un-named Script: hello.C { cout << "Hello" << endl; } • Named Script:say.C void say(char * what = "Hello") { cout << what << endl; } • Executing the Named Script root [3] .x hello.C Hello root [4] .x say.C("Hi there") Hi there Introduzione a ROOT: E. Meroni
Script es: histo.C { gROOT->Reset(); TH1F * h1 =new TH1F ("h1","Istogramma 1D",100,5.,5.);float x;fstream f;f.open("gaus.dat",ios::in);for (int i = 0; i < 10000; i++) { f >> x; h1->Fill(x);}f.close();h1->Draw(); } root[].x histo.C Introduzione a ROOT: E. Meroni
Script es:funzione.C { gROOT->Reset(); TF1 f1("f1","sin(x)/x",0.,10.);TCanvas c1("c1","funzione",600,400); f1.Draw(); } root[].x funzione.C Introduzione a ROOT: E. Meroni
Costruttori TF1 • 2. Same as the previous TF1 with Parameters • Call the constructor with parameter indices • TF1 *f1 = new TF1 • ("f1","[0]*x*sin( [1]*x)",-3,3); • Set the parameters explicitly • f1->SetParameter(0,10);f1->SetParameter(1,5);f1->Draw(); Introduzione a ROOT: E. Meroni