Download
1 / 20
200 likes | 459 Views
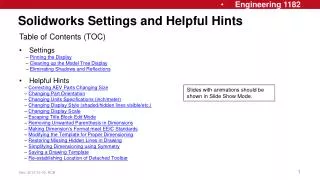
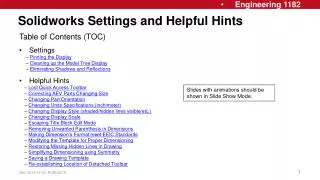
Solidworks Settings and Helpful Hints. Table of Contents (TOC) Settings – Pinning the Display – Cleaning up the Model Tree Display – Eliminating Shadows and Reflections Helpful Hints – Lost Quick Access Toolbar – Correcting AEV Parts Changing Size

E N D
Solidworks Settings and Helpful Hints • Table of Contents (TOC) • Settings • – Pinning the Display • – Cleaning up the Model Tree Display • – Eliminating Shadows and Reflections • Helpful Hints • – Lost Quick Access Toolbar • – Correcting AEV Parts Changing Size • – Changing Part Orientation • – Changing Units Specifications (inch/meter) • – Changing Display Style (shaded/hidden lines visible/etc.) • – Changing Display Scale • – Escaping Title Block Edit Mode • – Removing Unwanted Parenthesis in Dimensions • – Making Dimension’s Format meet EEIC Standards • – Modifying the Template for Proper Dimensioning • – Restoring Missing Hidden Lines in Drawing • – Simplifying Dimensioning using Symmetry • – Saving a Drawing Template • – Re-establishing Location of Detached Toolbar Slides with animations should be shown in Slide Show Mode.
Settings - Pinning the Display Original Display Click on ‘SOLIDWORKS’ Select the ‘Pin’ Display stays Click to return to TOC
Settings - Cleaning up the Model Tree Display Click ‘OK’ Right click and select Hide/Show Tree Items Change as shown Click to return to TOC
Eliminating Shadows and Reflections Entry “darkened” causes reflections Click on “View Settings” Entry “darkened” causes shadows SolidWorks Layout Click to return to TOC
Eliminating Shadows and Reflections Click entry so now entry “not darkened” and reflections eliminated Click entry so now entry “not darkened” and shadows eliminated SolidWorks Layout Click to return to TOC
3 Helpful Hints – Lost Quick Access Toolbar 1 Select View Then Select Workspace Finally Click on Default 2 Click to return to TOC
Helpful Hints – Correcting AEV Parts Changing Size Click to return to TOC
Helpful Hints – Changing Part Orientation Sometimes you need to re-orient your part so that the CHARACTERISTIC view will be the FRONT View when the part is extracted to a SolidWorks Drawing. Select CTRL + 1 keys to orient the object to “Normal To” the current FRONT view Then under Orientation select Left to cause the current FRONT view to be re-assigned to the LEFT View. Select CTRL + 7 keys to orient the object to it’s newly assigned FRONT and ISO View Right click on the blue selected face and under Zoom/Pan/Rotate select View Orientation Select CTRL + 7 keys to orient object into ISO View and select the FRONT face(dark blue) Then select Update Standard Views at the top of the dialog box and click on YES Click to return to TOC
Helpful Hints - Changing Units Specifications (inch/meter) Click on appropriate Units specification and then select OK Under Options select Document and then click on Units 1-Under Tools, select Options Note: Units specifications can be changed for both parts or drawings and should be done prior to sizing an object or applying dimensions to a drawing Click to return to TOC
Helpful Hints – Changing Display Style (shaded/hidden lines visible/etc.) Drag to reposition Right click on Isometric and select another style or Click to return to TOC
Helpful Hints – Changing the Display Scale Sometimes it is helpful to change the scale of the Isometric and add the appropriate note. More space for Ortho drawings and dimensioning NOTE: All views can be dragged to reposition and some views are locked to other views Click to return to TOC
Helpful Hints – Escaping Title Block Edit Mode Note that during Edit Sheet Format your drawings disappear After you have completed the TITLE BLOCK(via Edit Sheet Format) with all CAPS, exit by right clicking to get dialog box … Drawings reappear then select Edit Sheet. Click to return to TOC
Helpful Hints – Removing Unwanted Parenthesis in Dimensions When you start Dimensioning do you see 'unwanted' parenthesis You could eliminate the parenthesis by unclicking the 'parenthesis' box to produce this result Click to return to TOC
Helpful Hints – Removing Unwanted Parenthesis(cont’d) But it is really tiresome to do that for every dimension ! • Go to Tools/Options/Document Properties and click on Dimension. • Deselect Add parenthesis by default and click OK! Click to return to TOC
Helpful Hints – Making Dimension’s Format meet EEIC Standards • Go to Tools/Options/Document Properties/Dimensions and make these changes to each category listed below ( change font to 14 and select ) Arc Length Angle Chamfer Diameter • To change the font, click on Font, then select points and then 14 and then OK Radius Hole Callout Linear Ordinate Click to return to TOC
Helpful Hints - Modifying the Template for Proper Dimensioning If after you bring up the OSU template and try to dimension a hole you find the following incorrect format: To correct it, go to Tools/Options/Document Properties and even if you find ANSI (which is the desired format), open the menu using the down arrow and select anything else ( like ISO) and click OK. Then return to Tools/Options/Document Properties and select ANSI and click OK. When you dimension the hole you find the correct format. Click to return to TOC
Helpful Hint – Restoring Missing Hidden Lines in Drawing …then under Tools/ Options / System Options / Drawings, select Display Style andclick on Hidden lines visible and then OK. Click to return to TOC
Helpful Hints – Simplifying Dimensioning Using Symmetry • Use SYMMETRY note to simplify dimensioning • When you have holes that are symmetrical, dimension center mark to center mark Click to return to TOC
Helpful Hints – Saving a Drawing Template After making any desired changes in Document Properties and filling out the Title Block with your name and other fixed data and exiting the Edit Sheet Format mode: Click on File / Save as Rename the file (perhaps your initials) Open the menu under Save as type by clicking the arrow to the right Then select Drawing Templates [*.drwdot] Click on Save In the future, this named template will appear whenever you perform a New along with the other Part / Assembly / Drawing options Click to return to TOC
Re-establishing Location of Detached Toolbar Drag it under the box with up arrow, moving to left and/or right until BLUE BORDER appears. Then release mouse button. Drag it near to box with up arrow Detached Toolbar Detached Toolbar Detached Toolbar Toolbar is now attached to top of window SolidWorks Layout Click to return to TOC