Download

1 / 15
150 likes | 275 Views
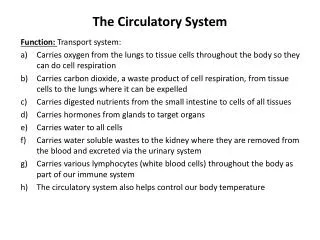
This guide outlines the detailed steps to assemble a circulatory system model, including the placement of parts such as the lungs, body, and ventricles. Learn how to mix solutions that represent oxygen-rich and oxygen-poor blood using phenolphthalein and apog in clear glass jars. Follow instructions to connect blood tubes and prepare the model for manipulation. Once assembled, students can observe the flow of solutions, simulating the human circulatory system's functioning. Ideal for science classes and hands-on learning.

E N D
Preparing to Use the Circulatory System Model Assembly Mixing of Solutions Manipulation
Assembly 1. Assemble the parts of the model as shown.
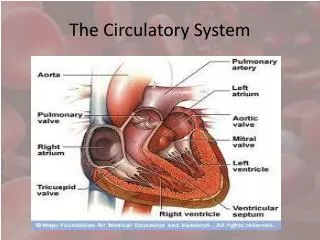
4. Put the “right” and “left ventricles”w/ “atria” in the rectangular hole in front of the “body” and the “lungs.” *As you face the model, the right ventricle and atrium will be on the left while the left ventricle and atrium will be on the right---just as they would be in a person facing you.
5. Then, connect the “blood tubes” as shown. The green or blue rubber stopper-syringe and tube covers the “right ventricle” with the other end of the “artery” going into the “lungs.” The “vein” leaving the “lungs,” color-coded red, is connected to the left atrium.
6. Do the same with the red color-coded rubber stopper-syringe. It should cover the “left ventricle” with the “artery” going into the “body,” and the “vein” going into the “right atrium.
7. When completely assembled, the circulatory system model should look like this: *You are now ready to mix the solutions that will represent “blood rich in oxygen” and “blood poor in oxygen.”
Mixing of Solutions 1.In a clear glass jar, dissolve half of 1/8 teaspoon of phenolphthalein powder in 70% ethyl alcohol. Set aside.
2.In another clear glass jar, dissolve 1/8 teaspoon apog in water until the mixture is clear.
3. Using a funnel, pour both mixtures into a 1.5 L clear plastic bottle. The resulting liquid suddenly turns dark pink or red.
4. Add water up to the neck. This will be the “oxygen-rich blood.” You may now pour this into the “lungs,” “left ventricle,” and “left atrium” of the model.
5. Fill the “body,” “right ventricle,” and “right atrium” with water.
Manipulation 1. Make sure all stoppers and covers are firmly in place. The circulatory system model is now ready for use.
2. Press the “right” and “left ventricles” rhythmically with your thumbs while your other fingers hold the bottles. Watch the solutions fill the tubes. *Add vinegar to the “body” when it starts to turn pink.