Download
1 / 40
420 likes | 462 Views
u25c6 Chemzone is the company involved in manufacturing high performance chemicals for construction, <br>turnkey based speciality civil construction work, consultant, advisor and marketing of construction chemicals.<br><br>u25c6 Chemzone is the manufacturer & supplier of Tile & Stone Solutions, Grouting Solutions, <br>Water proofing, Wall Putty Chemicals in Gujarat, India. Chemzone India has the best quality range <br>of Chemicals manufactured & Latest price of all Construction Chemicals in whole PAN India.<br> <br>Read more: http://chemzone.co.in/<br><br>ud83dudcf2 Call : 919898949394, (O) 02765224330<br><br>ud83dudce7 Email us : exports@chemzone.

E N D
Message from Founder & M.D. Greetings from Chemzone Group! As a managing director, I believe that we are committed to provide exceptional quality products for our esteemed customers with consistent and improved profitability. We would like to contribute to the development of a strong infrastructure leading to public safety and wish our efforts to be resulted in a continued creation of long term value for the company as well as our valued customers and dealers. Business is a never ending journey. I am privileged to be on this journey surrounded by talented employees, loyal customers and dealers. We believes in bringing the best product and best business practices to cater to the existing clientele as well as prospective dealers. OUR VISION To build high performing & Diverse work force offering Best in class Product & Services- Trust worthy. To become first choice (brand) in all types of Stone/Tile laying & Maintenance business in construction industry. Effective utilisation & Multi channel marketing Network & group's to achieve sustainable growth through Customer Service & Satisfaction. MISSION STATEMENT To satisfy our consumer expectations in premium quality, accurate delivery, and value through continuous improvement and consumer co-operation. Warm regards, J.M. Patel Founder and M.D. C E R T I F I C A T I O N N NG O O I I T T C C A A F F S S I I T T A A S S GU U A A R R A A N N T T E E E E D D PREMIUMQUALITY
Specialists in System-based Installation Solutions we believe we are not selling just products but offering you world class solutions to enable better design and faster execution. Our installation systems are specially innovated for those who love to experiment with new materials and techniques that lend their creativity a unique touch and a standout quality. We will partner you in the quest to push back the boundaries and set fresh benchmarks.
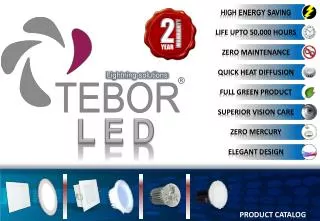
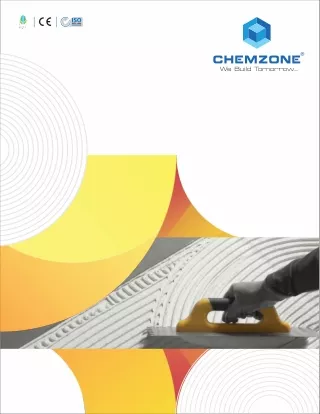
Index 05 33 FLORE CARE PRODUCTS TIPS & TRICKS • Grouting Tile: How to Apply Grout and Remove Grout Perfectly....................... • Tile Spacers: A Must in Your Installation.......................... • How to mix mortar for tile installation: the expert's recipe...................................... Preventing Lippage: • Start with the Right Tile Leveling System.... Modified or Unmodified Thinset: • Which Is Better?......................................... • Conzo Ceraclean.................................... 34 06 08 10 12 14 15 • Sparrow Wall Putty................................. 35WALLPUTTY TILE & STONE ADHESIVE 36 • Easy Flex C-111....................................... • Ultra Flex C-222....................................... • Vitri Flex C-252......................................... • Xtra Flex C-345........................................ • Stone Flex C-531....................................... • Block Fix.................................................. 19GROUTING 16 16 17 17 18 18 37SPACERS & TOOLS • Spacers & Tools.................................... • Sparkle Series......................................... 20 38 • Color Poxy............................................. 20 • Conzo Glitter............................................ 23WATERPROOFING • Conzo Conproof LW Super....................... 21 • Conzo Fill TG........................................... 22 24 • Conzo Bond SBR..................................... 25 • Conzo Bond SBR ADVANCE..................... 27 • Conzo Dampfin 2k................................... 30 • Conzo Conproof PWD.............................. 32 4
Tips & Tricks Grouting Tile: How to Apply Grout and Remove Grout Perfectly For some installers, grouting tile is one of the best parts of a project. For starters, it’s the last step in the installation process, so you know you’re almost done. Secondly, filling the joints with grout can add a second dimension to the flooring, pulling the look together. But, more than anything, grout is a vital structural element that secures the tiles together. Simply put, it can make the difference between a tile installation project that will last for decades and one that will show signs of trouble after the very first weeks. But, if you’ve ever struggled with getting the right thickness of the grouting mix or had grout turn rock hard before you managed to get it off the tile, then you know that this last step is also one of the most challenging. Make one mistake, and you’ll ruin all of your hard work to this point. When grout constantly exposes to water and warm temperatures, it creates a breeding ground for bacteria. That can affect the bonding between the tile and mortar, as well as the structure of the grout. As water moves freely through the grout to the base of the tile, it can cause cracking in the grout, advancing the structural decline of the entire assembly. Another crucial function of the grout is to hide the small dimensional variations of the tiles. No one doubts the fact that grouting tile plays a major role in the installation process. The question is, how to grout tile so that you get the best results every time? It all starts with working with the right type of grout for the task at hand. Sanded vs. Unsanded Grout • Sanded Grout When it comes to grouting tile, sanded grout is the favorite option for most installers. That’s because unsanded (also known as non- sanded) grout tends to shrink when mixed with cement. Due to the ratio of aggregate material to cement in sanded grout, this material has a thicker consistency and is more durable and resistant than unsanded grout. On the downside, however, the harsh aggregate material presented in sanded grout can damage soft materials like granite, limestone or marble. This type of grout can act like sandpaper, scratching the smooth surface of soft stones. For this reason, it’s best to use an epoxy-based non-sanded grout. This type of grouting material uses an advanced chemical compound which consists of a base and an activator. When you add the activator to the base, the chemical reaction will result in a grout that is smooth and extremely powerful. The problem with epoxy-based non-sanded grout is that it can be difficult to work with since it has a rather short curing time. If you don’t manage to apply it over the entire work area before it cures, it will harden, and you will have a difficult time applying it. That’s why it’s important to have the right tools for mixing grout. • Unsanded Grout In spite of its tendency to shrink, non-sanded grout is ideal for vertical surfaces. Since it has no sand or aggregate added to it, this type of grout is extremely sticky. As a result, it will spread easily over vertical surfaces and will stick there without causing you any additional problems. Although non-sanded grout is not recommended for applications where the tile would have to withstand a lot of foot pressure, when it comes to vertical surfaces, durability doesn’t represent a problem anymore. Another great benefit of using unsanded grout for vertical surfaces is how easy it is to work with it. It spreads easily and evenly, allowing you to focus on placing the tiles in the right spot rather than trying to correct errors. This comprehensive guide about grouting tile will help you avoid any problems and get the best results with minimum efforts. We’ll talk about how to mix grout, what consistency should grout be, and how to apply it and remove it so that you get the best results every time. The Purpose of Laying Joints Besides the aesthetic functions, laying joints with grout also plays a crucial role in absorbing tensile and stress. From a mechanical point of view, grouting tile can prevent the deformation or instability of the structural supports, keep the cement from retracting, and protect the tiles from humidity or temperature changes. All the movement and impact that tiles withstand causes stress to accumulate at the edges of the slabs. The grout serves as the first level of protection, reducing the tension by spreading it between tiles. As mentioned already, another reason for laying joints is to protect tiles from humidity or temperature changes. In cold geographic areas, vapor diffusion can lead to condensation. Even in warm areas, in the case of bathroom tiles, due to the constant exposure to moisture and temperature changes, grout can absorb a significant amount of water if it’s not applied properly. 6
Tips & Tricks How to Prepare the Grouting Material When you know how to grout tile correctly, the joints between the slabs are uniform in texture and color, with no cracks or residue. But, when the tile is installed over a thick mortar bed, the mixture could provide a sufficient amount of minerals to cause efflorescence. These problems can affect the grout life and require intense maintenance. Now, that you’ve ensured that everything is in order, the grouting tile process can begin. You can use whichever technique fits you best. Most installers find that spreading the grout diagonally is the most efficient way to apply grout. This technique ensures that the grout gets into the joints and prevents it from popping out as you apply it. If you’re applying grout over a vertical surface, then spreading it diagonally can mean that there’s less mess to clean after you finish. Of course, the right grouting tools can make a world of difference in how easy it is to apply the grout. Choose a mortar applicator that is lightweight and allows for an easy, quick, and clean application of the grout material. How to Remove Grout Here’s the part that most tile installers dread: removing grout. It should go without saying that no tile installation project is finished without grout removal. The residue left from grout application can make tiles look dusky and ruin their overall appearance. Be one minute too late with removal, and it would be nearly impossible to do a proper grout repair. So, even though this task is tedious and time-consuming, it needs to be done. So, get a sponge and water, get down on all fours, and start scrubbing. The sooner you get started, the faster you’ll finish. Sure, no one says that you can’t cheat a little. A grout removal tool, such as a grout scraper can make this task a bit easier to endure. If you need to remove old grout, then don’t waste a few days hand- scrapping it. Use a reciprocating saw or an oscillating tool to remove grout in as little as one afternoon. Be careful, though, not to chip the tiles. Conclusion You are finally done! That is if the client doesn’t ask you to seal the tiles and grout. If they prefer the natural appearance of the tiles, then congratulations for a new amazing project. Hopefully, after reading this guide, grouting tile, and especially removing grout, will become an easier task to handle. Do you have any expert tips about how to grout tile? We would love to hear your input. So, let’s start the discussion in the comment section below! To ensure proper grout application, you must pay close attention to the preparation of the material. If you use Chemzone Grouts materials for grouting tile, then you need to know that the temperature range for handling and application is rather limited. How long does grout take to dry? Well, it depends on the material’s condition. If the condition is below or above the recommended temperature range, then you might have a difficult time working with it. Be careful not to add any bonding agents to the grout material and, with materials, to use manufacturer’s recommended quantity of water. Although they can add extra adhesive strength to the grout, bonding agents can also cause discoloration. Grouting Tile: How to Apply the Material Any person with an internet connection can learn how to apply grout in under an hour. Or, so they think. Proper grout application requires years of experience learning the in’s and out’s of each material. First of all, you need to ensure that the installation joints are clear of any excessive adhesive materials. If you are using RG materials, then you should make sure that the flanks and the bottom seal are dry. The presence of water can affect the curing reaction and prevent tiles from adhering to the subfloor. 7
Tips & Tricks Tile Spacers – A Must in Your Installation There are instances where creativity and working with what you’ve got can alter the result for the better. That is the case of Tile Spacers. In art, for example, those who broke the rules and put their imagination to work were able to create new movements that defined an entire generation. The same goes for gastronomy: getting creative when you don’t have all the ingredients you need and using substitutes can often lead to a recipe that is more delicious than the original. When it comes to tile installation, however, precision and rigorousness are paramount to the success of a project. Using a substitute for your tile spacers, for example, may seem like a safe approach. But, as many tile installers have learned the hard way before you, the right tile installation tools can make or break your project. Using a substitute will, at best, increase the time and effort you need to spend on tiling. But, more often than not, this oversight can lead to damage to the tile, the tool and even yourself. The variety of tools that are essential for an installation project is immense. However, in this article, we want to focus on a small piece of equipment that a lot of installers often neglect. We’re talking about tile spacers. That is where tile spacers can come in handy. A tile spacer is a small piece of plastic that enables you to line slates properly and maintain the correct distance between them. They come in a variety of shapes and sizes and can be made of plastic, wood or ceramic. While keeping tiles equally distant is their main purpose, spacers have a few other applications too. For example, you could use them as a separation point when the tile meets the wall and create expansion joints. Spacers have great utility for both floor and wall tile installation projects. In other words, you could use a floor tile spacer for a wall tile project, as long as you have the right shape and size. Don’t assume that you can use this versatile piece of equipment only when you install the tiles. They can be extremely useful when you dry-lay the tile and create the initial outline. That way, you can get an accurate overview of how the project will look like as well as exact estimations of where you will need to place the tiles to get an even look. • Types and Sizes As mentioned already, spacers come in a variety of types and sizes. Keep in mind there isn’t any one-size-fits-all solution, and you must choose the right size and shape based on the requirements of your project. For a long time, professionals have used nails, screws, ropes, and even sticks to keep tiles at the proper distance from each other during an installation project. These tools were hard to work with, ineffective and made the entire process difficult and challenging. Thankfully, in the 1950’s, Bob Jobs invented the tile spacers, a cutting-edge piece of equipment that facilitates the placement of tiles and ensures uniform spacing between them. Even today, tile spacers are the best and easiest way to ensure that your tiles are set at the correct distance from each other and that the result is even, polished, and professional-looking. Do you need more reasons for why this essential tool should be in your arsenal? Let’s explore! What Are Tile Spacers and What Difference Can They Make in Your Installation Project Tile tends to expand when the room temperature reaches a certain level. That is why you should never install tiles next to each other and always leave a small space between slates for the grout lines. X-Shaped Tile Spacers: Use this type of spacers where four tiles meet. Their size varies from 2mm to 10mm. T-Shape Tile Spacers: Use this type of spacers where three tiles meet. Their size ranges from 3mm, 4mm, or 5mm. The Benefits of Tile Spacers At the most basic level, spacers have a pretty simple purpose: they will allow you to keep the tiles at equal distance, enabling you to space them correctly and get a symmetrical result. However, their benefits don’t stop there. Here’s how tile spacers can make your life easier and ensure that the installation process goes a bit smoother than before. •Create Even Grout Lines It doesn’t matter how hard you’ve worked to measure and prepare the surface before installing the tiles. If the grout lines are uneven, 8
Tips & Tricks then the final result will look messy and unprofessional. That is especially true if you’re using a grout color that stands out against the tiles. Spacers are an excellent way to ensure that the grout lines are uniform and well-proportioned. •Ensure Tiles’ Uniformity Accuracy and uniformity are two of the keywords of a successful installation project. Just think about it: if just one of the tile slate is slightly off-center, then it will jeopardize the appearance of the entire layout. Spacers make it easy to ensure the precise alignment of floor and wall tiles and achieve a uniform and constant look. That way, you won’t risk having the tiles at the edge of the floor set further apart than the ones at the center of the surface. • Enhance the Design One of the reasons you should use spacers when you’re dry-laying the tiles is that you can see what grout width works best with your pattern. That way, you can make adjustments to the design and enhance the appearance of the final result. • Improve the Durability of Tile Surface You may think that after years of experience, you don’t need spacers to tell how and where you should place the tiles. You would be wrong. Savvy installers know that every tiling project is different and even a formed eye can’t observe all the subtleties of the surface. Place the tiles too close together, and you risk damaging the material when the slates expand. Spacers, however, enable you to determine the exact distance you need to leave between tiles. As such, the surface you are creating is safer and more durable than if you were to guess the tile placement. • Fast Turnaround Tiling without spacers is not only extremely difficult but also time- consuming. You need to stop constantly and adjust the tiles so that you get an even layout. With a tile spacer, on the other hand, you will spend less time agonizing over the width and accuracy of your lines. How to Choose the Right Tile Spacers As mentioned already, you can’t just pick any tile spacer and call it a day. You need to consider the requirements of your project before you can determine what size and shape of the spacer will benefit you best. For starters, discuss with the client the amount of space they want to have between the tiles. Remind them that the distance will also function as the width of the grout line and make some suggestions if you believe that their expectations are a bit unrealistic. Consider the surface you will be working with as well. If the baseline is uneven, then let your client know that they should opt for small spaces between the tiles to create a uniform appearance. Not only that, but this approach will also increase the durability of the tiles and reduce maintenance costs significantly. Last but not least, you need tile spacers that are sturdy and reliable, and that won’t break at the first use. You can find a wide variety of spacers, perfect for a wide range of installation work. Their uniformity and durability of these CHEMZONE spacers will help you obtain an excellent finish and with outstanding accuracy. Conclusion When it comes to tiling, the right tools can make the difference between a successful project and one that will require extensive maintenance. Never assume that if you’re an experienced tiler, then your skills and expertise are enough to determine the proper placement of the tile slates. Sure, you may have installed one hundred floor tiles correctly. 9
Tips & Tricks How to mix mortar for tile installation: the expert's recipe One of the key aspects of a successful tile installation is to get the right mortar. Knowing how to mix mortar correctly is important to achieve the strongest bond possible and thus a long-lasting installation. Improper mortar mixing may cause issues to your installation or even lead to a complete failure. Here are some key steps to ensure a proper mix, and why they are necessary, regardless of the brand or type of mortar. How to mix mortar right: before you start Be familiar with the specific type of mortar you use. While specifics vary between manufacturers, every bag will have instructions printed on it – read them. You should at least know basic things like the mortar mix ratio or amount of water, slake time, pot life (time between mixing and when the mixture is no longer usable), and open time (time between spreading the adhesive and having the tile set). Provided you are aware of those things, there should be no real surprises following the steps below. To know how to mix mortar properly, you must understand these steps and the basics of how cementitious mortars actually work, on a chemically and microscopic level. Mortars consist of a few basic ingredients: sand, Portland cement, lime and (usually) various chemically manufactured additives which assist in the mortar mix being able to retain water for a longer amount of time. These additives can also provide different properties to the final product like flexibility, strength, faster curing times, etc. Most modern mortars have at least one type of additive. Understanding the way that cement works and why it needs to be mixed in a certain manner, in different stages, is key to ensure a successful result. Cement cures through a process called hydration. The dry cement molecules are inert – they don’t do anything at all until they are mixed with water. Once water is added to cement the molecules use that water to grow small crystals. The more water available to the molecule, the longer and thicker the crystals grow. When these cement molecules are all growing crystals next to one another, the crystals will grow around other crystals and interlock. This is how cement gets stronger, and why it gets stronger the longer it exposes to water. In the case of a mortar, the crystals will not only grow around other crystals, they will grow into the pores of the tile and substrate. This is how to achieve the bond. When a modifier is added to the mix, it helps achieve a stronger bond to the tile than a mortar without modifiers. The more modifiers included in the mortar mix, the stronger the bond, because the polymers allow the mix to retain water for a longer period. When the polymers expose to water, then dispersed evenly into the mix, they surround the cement molecules and allow them access to water for a longer period (the water won’t evaporate through the polymers). This process produces a longer, thicker cement crystal than the mortar you would have without any type of modifier. Equipment Wondering how to mix mortar the right way? Well, selecting the right tools for the job is among the first decisions you have to make. The mixing drill and mixing paddle are fundamental. Use a mixer with a low rpm. Most mortar manufacturers recommend a low rpm to ensure a minimum amount of air trapped in the mortar as well as a more consistent mix. You also want to use a spiral-type mixing paddle rather than the ‘egg-beater’ type. This also prevents excess air in the mix. The low rpm and comes with the proper type of paddle. Combined with the bucket, you have all the equipment needed to properly mix mortar for tile installation. Initial mortar mix Start by pouring water into your bucket first. This cuts down on the amount of airborne particles. If you put the powder in first, then add water, you’ll have a large cloud of dry mortar floating around when you begin mixing, and it’s difficult to get all the dry mortar mixed up, it will stick to the sides of the bucket. Add the mortar to the water, mix, add more mortar or water as needed to reach a fairly thick consistency – about the creaminess of thick peanut butter. You want the swirls at the top of the bucket to stand up without slumping or disappearing (see the photo). Most manufacturers recommend what seems like an excessive amount of time to mix mortar, five or ten minutes. This is a LONG time to mix mortar, but it will help achieve the required blending and saturation of the individual molecules, both cement and additives, in your mix. Most professionals will only mix long enough to get a consistent mix of the powder and water. Ideally, you should stick to the recommended time, but, realistically, it won’t likely happen. Just be aware, and always mix a bit longer than the time you feel may be necessary. 10
Tips & Tricks It is completely fine to add more mortar or water at this stage to reach the desired thickness. Do this during the initial mix rather than adding more later in the process. Adding more water or mortar after the slaking stage will considerably weaken the mortar. The mortar should be thick enough to stick to the trowel when you turn it upside down. If it drips off then it’s too thin, you need to add more powder to the mix. Final mortar mix Once the mortar slakes, move on to get the final mix by distributing the additives evenly into the mortar. This process helps spread the polymers and water throughout the mix to produce a consistent, properly blended mortar during and after the cure time. Do not add more water or powder to the mix at this stage! Excessive water will only spread out the mix. There is already water between the mortar molecules, separating them from each other. The farther apart the molecules are when the crystals begin to grow, the harder will be to achieve the interlocking crystal formation of the cement, which is where the strength of the mortar comes from. If the crystals cannot fully interlock with one another, the final product will be weaker. By the way, this is also why you don’t want excessive air trapped in the mortar mix. If properly mixed, the mortar should have standing ridges without slumping when spreading it with the trowel. Slaking The slaking stage is very important! It is a key issue when determining how to mix mortar perfectly. Slaking simply means letting the mixed mortar sit, untouched, for ten minutes or so. It is critical to allowing the chemical makeup of the mortar to work correctly. Not doing so, and using it immediately after the initial mix, will lead to the mortar getting stiff and unworkable (fairly quickly). Then, the mortar won’t bond or cure correctly with the tile. Slaking also provides the maximum working time once the mortar is fully mixed. So, how to mix mortar the right way? Just remember this: • Don’t add too much water – this will weaken the mix. • Mix slowly to trap the minimum amount of air in the mortar mix. • The mortar should be fairly thick, like thick peanut butter. • The thickness and consistency of the initial mix should be the same consistency of the final mix. • Slaking is necessary! • Do not add more water or mortar mix after the mortar slakes. • Know the working time of your mortar, pay attention to when it begins to stiffen up. The right mortar mix is critical to achieve a successful tile installation with the most durable bond. How you can see, it is not that simple to know how to mix mortar correctly. When done properly, it makes a world of difference. Do you know other pro tips about how to mix mortar for tile installation? Leave your comments below! Most modern modified mortars have powdered additives (usually polymers of some sort) added to the dry mix. Chemically speaking, these additives, like the cement, get activated through hydration, but they work a bit differently. When adding water to the cement, the mix begins to grow crystals and that’s how mortar gets its strength. The longer the cement exposes to water, the longer the crystals grow. The longer the crystals grow, the stronger the cured product will be. Once you add water to the additives, however, the molecules in the additives will absorb the water. Think of a molecule of the additive like a cotton ball. The outer layer of the additive will be hydrated, but the inner portion will still be dry. Slaking provides the additive enough time to become completely saturated. If you do not put the mortar to slake, the mix will have dry polymers. The dry polymers will leach water from the cement and cause it to stiffen up quickly. If the cement does not have sufficient water to continue growing the crystals, the crystal growth and curing process essentially stops. Therefore, not allowing the mortar mix to slake causes it to get stiff quickly, which weakens the mortar and create issues with bonding. Lack of crystal formation in the cement leads to an insufficient bond to the tile and substrate. Allow the additives to dissolve fully to have a proper mortar mix. 11
Tips & Tricks Preventing Lippage: Start with the Right Tile Leveling System As a pro tile installer, tile lippage is one of the worst things to happen to you. A slightly uneven floor or material problem can compromise the entire project if you’re not careful. One of the most common mistakes contractors and DIYers make is not using a tile leveling system to prevent tile lippage. Not only that the difference in height between the edges of the adjacent tiles is aesthetically unappealing, but it can also turn into a tripping hazard. A lot of factors can cause lippage, starting with the surface flatness and ending with improper thinset mortar coverage. So, before we teach you how to use a tile leveling system, let’s take a look first at how to level a floor for tile. How Do I Level the Floor for Tile? The number one rule when installing tile is that the result needs to be flat. Sure, other aspects, such as plumb, for instance, are important too, but they can be unattainable sometimes due to pre-existing conditions. Flatness, on the other hand, is non-negotiable. So, how do you ensure that the subfloor is as smooth and even as possible? It all begins with leveling floor for tile. Before we start, it’s important to note down the tools you will need. If you’re a small independent contractor, who is just starting out, keep in mind that you won’t find these materials at the local home improvement store. You’ll need to find a tile supply shop and head there to purchase everything you need. What Is Tile Lippage? Installing tile seems like a straightforward process, but if you are a pro you know there’s more to it than it meets the eye. You’ll need much more than trowels and spacers to align the tile properly. By setting the tiles at different levels, you risk creating lippage. Tile lippage is the vertical displacement between the edges of two adjoining tiles. Simply put, the tiles are set at different levels, meaning that they are spaced evenly in width, but not in height. Not only that it looks bad, but lippage can also lead to numerous problems. Damaged tiles are one of the most common one as carts or other objects hit it as they run over the edges. Lippage can also be a safety hazard, especially for people who use a walker. Here are the tools and supplies you will need for tiling uneven floor: • Contractor line or chalk line • Square-notched trowel (make sure to choose the right size for the task at hand. As a rule of thumb, the less flat the tile is, the more mortar you’ll need. The more thinset you need, the larger the trowel size should be.) • Grinder • Mortar • Bucket • Sponge • Brush Now, that you have everything you need, here’s how to level floor for tile. Step 1: Find Dips and Peaks This simple trick will help you identify peaks and dips regardless if the room is 20 x 20 or 4 x 5. Have a colleague hold one end of the chalk line and stretch it across the room with both ends on the floor. Look for any variations in the However, not every warpage qualifies as lippage. According to the American National Standards Institute (ANSI,), the allowable lippage for grout joints that are less than 6 mm (1/4 in.) wide is 1 mm (1/32 in.) plus the built-in tile warpage. The allowable lippage for grout joints that are 6 mm or wider is 2 mm (1/16 in.) plus the warpage. 12
Tips & Tricks floor’s height. Move the chalk line across the entire room and mark any peaks and valleys you find with a contractor pencil. Step 2: Determine the depth of the dip Once you’ve identified the valleys, you’ll need to know how deep they are. You can do this by using your trowel and holding it next to the chalk line. If the valley is deeper than your trowel notch, then you’ll need to use a bigger notch. More often than not a 1/4 x 3/8 in. square notch trowel is what you need when installing 12 x 12 in. tiles. Step 3: Remove Any Dirt and Debris Use a brush to remove any dirt, debris or drywall compound from the floor. Next, clean the floor with a sponge to eliminate dust. Step 4: Mix Mortar It could be argued that mixing mortar is an art. If you want to achieve a strong bond and long-lasting results, you need to know how to get the right consistency. Read this guide to learn how to mix mortar the right way and what tools you need to use. Step 5: Fill the Dips Use your trowel to spread the thinset over the dips marked on the floor. Pull it across the subfloor trying to leave even tracks. Use the straight edge of the trowel to remove any excess thin set. Step 6: Grind Peaks Use a grinder to level any humps in the floor’s surface. As a rule of thumb, grind from the middle to the edges to ensure you get a smooth result. Step 7: Final Filling Wait for at least 24 hours for the thinset to dry. You can also use fast- drying mortar, although it’s a bit more expensive. Check the floor again to make sure it’s flat and leveled evenly. If some of the dips are deeper than 1/8 of an inch, then you need to repeat step five. If everything looks fine, then you can move onto the next step of the project: installing the tiles. Managing Lippage: How a Tile Leveling System Can Help Making sure there are no peaks and valleys in the subfloor surface is paramount. But, sometimes, even if the floor is even, you can still get lippage due to irregularities in the thickness of the tile material. That’s where a tile leveling system can come to help. It’s almost certain that you will need a good tile leveling system to prevent tile lippage, especially when dealing with large format tiles. Due to its design, a tile leveling system interlocks the tiles, ensuring that the surface remains smooth and flat while the thinset dries. The interlocking design not only that minimizes the possibility of lippage, but it can also reduce or even eliminate settling from shrinkage. In addition to preventing lippage, a tile leveling system can also reduce the time of installation by almost eliminating the need to lift some of the tiles to add more thinset. A complete system consists of three main components:Clips, Wedges and pliers. These elements work together to prevent the movement of tiles when the compound is setting in and to improve the flatness of the surface. The tile strips guarantee rapid leveling. Due to their reduced thickness, the strips can reduce warpage to 1/16 in., the allowable lippage for grout joints. The circular base of the tile caps ensures that the pressure is distributed evenly over the surface of the tile. Because the pressure is applied vertically, you don’t have to check the variations in height between the tiles constantly. The role of the tile pliers is to provide the necessary pressure to the tile caps, thus making it easier for you to obtain a perfect leveling of the surface. The pliers can be used both horizontally (on the floor) and vertically (on the wall.) If you don’t own a tile leveling system and you’re just now considering buying one, make sure that the pliers have an ergonomic design. Not only that the bi-material handles are lightweight and safe, but they’re also sturdy enough to withstand years of constant use. The Best of Both Worlds Use the described procedure to level the floor for tile and a good tile leveling system to get the best results. Make sure that the surface is as flat as possible before installing the tiles. Adjust and hand set each tile to reduce the risk of lippage. Lift the tiles and add more thinset if necessary, remove mortar to push them down, and so on. Then use the leveling system to ensure and maintain a lippage-free tile surface. Don’t use the tile leveling system to manipulate the tiles so that they stick to the surface evenly. Level the subfloor first, and then use the system to set the tiles. That way, you can obtain a lippage-free floor every time. After all, that’s your primary objective of your tile installation project. You think a tile leveling system is a must-have tool for pro tile installers? Leave your comments below. 13
Tips & Tricks Modified or Unmodified Thinset: Which Is Better? When it comes to thinset, choosing between modified or unmodified thinset can leave many tile installers scratching their heads. Is one better than the other? Or is it just a matter of personal preference, convenience or plain work habits? Unmodified thinset has been around forever. Old-school professionals know how to work with it and understand its application perfectly. But, in the last decades, we have witnessed the rise of the modified thinset. Its simplicity charms more and more installers. Unlike unmodified mortar, which consists only of a blend of Portland cement, sand, and water retention agents, modified thinset includes additional retention products, such as latex polymers, which can increase its performance and strength. More than that, you don’t have to mix some types of modified thinset with water before spreading it out on the subfloor. That translates into less work for you and sturdier concrete for the client. It’s a win-win situation. Case closed, right? Obviously, modified thinset is the better option, and all this debate is useless. Not so fast! Before you can decide between modified or unmodified thinset, you need to ensure that you understand their strengths and weaknesses, their applications, and when it’s best to use one versus the other. Here’s what you need to know to determine if modified or unmodified thinset is the right option for you. The Hydration Reaction in Concrete Before we dive into the topic, it’s important to understand the scientific principles that cause concrete to harden when mixed with water. Adding water to Portland cement starts a chemical reaction known as hydration. The cement reacts with the water and forms interlocking crystals, which make cement hard. These crystals grow as long as they expose to moisture. Once there’s no more water in the mix, they start to slow down and eventually stop. known as the “full bed method.” People used between two and three inches of thinset beneath the tile to ensure that the cement had enough moisture to cure properly. If there wasn’t enough moisture, the thinset mortar wouldn’t have been strong enough to make the tiles stick to the subfloor. But, adding thick layers of thinset was a lot of work. It didn’t look very appealing either. That’s how the need for better retention techniques came to life. Professional installers wanted a solution that would allow them to harden cement more easily and organically. Engineers at that time added rubber into the thinset mix to repair and make seawalls more durable. Later, constructors began using it to make brick installations stronger. But, in spite of the fact that adding rubber to cement helped retain water for longer, this compound still had its limitations. For starters, rubber had limited working time. It was also difficult to store and keep it from degrading. That’s when a chemical engineer named Henry M. Rothberg decided to develop a synthetic form of rubber that would have an extended working time and would be easy to store. After creating more than 300 different chemical compositions, he finally discovered a liquid latex polymer that, when added to the thinset mix, would make the concrete stronger, durable, and more flexible. That is how “CHEMZONE” one of the best-known modified thinsets on the market came to life. From here on, a wide variety of mixtures were created, and the market for modified thinset expanded. Modified or Unmodified Thinset: Key Characteristics to Keep in Mind When it comes to modified or unmodified thinset, there are different grades that you need to take into account. These grades or levels are dictated by the ratio of cement to sand used in the mix. In the case of modified thinset, the percentage of the retention product added into the mix is also a telling factor for quality. These three elements: cement, sand, and the retention compound are what give quality and resistance to modified and unmodified thinset. A high-quality thinset will have a higher percentage of cement because it makes it sturdier as well as more resistant and sticky. One of the most popular retention compounds is the “hydrated lime” – a product renowned for its strong, long-term water retention properties. It’s for these reasons that builders use it for brick masons. Hydrated lime can retain water in the cement for longer than other compounds, thus making the product more durable and stronger. There is something else important to consider about modified thinsets. The additional polymers included in the modified thinset could be introduced in either liquid or powder form. In the first case, the modified thinset is mixed with a liquid polymer instead of water. In the latter case, manufacturers include the polymers into the powder that should be mixed with water later. So yes, you can actually “grade” your thinset options by simply looking at the ratio between these three key components. Based on this, you can group available thinset and choose the one that fits your needs best. That’s why curing, the process of maintaining the moisture level high, inside the cement is so important for hydration. As long as moisture and cement co-exist, the strength, density, and durability of the thinset will continue to increase gradually. As mentioned already, one of the benefits of modified thinset is that it contains retention products that allow for better water retention and, therefore, a stronger concrete cure. But if water retention seems to be easier to obtain by using the already mixed compounds of the modified thinset, then why are there still so many tile installers using unmodified mortar? The History of Thinset To better understand this modified vs. unmodified thinset talk, you might want to know the “behind the scenes” of this mortar blend and how modified thinset came to life. Back in the days of the early 1900s, tile installers used a procedure 5 14
TILE & STONE ADHESIVE Across the world, the winds of change are sweeping away traditional methods of installing tiles and stones as these have proven to be incapable of handling modern products and materials. Rising to meet the challenge is CHEMZONE range of new age polymer tile adhesive. Far superior to conventional methods, these tile adhesive break the shackles imposed on your creativity by allowing you to experiment with aesthetics. For instance, you can now even think of fixing a marble slab on the ceiling finally, today's construction need have met their match in CHEMZONE adhesive. Advantage • Higher working time • No curing required • Suitable for any substrate • Easy to apply • High strength • wide range for diverse application • high flexible • Enable faster completion of job - savings of time and money 15
TILE & STONE ADHESIVE EASY FLEX C-111 Easyflex C-111 adhesive is polymer, modifier & additives. it is used for fixing ceramic tiles.apply outdoor and indoor area and vitrified tiles indoor only. Easyflex C-111 is a bagged cementations powder to be mixed with either water for installing. Applications:Designed for fixing all ceramic tiles on internal & external and vitrified tiles Internal only. Advantage • Economy grade • Smooth & creamy • Ideal for fixing ceramic tiles on floors & walls. Suitable substrates • Cement mortar beds • Brick masonry • Cement terrazzo • Cement plaster • Coverage • Approx 50-60 sq.ft per 20kg bag. Packing : 20kg bags. Colour : Grey Compliance : Meets the following standards as per • IS-15477 type-1 • EN 12004/ISO 13007:C1T ULTRA FLEX C-222 Ultra flex C-222 is a smooth and creamy polymer based adhesive for installing small and medium size ceramic wall and Floor tiles in interior and exterior areas. Application : Designed for fixing all small and medium size tiles on internal and external areas. Advantage • Extended open time • Smooth and creamy • Ideal for fixing small and medium size tiles on floor & wall. Suitable Substrates • Cement mortar beds • Brick masonry •Cement terrazzo • Cement plaster • Tiles on tiles • Coverage • Approx 50-60 sq.ft per 20kg bag. Packaging : 20kg bags Colour : Grey Compliance • Meets the following standards as per • IS 15477 type-1 • EN 12004/ISO 13007:C1T. 16
TILE & STONE ADHESIVE VITRI FLEX C-252 Vitriflex C-252 is a multipurpose polymer modified powder offering utility including applications for floors and wall in interior and exterior area it is cementations thin set powder to be mixed only with water to install all type of medium and large size tiles & stone on variety of substrates using thin set method of installation. Application • Designed for specially for interior and exterior floor & wall installation of all type of ceramic vitrified, glass Mosaic tiles, precast terrazzo and natural stones. Advantage • Single component • Highly flexible yet strong on bond strength • Suitable for various substrates. Suitable substrates •Concrete •Cement mortar beds •Ceramic tiles & stone •Cement plaster •Brick masonry •Cement terrazzo •Gypsum wall board Coverage • Approx 50-60 sq.ft per 20kg bag Packing : 20kg bags. Colour : Grey and White Compliance • Meets the following standards as per • IS 15477 type 1 adhesive • EN 12004/ISO 13007 for C2 TE. XTRA FLEX C-345 Xtra Flax C-345 is a multipurpose high polymer, modified thin set mortar for interior and exterior installation of ceramic tiles, stone,quarry tiles, glass mosaic tiles, pavers and brick xtraflex c-345 multipurpose thin set adhesive is designed to mix water, has a convenient open time with high adhesion and workability xtraflex c-345 multipurpose thin set adhesive. Application designed for exterior and underwater application, superior bond to concrete, cement renders, screeds. Advantage • Highly flexible yet strong on bond strength • Single component • Suited for demanding external application Suitable substrates • Cement mortar beds • Cement plaster • ceramic tile and stone • Concrete • Concrete masonry • Brick masonry • Cement tarrazzo • Gypsum wall board Coverage Approx 55-60 sft per 20 kg bag with 6mm notch trowel for a bed of 3mm Packing - 20 kg bags. Colour - Grey & White Compliance • Meets the following standards as per • IS 15477 type 2 adhesive • EN 12004/ISO 13007 for C2 TE S1. 17
TILE & STONE ADHESIVE STONE FLEX C-531 Stone flex C-252 is a ultimate one step polymer fortified mortar for external facade installation of ceramic tiles, vitrified tiles, stone, quarry tiles, pavers and brick superior strength flexibility to handle structural movements, non say property and taking on extreme weather conditions are among its features mixed with water, it has a long open time with unsurpassed adhesion and workability. Applications • Designed for excellent for facades and underwater applications both interior and exterior areas. Advantage • Excellent for underwater application • Single component just add water • Good working time • Good open time • Long working time • No caring required after block work is done • Fast & Economical • Improved adhesive between two blocks. Suitable substrates • Concrete masonry • Concrete • Cement mortar beds • Cement plaster • Cement tiles & stone • Brick masonry • Cement terrazzo • Gypsum wall board • Calcium silicate boards Coverage • Approx 50-60 sq.ft per 20kg bag Packing : 20kg bags Colour : Grey and White Compliance • Meets the following standards as per • IS 15477 type 2 adhesive • EN 12004/ISO 13007 for C2 TE S1. BLOCK FIX Block flex is a factory prepared blend of carefully selected row material Portland cement and graded aggregates And polymers designed for use with water to produce high strength thyrotrophic mortar for laying aerated light Weigh concrete, fly ash bricks, cement hollow blocks, cellular concrete blocks or smoothing over the block work Surface in layers of up to 12mm thickness that meet and exceed the requirement of national and international Standards. Application : For interior and exterior for preparing thin bed block mortar for a/c and cellular concrete blocks. Advantage : • Long working time • No caring required after block work is done. • Fast & Economical • Improved adhesive between two blocks. Suitable substrates • Concrete blocks • Cement block/bricks • Concrete hollow blocks • Aerated light weight blocks • Fly ash bricks • Cellular concrete blocks Coverage : Approximately 300 sq.ft per 50kg bag when used at 2mm bed thickness coverage is based on smoothness size of block used and the thickness of mortar used a general guide line for coverage of mortar is given when used with 25% water added to powder. Note : Coverage is based on the block size of 600mm 200mm 100mm Packing : 50kg bags Colour : Grey 18
GROUTING Not using grouts when laying tiles can lead to problem ranging from chipped corners, water seepage, staining to even breeding of fungus and the tiles debonding or falling off. Extensive studies and in depth research by some of the most innovative minds in the business have seen the emergence of a new breed of grout that makes all others obsolete. the award-winning range is a perfect blend of aesthetics and performance and becomes the new yardstick of quality. Advantage • Acid/chemical resistant • Non-cracking/peeling • Antifungal and anti-bacterial • Dustproof • Highly durable • Easy to apply • available in a variety shades 19
GROUTING SPARKLE SERIES Conzo epoxy sparkle pro premium grout is a high performance griut which offers excellent colour uniformity, durability,beautiful and stain protection flush grout joints in an easy to use, non-sag formula. Application : Cafeterias and food joints institutional kitchens • washroom and clean room • Hospitals, operation theatres, laboratories balconies Drive ways , podium slabs and atriums • Advantage : Full flush joints * maximum nin sag performance * easy to install and clean * doesn't retain dirt and dust Packaging : 1 kg and 5 kg pails Varies with tile size and grout width Colour : Available in 22 attreactive colours Compliance • Meets the following standards as per EN 13888 : RG2 •ANSI : A 118.3 • Residential and Swimming polls, spa and sauna School and eductional institutes • • • Terraces and COLOUR POXY Conzo colour poxy epoxy grout for wall & floor is a colour fast, chemical resistant, acid resistant 100 % solid epoxy grout suitable for ceramics tiles marble and stone , vitrified tiles, especially in stain prone areas such as kitchaens and washrooms Application : Bathrooms, kitchens, swimming pools, water bolies, fountains, hospitals, operation theatres, restaurants, cafeterias, light industrial application and high traffic areas Advantage : Strong and durable stainfree • Anti bacterial and anti fungal Chemical and temperature resistant • • 100 % Acid resistant • Coverage : Varies with tile size and grout width Packaging : 1 kg and 5kg pails Colour : Available in range of more than 33 colour Compliance • Meets the following standards as per EN 13888 : RG2 •ANSI : A 118.3 20
GROUTING CONZO GLITTER Glitter for Conzo colour poxy Specific to be as an additive and metalized decoration of Conzo Product Strengths • Dissolves easily • Premanent shine • Excellent chemical resistance Areas of Use Additive for Conzo color poxy to give the metalized effect. Instructions for use Application add conzo glitter gold or silver in the recommended amounts(approx. 100 grammes for 3 Kg conzo color poxy according to the aesthetic finish required). Mix together manually using a trowel before mixing more smoothly from the bottom upwards with a low-rev (= 400/min.) helicoidal agitator, to prevent dispersion into air. When an smooth mixture has been obtained, apply conzo color poxy with additives and proceed with the usual finising and cleaning operations. Apply the mixed product to a trial section to check the aesthetic effect. Technical Data Compliant with Kerakoll Quality Standard Recommended dosage Nature Shape Dimensions Specific weight colour Chemical resistance 100- 3kg conzo color poxy polyester hexagonal prism = 0.2 mm = 1,38 kg/dm3 silver-gold Grade II 21
GROUTING Conzo fill TG Conzo fill TG a carefully prepared cement graded aggregates, polymers, fortifiers and colour fast pigment.It is designed for joint width 1mm to 3mm for porous and absorbent type tiles, non vitreous clay tiles, marbles and glazed wall tiles, suitable for internal and external applications. Applications : Residential, commercial, external facades Advantage : • Uniform colour • Hard and durable • Economical • For tile joints 1-3 mm Mixing ratio : Use approximate 400ml of water of conzo fill TG unsanded grout Coverage : Varies with tile size and grout width Packing : 500gm, 1kg, 5kg and 20kg Colours : available in a range of more than 20 colours. Compliance • Meets the following standards as per EN 13888 : CG1 •ANSI : A 118.6 22
WATERPROOFING CHEMZONE has innovated in this critical area to bring you a game-changing product. the advanced single component waterproofing membrane has the unique ability to bridge cracks in the substrate ( up to 3mm) and requires no other additional accessories for exceptional performance. the under-tile waterproofing membranes are especially recommended for tiled wet areas, washrooms, kitchens, swimming pools, and other water bodies. Highly flexible • Easy to apply. • extremely versatile - suitable for various substrates such as concrete • highly flexible - to adjust to structural movement • tile can be fixed directly on the membrane 23
WATERPROOFING CONZO CONPROOF LW SUPER CONZO CONPROOF LW SUPER is specially formulated integral liquid waterproofing Admixture compound composed of surface active plasticising agents, polymers and additives. It is used as an additive for cement concrete and plaster. It makes concrete cohesive and prevents segregation. Area of Application : Waterproofing of concrete and plaster used in Basements, • Roof slabs and screeds • Balconies and bathrooms • Sumps and drains • External plastering • Water tanks Features & Benefits : Strength-dose not affects the setting time and strength of concrete. Compatibility-Being a liquid, easily dispersible & compatible with concrete and plaster mixes. Durability- Increases durability by improving waterproofing of concrete and plaster. Permeability- It reduces the permeability of water into concrete and plaster. Cohesiveness - Make concrete more cohesive, hence protects steel against corrosion Shrinkage- Reduces shrinkage crack development in concrete and plaster. Workability- Improves workability of freshly mixed cement concrete. Method of Application •Cement & aggregates to concrete mixer as per the mix design, mix in dry state for 1-2 minutes. •Start addition of 70–80% mixing water & mix for 2-3 minutes. •CONZO CONPROOF LW SUPER is added as per the recommended dosage into the remaining mixing / gauging water, then add to concrete mixer & mix for another 2-3 minutes. •Place the concrete or apply plaster as needed. •Cure the applied plaster and concrete as per good construction practices. Precautions & Limitations •Maintain water-cement ratio as low as possible. •Do not add CONZO CONPROOF LW SUPER directly to dry cement & aggregate mix. •The dosage of CONZO CONPROOF LW SUPER should be maintained as per recommendations. Dosage 200 ml per 50 kg bag of cement. Coverage As per site condition Packing 1, 5, 20, 50 & 200 litre Shelf Life & Storage 24 months from the date of manufacturing in sealed pack and stored under proper condition. Store in a cool and dry place. Safety and Health Precautions Use rubber hand gloves and safety goggles, while using CONZO CONPROOF LW SUPER. In case of contact with skin, wash with plenty of water. Keep out of reach of children. 24
WATERPROOFING CONZO BOND SBR Conzo Bond S.B.R. is based on styrene butadiene rubber latex supplied as a ready to use bonding agent in liquid consistency. It is used for repair of spelled concrete – floors, columns, beams, slabs, chhajas and waterproofing of bathrooms and toilets, small terraces etc. as it bonds strongly to old & new concrete and to plasters. It reduces shrinkage, prevents cracking, dust pick up & improves abrasion resistance. Area of Application : Waterproofing of roof terraces, toilets, slabs, columns, lift pits, balconies bathroom, staircases, liquid and effluent tanks, decks and walkways. Bond coat – bonding of new concrete to old concrete, plastering, masonry, stone work etc. Concrete repairs- Spelled concrete of floors, columns, beams, chajjas parapets, slabs etc. Cladding- Reaffixing or fixing of slip bricks, stones, tiles & marble bedding. External rendering- Slurry coat for pinhole treatment on concrete surface, weatherproof and frost resistance render, high wear & erosion resistance render and as repair mortar for overhead application. Features & Benefits : • It prevents cracking by improving flexural strength • Improves the hardness & prevents dust generation • It is multipurpose & economical product, easy to use • Bonding strongly to concrete, stonework, masonry, plaster, cementations surface • Improves abrasion resistance of the cement mix • Improves erosion resistance & prevents corrosion • Reduces viscosity of cement injection grout for better fluidity & bonding. Method of Application SURFACE PREPARATION • Clean the surface with wire brush or scrubber to remove all loose particles, dirt, oil, grease, Degrease the surface by using suitable solvents. Vacuum clean to remove all loose material. • Repair the spelled concrete portion by saw, cutting the extreme edges of the repair location to a depth of at least 10 mm to avoid feather edging & to provide strong bond. • Clean the concrete surface to remove any contamination where breaking is not possible. Roughen the surface by light scrabbling or grit blasting. • For priming of concrete substrate, the surface should be thoroughly saturated with potable water. Remove any excess of water prior to application. ECONOMICAL WATERPROOFING For a waterproofing coating Mix Conzo band SBR: Cement in the ratio 1:1.5 by volume. Mix for 3-4 minutes to avoid air entrapment. Keep on slowly adding cement to Conzo Bond S.B.R. until the required consistency is achieved. Brush apply 2 coats of the mix in a span of 5-7 hours on the prepared concrete substrate. Overlay the coating with a protective screed to the desired slope & thickness. 25
WATERPROOFING CONZO BOND SBR REPAIR MORTARS : A suitable mix ratio for patching repair mortar or render is as follows: Mix design - Portland cement: 50 kg, Washed sand: 150 kg, Conzo Bond SBR: 6-8 kg & Water: 10 Lit SCREED CONCRETE : A suitable mix ratio for patching repair mortar or screed is as follows: Mix design - Portland cement: 50 kg, Washed sand: 75kg, 6mm downsize aggregates: 75 kg, Conzo Bond SBR: 6-8 kg & Water: 10 Lit BONDCOAT IN REPAIRING For a bonding coat of Conzo Bond SBR mix SBR: Cement in the ratio 1:1 by volume Brush apply 1 continuous coat of the mix on the prepared concrete substrate. Ensure to overlay the repair mortar when the bond coat is still tacky. Using Conzo Bond S.B.R. Wide range of mix designs are recommended for different application using Conzo Bond S.B.R. Technical specification 40 + 1% Packing : 1,5,20,50,100 & 200 kg Dosage : Economical waterproofing - Mix proportion by volume 1:1.5 (Conzo Bond SBR: Cement) Repair mortar -10-15 % of Conzo Bond SBR by weight of cement Bond coat – Mix proportion by volume 1:1 (Conzo Bond SBR: Cement) Coverage : As per site condition Shelf Life & Storage • Best before 12 month from the date of manufacturing • Store in a cool & dry place in unopened condition away from direct sunlight. Safety and Precautions Avoid contact with skin and eyes. In case of contact with skin, rinse with plenty of clean water and then clean with soap water. In case of contact with eyes, rinse immediately with plenty of clean water and seek medical advice. Wear suitable protective clothing, gloves, eye protection and respiratory protective equipment during application. 26
WATERPROOFING Conzo Bond S.B.R. ADVANCE SBR Latex for Waterproofing & Repairs Conzo Bond SBR Advance is based on modified Styrene butadiene latex used for high performance applications in waterproofing and repairs. it is used for repairs of spalled concrete such as – floors, columns, beams, chhajjas, slabs & waterproofing of toilets & bathrooms & terraces. it bonds strongly to old & new concrete & plaster. Areas of Application : waterproofing - Waterproofing of small roof terraces, sunken portions of toilet & bathrooms, chajjas & lift pits, balconies & stare cases. waterproofing of liquid & effluent tanks, car deck and walk ways. Bond coat - plaster to plaster, concrete-to-concrete, plaster to concrete masonry to stone work and for plastering over brick masonry. Bonding coat & mortar for tiles & panels, underlays for special finishes such as top rendering coat for chemical resistant floors. Method of Application SURFACE PREPERATION • Clean the surface with wire brush or scrubber to remove hidden dirt, loose particles. Laitance, & dust. Degrease the surface by using suitable solvents • Repair the concrete spalled portion by saw cutting the extreme edges of the repair location to a depth of at least 10 mm to avoid featheredging & to provides strong substrate • Roughen the surface by light scabbling or grit blasting • Clean the concrete surface to remove any contamination where breaking is not possible. • Expose corroded rebars in the repairing area fully. Remove all loose scales & corrosion deposits & immediately clean the surface. Cladding - fixing or refixing of slip bricks, tiles, stones & marble bedding. Crack repair - Repairs of plaster cracks more than 5 mm & in gaps developed between masonry and RCC members. External rendering- Weatherproof & frost resistant render, high wear & erosion resistant render. bonding slurry coat for pin hole treatment on concrete surface & as repair mortar for overhead applications. Features & Benefits : Reduces drying & aging shrinkage cracks • it prevents cracking by improving flexural strength • it is multipurpose & economical product, easy to use • improves the hardness & prevents dust generation • Bonds strongly to concrete, masonry, stone work, plasters, steel, asphalt & mostof the building materials. • improves abrasion resistance of cement mix. • improvers erosion resistance & prevents corrosion. • prevents leakage & dampness. • enhances strength of a repair mortar & provides durability. 27
WATERPROOFING Conzo Bond S.B.R. ADVANCE Application mixing Apply a single coat as a bond coat prior to the crack filling of the chemzone. Compact it into the crack fully and trowel.finish to level. add CONZO CONPROOF LW SUPER to the second coat plaster. 28
WATERPROOFING Conzo Bond S.B.R. ADVANCE PROPERTIES Appearance Colour Specific gravity @30°C. gms / ml pH value Chemical resistance freeze thaw resistance RESULTS free flowing liquid Milky white 1.02 + 0.02 7 – 9 Resists mild acids & alkalies excellent Technical Information Coverage For Bonding & waterproofing applications 1 kg of super latex will cover 70 - 80 sq. ft. area in 2 coats for a proportion mix 1 : 4 : 7 (Super Latex : Water : Cement). PACKING 1, 5 & 20 Kg Shelf Life & Storage 12 month from the date of manufacturing. Store in a cool & dry place in unopened condition away from direct sunlight Safety Precautions Avoid contact with skin and eyes in case of contact with skin,rince with clean water and then clean with soup water. in case of contact with skin,rinse immediately with clean water and seek medical advice. Keep out of reach of children’s 29
WATERPROOFING CONZO DAMPFIN 2K Areas of Application: Pile Heads • Basement retaining walls • Structural surfaces of cellars • Water tanks and swimming pools • Concrete roof slabs, floors, balcony floor slabs • Canals and dam walls • Bridge decks • Waterproof coating (bottom coat) for marble, granite and other natural stones • Structural surface of dykes • Suitable for steam room waterproofing • Sewage treatment plants • For special applications such as areas where more thick plaster application is needed. Features & Benefits : Water permeability - Excellent resistance to ingress of water • Adhesion - Excellent adhesion to concrete, natural and artificial stone • Flexibility-Provides a flexible & low permeable coating • Slip resistant - Provides slip resistant coating • Waterproof- Waterproof for concrete structures • Diffusion –Excellent resistance to chloride ion diffusion and carbon dioxide • Low temperature resistant - Resistance to freeze-thaw cycles and de-icing salts • Carbonation-Prevents carbonation of cement concrete. TWO PACK CEMENTITIOUS WATERPROOF COATING DESCRIPTION CHEMZONE 2K is two-part component cementation and acrylic flexible waterproofing & protective coating composed of best quality portland cement. properly selected & graded aggregates, additives & acrylic emulsion polymer as a binder it is applied to waterproof and protect concrete and similar structures. specially formulated for swimming pools, retaining wall, pile heads, water tank, submerged tunnels, sumps, bridge decks, marble, granites and a wide variety of extreme service class structures because on curing it forms an excellent elastomeric, waterproof & protective layer over the substrate. Method of Application SURFACE PREPARATION : The surface must be strong & free dirt, dust & lose particles. thoroughly wire brush the surface & clean the dust by air compressor or wash the surface with water • Any damage surface must be repaired by using polymer modified repair mortar • Oil & grease must be removed using degreasing solvents. MIXING : Shake well the liquid component to a homogenous milky colour, before mixing transfer entire quantity of liquid component into a suitable clean mixing vessel, gradually start addition of powder component under constant mixing with a stirrer using a pneumatic or electric power tool at slow speed 300 -400 rpm for 5-7- minutes to homogeneous & uniform free flowing slurry. APPLICATION Blinding Coverage : Apply slurry coat of mixed material for two coats at a coverage rate of 1.5 kg/m² over the set concrete slab by a masonry brush or appropriate power spray equipment. 30
WATERPROOFING CONZO DAMPFIN 2K Water tanks and swimming pools : Two coat of CHEMZONE 2K applied @ 1.5 kg/m² each coat by masonry brush or an appropriate power spray equipment • All applications where two coats are specified. the second coat shall be applied when the first coat is completely dried • The treated area should be protected from direct sunlight and to be damp cured by covering with damp hessian or similar system. Marbles/Stones : It is recommended to apply one coat at the bottom side of the marble @1.5mm thick at a coverage of approximately 1.8 to 2 kg/m² Pile Heads : Two coat of mixed slurry to be applied on the pile head @0.75 kg/m² first coat and 1.25 to 1.5 kg/m² • Second coat either by a masonry brush or by appropriate power spray equipment. Concrete slabs or roof slabs : Two coat of mixed slurry to be applied to the set concrete @ 1.5 -2 kg/m by a masonry brush, roller or appropriate power spray equipment. Precautions & Limitations : Do not use powder with the liquid other than the powder accompanied with liquid, it will affect the performance • Do not add water for dilution • Mix the entire quantity of both the components at one go • Do not flood or overexpose the treated surface to water until it is completely cured. Coverage Approximately 1.5-2 kg/m² @ 1mm thickness for 2 coats. Packaging 3, 15 kg. Shelf Life & Storage Shelf life is 12 month from date of manufacturing. 31
WATERPROOFING CONZO CONPROOF PWD INTEGRAL POWDER WATERPROOFING COMPOUND FOR CONCRETE AND PLASTERS Description Conzo Conproof PWD is a chloride free powder that seals the surface of concrete and cement mortars thereby blocking water absorption. It is water insoluble, powder improves workability to a nominal level. Areas of Application Conzo Conproof PWD can be mixed to waterproof concrete or sand-cement mortars, used in basements, roof slabs and screeds, water retaining structures, sunken slabs, terrace slabs, water tanks, sump tanks etc. Features & Benefits Increases cohesive property of concrete & mortars. It reduces the permeability of water into concrete, thus improving its durability. Reduces shrinkages & crack development in concrete and plasters. Chloride free hence reduces the chance of corrosion of reinforcement bars. Method of Application Hand Mixing: • Add Conzo Conproof PWD to the dry mix of cement sand first and then mix evenly with a trowel, until an even mix is obtained. • Add the measured quantity of potable water as per the W/C ratio and mix to a homogeneous & uniform consistency concrete or mortars. • Place the mixed concrete or mortar into shuttering, provided. Use of mixer is recommended as a good practice. • Cure the concrete or mortar surface, as is done in regular practice of water curing. Machine Mixing: • Charge the cement & sand into the concrete mixer & mix for one minute. • Add 1 KG of Conzo Conproof PWD for every 50 kg bag of cement & mix for one more minute. • Add the measured quantity of potable water as per the W/C ratio and mix for 2-3 minutes to a lump free homogeneous concrete. Place the mixed concrete or mortar as needed. • Cure the concrete or mortar surface, as is done in regular practices of water curing. Precautions & Limitations Cannot be used for concrete cast in structural members. Dosage: 1 KG per 50kg bag of cement. INTEGRAL POWDER WATERPROOFING COMPOUND FOR CONCRETE AND PLASTERS Packaging: 1 kg Shelf Life: 1 year of unopened pack from the date of manufacture. 32
FLORE CARE PRODUCTS CHEMZONE has innovated in this critical area to bring you a game-changing product. the advanced single component waterproofing membrane has the unique ability to bridge cracks in the substrate ( up to 3mm) and requires no other additional accessories for exceptional performance. the under-tile waterproofing membranes are especially recommended for tiled wet areas, washrooms, kitchens, swimming pools, and other water bodies. Highly flexible • Easy to apply. • extremely versatile - suitable for various substrates such as concrete • highly flexible - to adjust to structural movement • tile can be fixed directly on the membrane 33
FLORE CARE PRODUCTS CONZO CERACLEAN Conzo ceraclean is a fast acting acid based cleaner for regular cleaning of dirt and stains on tiles surface conzo ceraclean is designed for daily maintenance of tiles, it is ideal for interior and exterior use. Application • Cleans dirt and removes stains • Easy to use • Fast acting Coverage • Depends on porosity of the substrate. Packing 1ltr, 5ltr 34
WALLPUTTY SPARROW wall putty from CHEMZONE not only strengthens wall but also protects expensive paint from dampness and moisture. Its greater adhesive properties enable perfect bonding with the base and paint .providing bright, even finished surface that effectively eliminates the need for primer. Vastly superior to any other wall putty available in the market today. It serves as the best sub-surface for all type of interior and exterior paints application. Benefitting you with a considerable saving of time and money. 35
WALLPUTTY SPARROW WALL PUTTY Sparrow wall putty is unique formulation of white cement and high performance chemicals and polymers.Which can be applied on damp as well as dry surfaces. Coverage We recommend • Maximum two coats of sparrow wall putty • Approximate achievable coverage is 4-5 sq.ft/kg/3mm however actual coverage achieved depends on surface condition Available pack sizes : 5kg,20kg, and 40kg. Advantage • While cement based wall putty • Prevents flaking of painter • Ideal for internal & external wall. Specialists In System based Installation Solution At CHEMZONE. We belive we are not selling just products but offering you world class solutions to enable better design and execution. Our installation system are specially innovated for those who love to experiment with new materials and techniques that their creativity a unique touch and a standout 36
SPACERS & TOOLS CHEMZONE, the leader in the stone and tile installation industry, presents a world class range of innovative products Spacers, levelling system and tools. Tile Spacers are used to keep tiles evenly spaced, removed before grouting. Tile Spacers can be removed and used time and time again, saving money. The CHEMZONE tile leveling system features a patented easy-break system that breaks the clip off at the base. Eliminating time spent removing material from clips breaking off flush with the tile surface. To be used with CHEMZONE wedge. 37
SPACERS & TOOLS SPACERS & TOOLS CHEMZONE, the leader in the stone and tile installation industry, presents a world class range of innovative products Spacers, levelling system and tools. Tile Spacers are used to keep tiles evenly spaced, removed before grouting. Tile Spacers can be removed and used time and time again, saving money. The CHEMZONE tile leveling system features a patented easy-break system that breaks the clip off at the base. Eliminating time spent removing material from clips breaking off flush with the tile surface. To be used with CHEMZONE wedge. 38
Application of chemzone epoxy systems Hardener Resin Filler before joint filling, remove excess mortar debris from the joints clean the tile surface to remove dust,stain or dirt. gradually add 2 parts of resin to 1 part of hardener by weight and mix the components for 1 minute. add B parts of filler by weight to resin and hardener mix. Add filler to the mixture slowly by continuous mixing mix the contents for 3-4 minutes to get u n i f o r m p a s t e consistency Before application wear rubber gloves and start filling the tile joints fill the joints with a trowel or an appropriate tool Remove excess material by placing the rubber trowel or an appropriate tool perpendiculer to the tiled surface. The joints start hardening after 30-40 min then start the intail cleaning with water using scrubber finally clean the tile surface after 50 mins of joint filling to remove epoxy stain with water and soap solution. Application of chemzone adhesive systems Clean water in to the bucket Add the adhesive and mix Add the water until the desired consistency is achived (Use slow speed blender 500 RPM approx) Apply the adhesive to the surface with the smooth part of the trowel Spread the adhesive using the toothed part of the trowel As per requirement do back buttering on tile While fixing the tile ensure that the back surface of tile is fully covered with adhesive R e m o v e e x c e s s adhesive from the tile surface Grout 24 H after fixing
CHEMZONE INDIA PVT. LTD. Registered Office : 7, G.I.D.C. Estate, Road - D, Ta. - Visnagar, Di. - Mehsana, Pin Code - 384315, Gujarat, INDIA. Ph.: +91 2765 224 330, Helpline No.: +91 98 98 94 93 94 Email : info@chemzone.co.in | exports@chemzone.co.in | www.chemzone.co.in CIN : U24100GJ2017PTC094986 NOTE : THE INFORMATION GIVEN IN THIS IS FOR GENERAL GUIDANCE. HOWEVER, COMPANY IS NOT RESPONSIBLE FOR ANY IMPROPER APPLICATION OF THE PRODUCT.