Download

1 / 33
330 likes | 342 Views
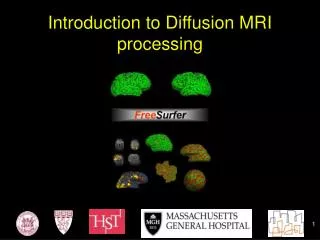
Learn about the UNC-NAMIC Atlas Fiber Analysis, unbiased DTI atlas building, fiber tracking, editing tracts, extracting fiber profiles, statistical analysis, DTI QC, post-processing, clustering, and statistical analysis methods.

E N D
Diffusion MRI - Lesson 4Atlases, Fibers and Profiles Martin Styner UNC Thanks to Guido Gerig, NYU And many, many folks
Content • The UNC-NAMIC Atlas Fiber Analysis • Unbiased DTI atlas building via DTIAtlasBuilder • Tracking fibers via AutoTract • Editing tracts in Slicer and FiberViewerLight • Extracting fiber profiles via DTIAtlasFiberAnalyzer • Statistical Analysis via FADTTSter
UNC dMRI Slicer Extensions • DTI QC: Vibration artifacts, Error estimation • Fibers: Post-processing, clustering • Statistical analysis methods • Main tool development, Slicer extensions, batch and grid processing
UNC-NAMIC DTI Fiber Analysis • Analysis of DTI properties along the fiber • Many years of methods & tool development • Allows for localized analysis with high sensitivity Verde AR, Budin F, Berger J-B, Gupta A, Farzinfar M, Kaiser A, Ahn M, Johnson H, Matsui J, Hazlett HC, Sharma A, Goodlett CB, Shi Y, Gouttard S, Vachet C, Piven J, ZHU H, Gerig G, Styner M. UNC-Utah NA-MIC framework for DTI fiber tract analysis. Front Neuroinform. 2014;7:51. PMCID: PMC3885811
DTIPrep/Topup/Eddy FADTTSter/Slicer AutoTract/Slicer/FiberViewerLight DTIAtlasBuilder DTIAtlasFiberAnalyzer
DTI Population Atlases • Definition of standard space • SNR increase • Better tractography Neonate 1 year Rhesus (15mo) 2 year Adult
1. Affine Atlas • Optional initial template • Allows for atlas to be aligned with prior reference space • Otherwise first image is initial template • First loop: align to initial template • First affine average atlas after first loop alignment • Second loop: align to first affine atlas • Final affine average atlas after second loop
2. Diffeo atlas • Unbiased average atlas • Diffeomorphic registration • Iteratively sharpening atlas • Deformable average that minimizes deformation over all input datasets • Unbiased to order of presentation • Employs ”GreedyAtlas” tool • Sensitive to outlier intensities in data • Ensure good brain masking • Separate folder for conversion of data formats
3. Symmetric Diffeo Atlas • 2 runs of symmetric diffeomorphic registration • Employs DTI-Reg/”ANTS” tool • Make sure to change default • Default is an older tool (Demons) that does not perform as well • 1 loop: Computes final atlas • 2 loop: Maps data into final atlas
Data Organization … DTIAtlas 2_NonLinear_ Registration 3_Diffeomorphic _Atlas 4_Final_ Resampling Dataset .csv Parameters .txt Results .csv 1_Affine_ Registration Script First Resampling Second Resampling LoopN Loop0
Add DTI Images • Clicking the '+' button will allow you to select several DTI images, and adding them to the central Cases box
Remove DTI Images • After having selected some images, you can remove them from the central Cases box by clicking the '-' button
Give an output folder • You need to give an output folder: A folder named "DTIAtlas" will be created in your output folder, and all the files generated by the program will be put in it (Data organization on slide 33)
Compute the Atlas • When you added cases and gave an output folder, you can compute the Atlas by clicking the "Compute" button. It will test the existence and type of the files and the folders and tell you if some files are not images or DTIs.
Overwriting • The "Overwrite" option will allow you write the images anyway, over existing images if they were computed already.
Correcting Affine Registration • If affine registration isbad • Add an initial affine transform : • CaseX_InitLinearTrans.nrrdin folder [OutputFolder]/DTIAtlas/1_Affine_Registration/ • It will be used as an input for the Affine registration (with BRAINSFit) • Generate initial transform in Slicer visually/manually and save as .txttransform file
Affine Atlas Safety margin => deformable registration has issues with images touching margins
Diffeomorphic Atlas • Don’t touch…
Final Resampling • Will be performed via DTI-Reg • Creates deformation fields from original to atlas space • Use ANTS! Change the default
Final Resampling • Will be performed via DTI-Reg • Creates deformation fields from original to atlas space • Use ANTS! Change the default
Load and Save • Save yourparameters: In the « File » Menu, youcan Save or Load a parameter file. • When you save the parameters, a .csv file with the dataset will automatically be created in the same directory than the parameter file. • Auto save: Whenyou push the « Compute » button, the program willautomaticallysave a parameter file (DTIAtlasBuilderParameters.txt) and a .csv dataset file(DTIAtlasBuilderDataset.csv) in [OutputFolder]/DTIAtlas. It will also save a .csv file with the paths to all the interesting files generated, in this same folder(DTIAtlasBuilderResults.csv). • Save your Dataset into a CSV file so you can load it and use it again later.
Quality Control • By pushing one of the QC buttons, you will run MriWatcher to see the images at different steps of the compute, and check if the results are good.
Quality Control • Affine QC: Affine registeredFAs and last affine averagecomputed • Deformable QC: DeformablyregisteredFAs and Diffeomorphic Atlas • Final QC: Final DTI-Reg resampledFAs and final Atlas
Manual Configuration • If you have your own version of the programs or if you need to use a particular version of it, you can write the path manually or click the button to search it.
Software Configuration Automatic Configuration • By clicking the "Default" button, the program will automatically search all the programs in the PATH, and tell you if some of them are missing.
Automatic Configuration • If you want to reset the path for one or more programs, just push the "R" button and it will search the corresponding program in the PATH.
Newest Version (change) • Number of threads for a given tool (no parallelization)
Load and Save • Save your configuration: In the « File » Menu, youcan Save or Load a configuration file generated by the program. • You can set an environment variable manually with the name “DTIAtlasBuilderSoftPath” and contaning the path to a configuration file. It will be read at the beginning of the program to configure the softwares. • When opening the program, it will automatically search and load any file called “DTIAtlasBuilderSoftConfig.txt” in the directory where the executable is and in the current work directory. So you can put this file in any of these folders and you will not have to set an environment variable to have to software automatically configured.
GridProcessing • Grid processing: provide the submit command for your grid for parallelization of the registrations. For each step of the pipeline, commands for all the cases are submitted and the program will wait until all cases have been processed. • Additional setting for unbiased diffeo step as that one needs much more memory