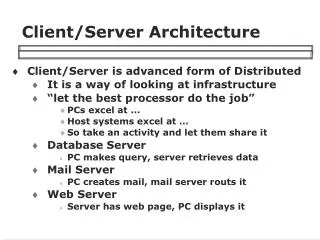
Appendix WEB CLIENT/SERVER
Appendix WEB CLIENT/SERVER. Overview of Apache Web server.

Appendix WEB CLIENT/SERVER
E N D
Presentation Transcript
Overview of Apache Web server • Apache is a very popular open source HTTP compliant Web server in the world developed by the Apache Software Foundation. Over 60% Web sites in the world use Apache. Many commercial vendors have adopted Apache-based solutions for their products, including Amazon, Yahoo, IBM, Red Hat, and ORACLE. • Apache development group said: The Apache HTTP Server Project is an effort to develop and maintain an open-source HTTP server for modern operating systems including UNIX and Windows NT. The goal of this project is to provide a secure, efficient and extensible server that provides HTTP services in sync with the current HTTP standards. • The Apache server is a powerful, flexible, HTTP/1.1 compliant Web server
Apache is available at http://httpd.apache.org for downloading.The current version Apache supportsWeb Development Platform Integration that an Apache module can be written entirely in the integrated language platforms. Apache has several integrated modules that support Web application development tool with the server such as Java, C#, etc. Here is a list of Apache integrated development platforms. • PHP (an Apache popular module) is a server-side, cross-platform, HTML embeddedscripting language which has many supporting modules such as: • Database connectivity module for popular databases such as ODBC, Oracle, MS-SQL server, MySQL, PostgreSQL.
XML • HTTP, FTP • Directory support: LDAP • PDF document generation • CORBA • SNMP
Apache has integrated modules to support many script languages such as PHP, JavaScript, Ruby, and Python for Web application as well. Apache Web server also supports MySQL database server. • A typical ideal Web server configuration for Apache Web application is the common acronym LAMP (Linux - Apache - MySQL - PHP).
Apache server installation and start up • This section introduces how to build up an Apache HTTP Web sever for any Web applications. First, let’s download Apache Web server and install on a Windows machine. • Download Apache Http server from http://httpd.apache.org/download.cgi; you may want to select the Win32 Binary (MSI Installer) to install and then you can refer to http://httpd.apache.org/docs/2.2/platform/windows.html. • The most current Apache version is 2.x at this time. The following is the download page for Apache.
Follow the Apache installation instructions on the screen and you will not have any difficulty completing the installation. After you install Apache Server, you can see the following screen which indicates Apache Server is up running:
PHP Overview • PHP is just one of many popular Web server side open source scripting languages. PHP is a perfect server scripting language to handle the Ajax XMLHttpRequest. It is widely used for Web application development. There are over half a million server pages developed by PHP. It is still growing very fast. • PHP is often embedded into HTML to enhance functions of HTML. PHP allows you to interact with a HTML page dynamically. PHP collect data from page where user provides and then process and utilize data to create a dynamic home page output.
The answer is following: • PHP is Open Source and free • PHP is much more compact than Java and .NET in term of its system size • PHP is portable and runs on Linux, Windows, and Mac platforms • PHP is a server-side script language, easily adopted • PHP has fast connections to popular databases compared with Perl
PHP is integrated with the Open Source MySQL database • PHP is an OO interpreter language • PHP Web pages work with all major browsers • PHP has integrated linking to XML PDF, SWF, and Java for dynamic creation and processing • PHP syntax is familiar to C, Perl, and Java
Practice Lab for PHP Web Application on Apache • In this section, you will be given a hands-on lab on a “Hello user” Apache server and PHP Web project. A PHP based on HTTP server page is populated on an Apache Web server. If a Web client accesses this page and fills in his/her name as <name> then the PHP page will dynamically create a response page with a greeting statement “Hello <name>”.
After installing Apache server, you can download and install PHP with http://www.php.net/downloads.php. The installation manual at http://www.php.net/install.windows may be helpful. The binary installer is very easy to use. However, if you want to use manual installation, you need to extract the php 5.x into C:\php. You may choose a different location but do not leave any spaces in the path (like C:\Program Files\PHP) as some Web servers will crash if you do so.
In your php directory, there are two files: php.ini-dist and php.ini-recommended. Change one of them into php.ini (php.ini-recommended is preferred). First, edit php.ini file as follows: doc_root = C:\Program Files\Apache Software Foundation\Apache2.2\htdocs extension_dir = "c:\php\ext" Next, edit Apache configuration file httpd.conf. Add following lines into it, the PHP would work as a module: ### LoadModule php5_module "c:/php/php5apache2_2.dll" AddType application/x-httpd-php.php PHPIniDir "c:/php“ ###
You can create a file named test.php in your apache default folder: C:\Program Files\Apache Software Foundation\Apache2.2\htdocs The php template is shown as . . . <?php phpinfo(); ?> . . .
<html> <head> <title>hello user</title> </head> <body> <form action="test.php" method="post"> Name: <input type="text" name="name" /> <input type="submit" value="submit"/> </form> Hello! <?php echo $_POST["name"]; ?> </body> </html> This is a html file with embedded php tag <?php ?>.
PHP and Ajax • This tutorial shows the same hello user example implemented by Ajax client and PHP server interaction on an Apache server. The XAMPP(LinuX, Apache, MySQL, PHP and Perl) is Apache distribution containing MySQL, PHP and Perl. XAMPP is very easy to install and to use, just download, extract and start. Here the XAMPP is used with the pre compiled apache and PHP. • You can download XAMPP for Windows in http://www.apachefriends.org/en/xampp-windows.html
Inside the XAMPP folder, there is a folder named htdocs. Inside this folder you open a Notepad and type the following code. Create a phpindex.php file as follows. <HTML> <head> <script type="text/javascript"> var req; function ajaxCall() { var poststr = "username=" + encodeURI(document.frmtest.content.value); var url = "ajax.php";
// create XMLHttpRequest object if (window.XMLHttpRequest) { req = new XMLHttpRequest(); } else if (window.ActiveXObject) { req = new ActiveXObject("Microsoft.XMLHTTP"); } //Configure the XMKHttpRequest object in a Asyc(true) mode req.open("POST", url, true); req.onreadystatechange = callback; req.setRequestHeader("Content-Type", "application/x-www-form-urlencoded"); req.setRequestHeader("Content-length", poststr.length); req.setRequestHeader("Connection", "close"); //Make the request to url req.send(poststr); }
//XMLHttpRequest object will callback this callback function to process //the result returned back from server function callback() { if (req.readyState == 4) { if (req.status == 200) { parseMessage(); } } } function parseMessage() { var message = req.responseText; setMessage(message); }
//Update the HTML DOM with the docoment object function setMessage(message) { mdiv = document.getElementById("Message"); mdiv.innerHTML = "<div style=\"color:green\">"+message+"</ div>"; } </script> </head> <body>
<form action="" name="frmtest" method="post"> <!--Specify the event handler for the keyup event--> <input type="text" name="content" onkeyup="javascript:ajaxCall();"> </form> <div id="Message"></div> </body> </html>
NetBeans and Tomcat Overview of NetBeans • The NetBeans IDE is a free, open-source Integrated Development Environment (IDE) for Java software developers. It covers all Java Standard Edition (Java SE), Java Enterprise Edition(Java EE, was called J2EE before), Java Micro Edition( was called J2ME) all in one IDE environment.
This IDE runs on almost all platforms including Windows, Linux, Solaris, and the Mac OS. It is easy to install and very convenient to develop any Java based cross-platform desktop, enterprise, Web and mobile applications. It is also a very useful component-based software development (CBSD) tool to create, reuse, and deploy Java jar, war, and ear components.
Once you install NetBeans, Glassfish v2.1 is the default Server installed. If you like to run on Tomcat server you need to install it externally. • Installing and adding an External Tomcat server in Net beans 6.0: Reference: http://wiki.netbeans.org/AddExternalTomcat It is assumed that Apache Tomcat, NetBeans 6.0, and the latest JDK are installed. In NetBeans 6.0 we need to add the Tomcat server externally. Let us see the configuration of the Tomcat 6.0 server. • Tomcat 6.0 setup: You can either install the executable file to install Tomcat 6.0 or you can extract the Tomcat6.0.zip folder to the drive, ex: you can extract it to the drive C:\Tomcat6.0
Now go into your Tomcat/conf/ folder and open tomcat-users.xml in a text editor and add the username and password in which manager role is assigned to the user.Here is how your tomcat-users.xml should look: <?xml version='1.0' encoding='utf-8'?> <tomcat-users> <role rolename="manager"/> <role rolename="standard"/> <user username="admin" password="mypassword" roles="standard,manager"/> </tomcat-users>
This will add the username as ‘admin’ and password as ‘mypassword’. In NetBeans 6.0 you need to specify the username and password. • You will build application by using JSP technology and the work will be done in the NetBeans IDE 6.0. Once the Tomcat server is installed properly, open the Netbeans 6.0 IDE to add the Tomcat as an external server.
Note: If you have installed the Tomcat executed file, the two files catalina.bat, setclasspath.bat might be missing in Tomcat\bin folder. These two files are needed in order to start Tomcat server from NetBean6.0 IDE. If the two bat files are missing you can get them from the URL: http://forum.java.sun.com/thread.jspa?threadID=664901&messageID=3893743, and make these two bat files available in order to start the server from NetBeans 6.0
Copy the following code in the body tag: <!DOCTYPE HTML PUBLIC "-//W3C//DTD HTML 4.01 Transitional//EN" "http://www.w3.org/TR/html4/loose.dtd"> <html> <head> <title>Hello User! JSP Page</title> </head> <body> <form name="name" action="index.jsp" method="POST"> <input type="text" name="name" value="" /> <input type="submit" value="submit" name="submit" /> </form>
Contd….. <%if(request.getParameter("name") != null){%> Hello, <%=request.getParameter("name")%> <%}%> </body> </html> Press Run Main Project (F6); NetBeans will run Tomcat server and you can use the browser to visit localhost to access this JSP file:
Ajax with JSP Developed in NetBeans Before starting this tutorial, assume that you have already installed Apache Tomcat and NetBeans IDE. You will build our AJAX server by using jsp technology and the work will be done in NetBeans IDE. Step 1: Startup NetBeans. Select File->New Project…
Step2: Select Web and Web Application, then Next. • In the new dialog box, name your project and choose a location for it. Press finish when you’re finished with it. • You will see a default page index.jsp and the directory structure like this where you can place “How World!” in the HTML body: