2.5.2
220 likes | 408 Views
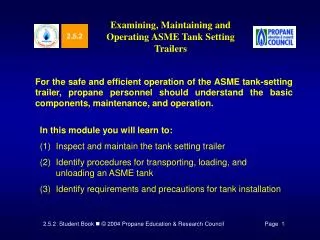
2.5.2. Examining, Maintaining and Operating ASME Tank Setting Trailers. For the safe and efficient operation of the ASME tank-setting trailer, propane personnel should understand the basic components, maintenance, and operation. In this module you will learn to:

2.5.2
E N D
Presentation Transcript
2.5.2 Examining, Maintaining and Operating ASME Tank Setting Trailers For the safe and efficient operation of the ASME tank-setting trailer, propane personnel should understand the basic components, maintenance, and operation. • In this module you will learn to: • Inspect and maintain the tank setting trailer • Identify procedures for transporting, loading, and unloading an ASME tank • Identify requirements and precautions for tank installation
Read and follow manufacturer’s instructions for inspecting, maintaining, and operating tank setting trailers. Always be sure to comply with any applicable company-specific procedures. Inspect & Maintain the Tank Setting Trailer • Tank Setting TrailerComponents – designs vary in the following ways: • type of lifting mechanism • method for activating braking systems • method for securing the tank support cross-members (called “bunks”, in their tank transporting and empty traveling configurations)
Inspect & Maintain the Tank Setting Trailer Braking Systems On electric/hydraulic brake systems, the electrical current flows when the towing vehicle’s brake lights are activated. Proper operation of the brake lights is critical to the operation of the trailer braking system, along with proper electrical connection to the towing vehicle. On coupler-activated hydraulic systems, proper lubrication and movement of the trailer tongue-mounted hydraulic cylinder levers is critical to proper braking system operation.
Inspect & Maintain the Tank Setting Trailer Figure 1. Components of a Typical Tank Setting Trailer
Inspecting the Tank Setting Trailer Pre-Trip Inspection– If the trailer is towed on public roadways a pre-trip inspection is required by DOT regulations. Pre-use inspection items on tank trailers should, as a minimum, include: • Hydraulic Systems • Electrical System • Mechanical Components • Mounting Hardware • Brake Master Cylinder Reservoir • Lights • Reflectors • Tongue & Tow Coupling • Tongue Jack • Bunks • Safety BreakawayMechanism • Safety Chains • Rims and Tires • Placard Holder
Inspecting the Tank Setting Trailer Post-Trip Inspection A towed tank trailer used to transport ASME tanks is a commercial motor vehicle (CMV) under U.S. Department of Transportation regulations. Before the vehicle is operated on a public roadway, the driver must complete a pre-trip inspection, including a review of the previous Driver Vehicle Inspection Report (DVIR). At the end of the day, or when use of the CMV is finished for the day, a post-trip inspection and a DVIR must be completed. The towing vehicle as well as the trailer must be included in the CMV pre-trip and post-trip inspections and DVIR.
Maintaining the Tank Setting Trailer Basic Trailer Maintenance – The best source for guidance for trailer maintenance is the manufacturer owner’s manual. General maintenance items include:
Loading, Unloading & Transporting Tanks Vehicle Placards – If the weight of the tank and LP-gas exceed 1,001 pounds, the vehicle must be placarded on the front, back and both sides with placards. Figure 2. LP-Gas Placard (Either Hazard Class 2 or Division 2.1 may be used.)
Loading, Unloading & Transporting Tanks Tank Labels – Tanks having water capacities less than 1,000 gallon must be labeled on two sides. Figure 3. (4 x 4) Flammable Gas Shipping Label
Loading, Unloading & Transporting Tanks Tank Labels During transportation, ASME tanks that contain propane must be labeled using either flammable gas shipping labels or placards. Flammable gas shipping labels or placards must be placed on two sides of tanks with less than 1,000 gallons capacity during transportation in addition to the four placards required for the vehicle. Tanks with 1,000 gallon capacity and larger must have labels or placards placed on both sides and both ends.
Loading, Unloading & Transporting Tanks Securing the Tank – Straps or chains should be secured in at least two locations, one on either side of the tank dome or the valves, if the dome is removed. Figure 4. 1,000 Gallon Water Capacity ASME Tank Being Prepared for Transportation
Loading, Unloading & Transporting Tanks Backing the Trailer Figure 6. Starting a Trailer Backing Turn
Loading, Unloading & Transporting Tanks Loading the Tank Figure 5. Positioning the Trailer Tank for Loading Figure 7. Securing the Bunks to the Trailer Frame
Loading, Unloading & Transporting Tanks Loading the Tank Follow manufacturer instructions for installing the bunks and be sure that they are secured as directed. If lock pins or clips are required, be sure that they are in place. If the bunk shows any defect such as a broken weld, or if it is bent so that it does not fit properly, do not continue the loading operation until the bunk is repaired or replaced.
Loading, Unloading & Transporting Tanks Loading the Tank Figure 8. Lowering Tank Onto Bunks Figure 9. Securing the Tank with Cargo Straps
Requirements & Precautions for Tank Installation Tank Installation • When tanks are installed at customer locations, propane personnel should consider the following factors before driving on the customer’s property or unloading the tank. • Is the soil around the installation location sufficiently dry to support the towing vehicle and trailer ? • Are all underground facilities marked ? • Does the tank installation location meet NFPA 58 code, and can it be serviced ?
Requirements & Precautions for Tank Installation Precautions • DO NOT use a tank trailer that has any mechanical or structural defect. • Be sure that the towing hitch is rated to carry the load & in sound condition. • Be sure safety chains and breakaway connections are properly secured to the towing vehicle. • Check the tongue jack and dolly to be sure that it is locked in the transport position. • Be sure that the trailer hitch is secured and locked on the towing vehicle’s towing hitch before lifting the tank.
Requirements & Precautions for Tank Installation Precautions • Check the condition of the trailer’s lifting equipment before attaching or lifting a tank. • Do not lift a tank by its lifting lugs if it contains more than 5% liquid propane. • Avoid placing hands, arms, or any body part beneath a suspended tank. • Be sure that tank bunks are secured according to manufacturer’s instructions before lowering the tank. • Secure the tank with at least two suitable securing devices
Requirements & Precautions for Tank Installation Precautions • Be sure that the trailer tongue weight does not overload the towing vehicle hitch. If too much weight is carried on the rear axle of the towing vehicle, it can cause loss of steering control, fishtailing, or unstable braking. • Secure any loose tools, slings or chains in a toolbox on the trailer or towing vehicle before transporting the tank, or after setting a tank and returning to the bulk plant. • Be sure that bunks are secured and locked onto the trailer according to manufacturer instructions before leaving the tank installation location.
Time to See If You Got the Key Points of This Module… • Complete the Review on pages 11 & 12. • See if you are ready for the Certification Exam by checking off the performance criteria on page 13.