Download
1 / 39
390 likes | 702 Views
Pressure Canning & Canning Low-Acid Foods at Home. This slide show is a description of basic principles and typical steps in home canning. It is not intended to be the only canning instruction and reading you need to do in order to can food safely at home.

E N D
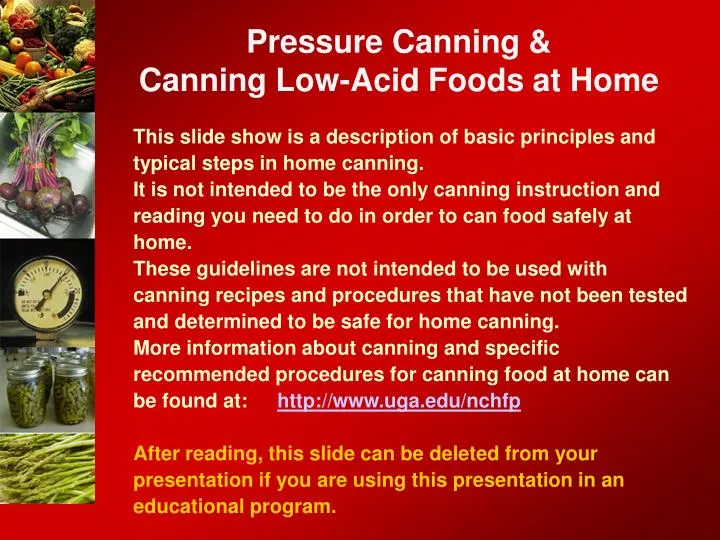
Pressure Canning &Canning Low-Acid Foods at Home This slide show is a description of basic principles and typical steps in home canning. It is not intended to be the only canning instruction and reading you need to do in order to can food safely at home. These guidelines are not intended to be used with canning recipes and procedures that have not been tested and determined to be safe for home canning. More information about canning and specific recommended procedures for canning food at home can be found at: http://www.uga.edu/nchfp After reading, this slide can be deleted from your presentation if you are using this presentation in an educational program.
Pressure Canning &Canning Low-AcidFoods at Home Cooperative Extension The University of Georgia
Two Methods of Canning • Boiling Water Canning • Used for acid foods • Pressure Canning • Used for low acid foods (and some acid foods)
Low Acid Foods pH greater than 4.6 • Generally all vegetables • Meats • Poultry • Seafood • Soups • Mixed canned foods (low acid + acid) • However, if pH < 4.6 = acidified foods
Canning Low Acid Foods • Temperatures of 240 F or above needed for reasonable process times. • 10 psig = 240 F at sea level. • 15 psig = 250 F at sea level.
Why Two Methods of Canning? Clostridium botulinum! • Yeasts, molds and most bacteria are destroyed at boiling temperatures (212oF at sea level). • C. botulinum forms spores that require higher temperatures for destruction in a reasonable period of time (usually 240oF or above at sea level).
Botulism Food Poisoning • The botulinum toxin, one of deadliest known, causes botulism food poisoning. • 1 mg can kill 655 tons of mice. • Food can contain toxin without showing signs. • Antitoxin is available, but there is slow recovery. Permanent nerve damage possible.
Botulism Food Poisoning • Symptoms usually appear within 12 to 72 hours: • Digestive upset (in some cases) • Blurred, double vision • Difficulty swallowing, speaking and breathing • Possible death from suffocation
Botulism Food Poisoning • To germinate and produce toxin, the spores need the following conditions: • Anaerobic • Low acid (pH > 4.6) • 40oF to 120oF • Relatively high moisture growth (multiplies) spore (germinates) bacterium waste materials and toxins
Preventing Botulism • Home Canned Foods • Spores won’t germinate in acid foods (pH < 4.6). • Spores are killed when heated long enough at a specific temperature. • USDA usually recommends 240oF at sea level for canned low-acid foods. • Pressure canner must be used for all low-acid foods.
Preventing Botulism, cont. • Food must be properly prepared and processed correct time. • Canner must be accurate and operated correctly. • Foods must be checked carefully when opening jars.
Preventing Botulism, cont. • Follow recipe exactly. The following slow down heat penetration: • Extra sugar or fat • Oversize food pieces • Added thickeners • Use recommended canners. Heat-up and cool-down times in pressure canners are counted toward sterilizing value of the process. Don’t rush them.
PressureincreasesTemperature Only safe way to can low-acid foods is with pressure.
Altitude Adjustments • As altitude increases, temperatures decrease at a given pressure. • As altitude increases, increase pressure. • Dial Gauge • 1001-2000 ft: 11 psig • 2001-4000 ft: 12 psig • 4001-6000 ft: 13 psig • 6001-8000 ft: 14 psig • Weighted Gauge • Altitude adjustment requires increase of 5 psig pressure. • 1001 ft and above: 15 psig
Pressure Canners • Flat rack in bottom. • Pressure regulator or indicator. • Dial or weighted gauge. • Older: petcocks. • Vent pipe (port) for pressurizing. • Safety valves or overpressure plugs. • Safety locks when pressurized. • Flexible gasket in lid or • One type: metal to metal seal. • Gasket sometimes called “sealing ring” in manufacturer’s book.
Pressure Canners, cont. • Dial Gauge • Indicates pressure inside the canner. • Must be checked for accuracy. • More flexibility in altitude adjustments – small psig increments. • Has dead- or counter-weight to close open vent for pressurizing. • Not to be used for indicating pressure. • Pressure is increased or decreased by adjusting burner heat.
Pressure Canners, cont. • Weighted Gauge • Regulates pressure inside the canner. • Open vent is the same one that pressure regulator fits. • Will continue to allow some air to be released from canner during process. • Can’t be tested for accuracy. • Altitude adjustment requires increase of 5 psig pressure.
Pressure Canners, cont. • Weighted Gauges • One piece • Fitting for 5, 10 or 15 psig. • Do not use dead- or counter-weight from dial gauge canner or pressure cooker. • Mirro: “jiggles” 3 to 4 times per minute. • Three piece • Number of pieces used determines 5, 10 or 15 psig. • Presto: rocks gently throughout entire process. • Mirro: “jiggles” 3 to 4 times per minute.
Pressure Canners vs. Cookers • To be considered a pressure canner for USDA processes, the canner must be big enough to hold at least 4 quart-size jars. • Pressure cookers/saucepans with smaller volume capacities are not recommended for use in canning. • Enough heat may not be delivered during pressurizing and the cool-down period in smaller pressure cookers/saucepans.
Pressure Canners, cont. Using PC the First Time • Some parts may need assembling; see manufacturer’s directions. • Become familiar with parts and their functions. • Usually need to clean to remove manufacturing oils. (cover, body and gasket) • Parts are usually pre-lubricated. May need to verylightly coat the exposed gasket and lugs on the canner body with cooking oil. • Before EACH use: be sure vent pipes are clear and open.
Venting the Canner • Also called “exhausting” the canner. • As the water boils in the canner, the “empty” space becomes a mixture of steam and air. • The temperature of a steam/air mixture is lower than the temperature of pure steam. • Venting eliminates (“exhausts”) the air so processing takes place in a pure steam environment. • Process times are intended only for a pure steam environment.
Venting the Canner, cont. • Some manufacturers of weighted gauge canners say venting is not necessary. • USDA instructs to vent ALL pressure canners. • The one difference in “following manufacturer’s directions” if not included there. • Without proper venting, up to 30% of the sterilizing value of a 20-minute process may be lost. • At 10 psig.
Venting the Canner, cont. • Steam must flow freely from the open ventport in the lid for 10 minutes prior to pressurizing. • After putting filled jars in the pressure canner, fasten the lid in place. • Leave the ventport open. • Pipe where weighted gauge or dead weight will go. • Turn the heat on high. • When water boils, steam will start to come out of open vent. • Wait until there is a constant, strong funnel of steam, then start timing 10 minutes. • At the end of the 10 minutes, place weight in place to start pressurizing the canner.
Pressure Canner Processing • Use 1 inch headspace in jars. • A few products use 1-1/4” • Have 2” to 3” of water simmering or hot in canner. • Hot packed jars – simmering water, 180 F • Raw packed jars – warm to hot water, 140 F • Place jars on rack in canner. • Put lid on canner with weight off or petcock open.
Pressure Canning, cont. • Exhaust canner 10 minutes. • All pressure canners, according to USDA. • Close vent or petcock. • Start counting process time when correct pressure is reached. • Adjust pressure for altitude, if needed. • Turn off heat at end of processing. • Let pressure drop to 0 psig naturally.
Pressure Canning, cont • Wait about 1-2 minutes after pressure drops to 0 psig to make sure all pressure is gone. (For some canners, check that locks in handles are released.) • Remove weight or open petcock. Wait 10 min. • Open canner. (Be careful of steam!) • Remove jars to padded surface or rack. • Cool jars 12 to 24 hours, undisturbed. • Check that jars have sealed.
Opening the Canner • In pressure canning, turn heat off at end of process and let jars cool in canner until pressure is gone. • When the canner lid is opened, tilt it so the steam is pushed away from your face. • The steam, water and jars in the canner will still be very hot, even bubbling or boiling.
Opening the Canner, cont. • Dial Gauge • Watch needle on dial. • After it reads 0 psig, carefully remove the weight. • If there are piston locks in the lid or handle, see that they have also opened. • Wait 10 minutes, then open lid. • Remove jars from canner.
Opening the Canner, cont. • Weighted Gauge • Time the cooling process. • Heavy-walled older canners: • 30 min full of pint jars, 45 min full of quarts. • Thinner wall, newer canners: • 20 to 30 minutes. • If there are piston locks in the lid or handle, see that they have also opened. • Carefully remove the gauge. • Wait 10 minutes, then open lid. • Remove jars from canner.
Loss of Pressure • Drop in pressure during processing means the sterilizing value of the process will be decreased. • Underprocessing. • Foodborne illness (botulism) and/or spoilage could result. • If pressure drops below target anytime during the process time, bring the canner back up to pressure and start timing the process over, from the beginning.
Fluctuating Pressure • Large and/or quick variations in pressure during processing may cause loss of liquid from jars. • If the variation is a drop in pressure after process has begun, it also means the process must be started over.
Force Cooling Canners • Done by cooling the canner with running cold water or opening the vent port before canner air cools to 0 psig. • Do not cover with wet towels; do not put in cold air drafts. • May result in: • Food spoilage. • Foodborne illness. • Underprocessing • Loss of liquid from jars. • Seal failures. • Warping of canner lid.
Storing Canner • Thoroughly dry canner, lid and gasket. Do not put lid in water. • Older canners: Take off removable petcocks or safety valves. Wash and dry. Reassemble carefully. • Clean openings by running clean pipe cleaner or thin strip of cloth through them. • Store canner with crumpled clean paper or paper towels in it; do not fasten the cover. • Wrap cover in paper and turn upside down on the canner bottom.
Replacement Parts • Dial gauges when inaccurate. • Gaskets (sealing rings). • Every 2 years usually • Rubber overpressure plugs. • Every 2 years • Vent pipes if clogged. • Air vent/cover lock from lid. • Weighted gauges or dead weight if lost.
Testing Dial Gauges • Accuracy of gauge essential to safety of the canned food. • Two ways: • Maximum thermometer • Comparing to master dial gauge • 1 pound error in a 20-minute process causes over 10% decrease in sterilizing value. • 2 pound error a 30% decrease.
Disclaimer and Credits • Disclaimer: • Trade and brand names are used only for information. The Cooperative Extension Service, University of Georgia College of Agricultural & Environmental Sciences and College of Family & Consumer Sciences, and the U.S. Department of Agriculture do not guarantee nor warrant published standards on any product mentioned; neither does the use of a trade or brand name imply approval of any product to the exclusion of others which may also be suitable. • Document Use: • Permission is granted to reproduce these materials in whole or in part for educational purposes only (not for profit beyond the cost of reproduction) provided the author and the University of Georgia receive acknowledgment and this notice is included: • Reprinted (or Adapted) with permission of the University of Georgia. Andress, E.L. 2008. Pressure canning & canning low-acid foods at home (slides). Athens, GA: The University of Georgia, Cooperative Extension. • This material is based upon work supported by the Cooperative State Research, Education, and Extension Service, U.S. Department of Agriculture, under Agreement No. 00-51110-9762.
Photography Credits • Photography credits • Elizabeth Andress and Elaine D’Sa, National Center for Home Food Preservation, University of Georgia. • Information Staff, Agricultural Research Service, USDA.