Download
1 / 39
400 likes | 711 Views
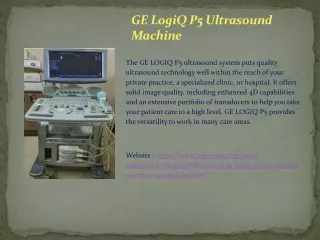
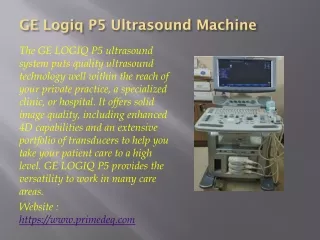
The LOGIQ 200 PRO Series. LOGIQ 200 PRO Series. Professional. Image Quality. The PRO Series represents outstanding value for the most discerning professional, delivering increased productivity and superior diagnostic outcomes for you and your patients. Productivity. Productivity.

E N D
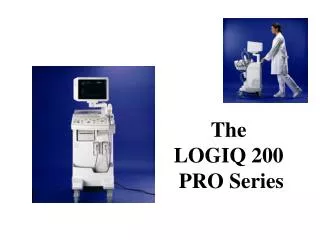
The LOGIQ 200 PRO Series
LOGIQ 200 PRO Series Professional Image Quality The PRO Series represents outstanding value for the most discerning professional, delivering increased productivity and superior diagnostic outcomes for you and your patients. Productivity Productivity Investment Protection Progress
SCAN Board RELAY CON 1 CON 2 -SHV +SHV SCANNER INTERFACE USC BUS
TBF TX DRV PRE AMP PGC CROSS POINT P GUN ASSY \ +THV -THV WATCH DOG INTERFACE USC BUS NOVA BUS
RBF PGC ACC GEN TO MVP TGC COSMO ADC AAF DDS IIC USC BUS NOVA BUS
WOW!! 40MHz Ultra-High frequency Sampling Rate MR Technology (Wide Aperture Technology) Flicker-free Monitor!! 011010011010 011010011010 011010011010 Σ Target 011010011010 011010011010 011010011010 Digital Time Delay Probe Digital Adder Digital Beamformer Catch Axial, Lateral, and Temporal Resolution….
Digital Beamformer Flicker-free Monitor ATO Axial Resolution 3CB(2-5MHz Probe) Auto Wave Shaping Lateral Resolution Best B-Mode IQ! Contrast Resolution Wide Aperture Technology Temporal Resolution 40MHz Converter High Precision Digital Beamformer
ATO Acoustic Data LOGIQ200MD PRO Image Processor Image ATO gives you the best contrast resolution using One-Touch on keyboard Image Analysis Optimization based on Digital Adaptive Processing
ATO Conventional ManualImage Optimization 2-5 Minutes ROI In seconds ATO Less Operator Dependent… Faster... Better Image Quality
NOVA BUS IMAGE STORAGE RAM MVP Board FRAME AVERAGE XY MEMORY IMAGE DISPLAY CONTROL IMAGE SOFTENER ALM ITP VIDEO LUT Video DAC CRDTF ZOOMER PEAK HOLD B/M FRONT END CONTROL XY ADDR GEN INTER LACE CONVERT NON-INT CONVERT VID DAC VIDEO DECODER CINE MEMORY CINE CONTROL SAP SYNC GENERATOR XY MEMORY FIFO USC BUS USC BUS I/F DSP PROGRAM MEMORY
CPU MSTE RESET ROM RTC SUPER I/O RAM VRAM AGDC IDE CTL FROM NOVA BUS
HV +/-100V +/- 65 V
Follow these steps to enter the Service Menu. Note Probes should be installed in the port and Blue Shift key should be off before take these steps. 1. Pressing Shift + Ctrl keys and then press the Shift +s keys, and then Shift + 1 keys. 2. Input the PASSWORD and press Return key. The Service Top Menu will appear on the monitor as shown in ILLUSTRATION 2--5. Service Utility MENU : Top Menu 99/03/12 09:16:37 Current Software Version is 3.0 *System Diagnosis Board/Program Version System Reset Key Operation History Option Set Initialize :1 (1:America 2:Europe 3:Asia 4:Japan) System Clock Adjust Exit
Follow these steps to exit the Service Menu. 1. Press Shift + R keys. If this step will be performed again, the Service Menu will be entered again. OR 2. Select Exit on the Top Menu, and press Set or Return keys. The Service Menu will be exited. Follow these steps to operate the Service Menu. 1. Using Arrow Up/down keys, select one of seven items. 2. Press Set or Return keys. The Service Sub Menu will be appeared or Service Menu will be operated. Note Resetting the system using the System Reset, to reboot System, does not affect on the system presets.
Follow these steps to enter the System Diagnosis menu. 1. Using the Arrow up/down keys, select the “System Diagnosis”menu in the Top Menu. Refer to the ILLUSTRATION 2--5. The left side of selected menu, here will be appeared the cursor (*). 2. Press Set or Return keys. The System Diagnosis menu will appear on the monitor as shown in the ILLUSTRATION 2--6. Service Utility MENU : System Diagnosis 99/03/12 09:16:37 Current Software Version is 3.0 NAME Time Status *System test 21 M Scan Test 0 M TBF Test 0 M Linear/Convex Path 0 M Sector Probe Path 0 M BPHV test 1 M MVP Hardware Test 1 M B mode Function 1 M B mode Cine 8 M M mode Function 2 M MSTE test 4 M Keyboard 0 M PIOP 1 M Monitor 0 M Power Supply 1 M Exit Press ’ctrl’+’X’to
Wide Range of Probes CBF Convex Probe - Frequency:3.5Mhz - Bandwidth: 2.5 - 5.0 Mhz -FOV:72deg -Convex ROC:50mmR -Biopsy guide: Available LB Linear Probe -Frequency:3.5Mhz -Bandwidth: 2.5 - 5.0 Mhz -FOV:94mm CAE Convex Probe -Frequency:5Mhz -Bandwidth: 3.7- 7.4 Mhz -FOV:72deg -Convex ROC:72mmR -Biopsy guide: Available LE Linear Probe -Frequency:5.0Mhz -Bandwidth: 3.7 -7.4 Mhz -FOV:83mm MTZ Micro-Convex Probe -Frequency:6.5Mhz -Bandwidth: 4.3 -8.6 Mhz -FOV:124deg -Convex ROC:10mmR -Biopsy guide:Available LD Linear Probe -Frequency:3.5Mhz -Banswidth: 2.5 -5.0 Mhz -FOV:94mm
Wide Range of Probes ERB Micro convex/Linear Array probe -Frequency : 7.0Mh -Bandwidth : 5.2-11.3Mhz -FOV : 12 deg 10L Linear probe -Frequency : 9.0Mhz -Bandwidth : 5.2-11.3Mhz -FOV : 40mm S317 Phased Array Sector probe -Frequency : 3.5Mhz -Bandwidth : 2.5-5.0Mhz -FOV : 90 deg 3Cb Convex Array Probe -Frequency : 3.5Mhz -Bandwidth : 2.5-5.0Mhz -FOV : 59 deg CS Microconvex Array probe -Frequency : 3.5Mhz -Bandwidth : 2.7-4.2Mhz -FOV : 81 deg