Download
1 / 12
120 likes | 221 Views
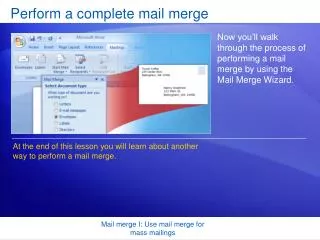
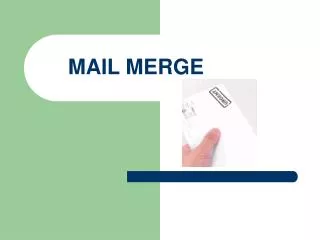
Use the Ribbon to perform a mail merge. You’re already familiar with the wizard that steps you through the mail merge process. .

E N D
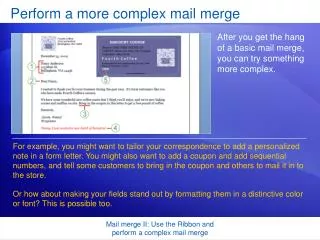
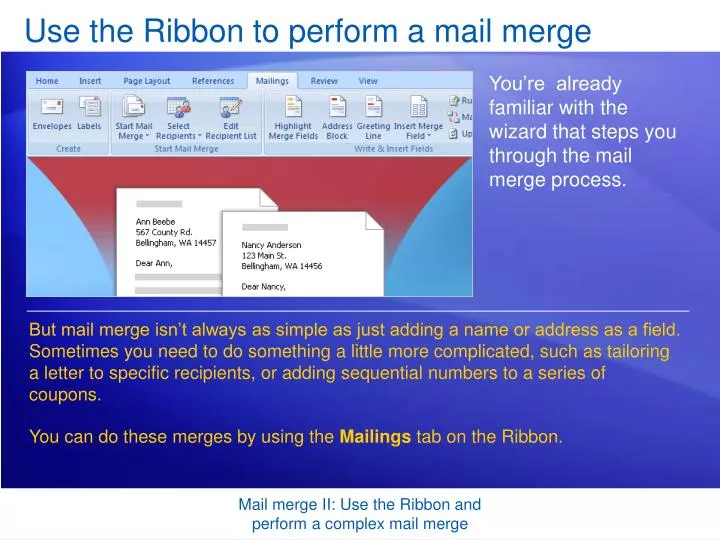
Use the Ribbon to perform a mail merge You’re already familiar with the wizard that steps you through the mail merge process. But mail merge isn’t always as simple as just adding a name or address as a field. Sometimes you need to do something a little more complicated, such as tailoring a letter to specific recipients, or adding sequential numbers to a series of coupons. You can do these merges by using the Mailings tab on the Ribbon. Mail merge II: Use the Ribbon and perform a complex mail merge
Groups and commands on the Mailings tab The Mailings tab on the Ribbon is where you can perform a mail merge by using the four groups shown in the picture. Start Mail Merge: This is the beginning point where you pick a document type and then select, create, or edit the recipient list. Write & Insert Fields: Here’s where you can insert the fields and if necessary map your fields to your recipient list. Mail merge II: Use the Ribbon and perform a complex mail merge
Groups and commands on the Mailings tab The Mailings tab on the Ribbon is where you can perform a mail merge by using the four groups shown in the picture. Preview Results: View the individual merged documents before you complete the merge. Finish: Complete the merge and combine your individual documents into one comprehensive document, or print them out, or send them electronically. Mail merge II: Use the Ribbon and perform a complex mail merge
Step 1: Start the mail merge You may be familiar with starting the Step by Step Mail Merge Wizard by clicking the Start Mail Merge command. Using that same command you can also go directly to the type of document you want to use in the mail merge. To start a mail merge, click the Mailings tab and the Start Mail Merge command. Then choose the type of document you want to use in the mail merge. Mail merge II: Use the Ribbon and perform a complex mail merge
Step 2: Select the recipients Next you connect to your recipient list by clicking Select Recipients. You can type a new recipient list, browse to select an existing list, or select your Outlook Contacts. When you browse to an existing list, Word will first look in the folder, My Data Sources, a convenient place to keep your recipient list because it opens first. When you select the file you want to use for your recipient list and click OK, you’ve connected your document to the list. Mail merge II: Use the Ribbon and perform a complex mail merge
Step 3: Insert fields You’ve probably written the text that will be the same in every copy of your merge document, so this step is where you can add the Address Block or Greeting Line fields. Or, click Insert Merge Field to add any other information from your recipient list that you want. The picture shows an example of the Address Block field in the Write & Insert Fields group. Mail merge II: Use the Ribbon and perform a complex mail merge
Step 4: Preview the merged document After you’re through writing your document and inserting fields, click Preview Results to see an example of a merged document. You can look at each additional merged document by clicking the Next Record or Previous Record arrows. Looking for a specific person? Just click Find Recipient and enter the recipient’s name. Mail merge II: Use the Ribbon and perform a complex mail merge
Step 5: Edit individual documents Your merge is ready, but you have the option to review some or all of the merged documents. Clicking Finish & Merge and then clicking Edit Individual Documents creates a separate comprehensive document that includes every recipient in the merge. Mail merge II: Use the Ribbon and perform a complex mail merge
Step 5: Edit individual documents Your merge is ready, but you have the option to review some or all of the merged documents. Here’s where you can take a final look at each merged document—just scroll through the set of finished documents to review and modify them. After you’re done, you can print the finished documents immediately. Mail merge II: Use the Ribbon and perform a complex mail merge
Step 6: Print the merged documents Perhaps you skipped the option to edit individual documents and are ready to print all the merged documents. Simply click Print Documents from the Finish & Merge command. The Merge to Printer dialog box opens, where you can choose to print all the merged documents or just specific ones. If you are distributing your mail merge documents electronically, use Send E-mail Messages instead. Mail merge II: Use the Ribbon and perform a complex mail merge
Step 7: Save the documents If you plan to use the main document again for another mail merge, it’s a good idea to save it. Saving the main document means that you will keep the connection to the recipient list. When you open the document again, you will be asked if you want to connect to the same list. Mail merge II: Use the Ribbon and perform a complex mail merge
Step 7: Save the documents Here’s how. Click the Microsoft Office Button. On the menu, click Save. Then choose a location and name for the file and click Save again. Mail merge II: Use the Ribbon and perform a complex mail merge