Download
1 / 2
20 likes | 48 Views
Before hiring an Outsourcing Scan To BIM company you need to check the process of how to convert it. Here are a few steps that require to follow every designer when conversion of Scan To BIM projects. Check here https://bit.ly/3crUNKt<br>info@caddraftingservices.in<br> 1 209 565 8512<br>

E N D
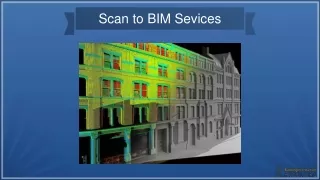
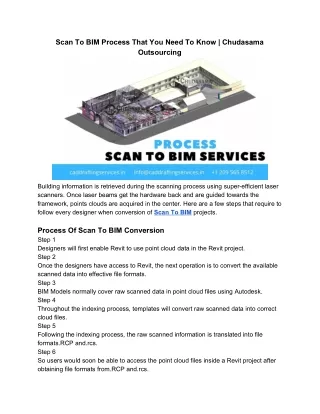
Scan To BIM Process That You Need To Know | Chudasama Outsourcing Building information is retrieved during the scanning process using super-efficient laser scanners. Once laser beams get the hardware back and are guided towards the framework, points clouds are acquired in the center. Here are a few steps that require to follow every designer when conversion of Scan To BIMprojects. Process Of Scan To BIM Conversion Step 1 Designers will first enable Revit to use point cloud data in the Revit project. Step 2 Once the designers have access to Revit, the next operation is to convert the available scanned data into effective file formats. Step 3 BIM Models normally cover raw scanned data in point cloud files using Autodesk. Step 4 Throughout the indexing process, templates will convert raw scanned data into correct cloud files. Step 5 Following the indexing process, the raw scanned information is translated into file formats.RCP and.rcs. Step 6 So users would soon be able to access the point cloud files inside a Revit project after obtaining file formats from.RCP and.rcs.
Step 7 In a.rcp file are included countless.RCS files (Reality Capture Scan files). Step 8 Thus, Designers of cloud files will first click on the 'Insert button' and then on 'Connect Row.' Step 9 The Designers have to identify the files which should be linked to the project after selecting Point Cloud. Step 10 BIM Designers can choose either an extended file of.rcp or an extended file of.rcs, depending on their requirement. Step 11 BIM Models should have used the Point Cloud tool to insert the file into Project Revit. Step 12 After selecting an appropriate file by Designers, then they need to focus on how to place a file in the project. Step13 Designers may location a file in the project either by using Auto-center to center option or by choosing Auto-Origin to Origin, Auto-Origin to Last Positioned, and Auto-By Mutual Coordinates method. Step 14 If the Designers choose an appropriate file positioning method, the point cloud file in the project can be connected by clicking on "available." If the Designers successfully follow these all steps mentioned above, they can quickly and securely connect the Scan To BIM projects into Revit. https://caddraftingservicesblogs.wordpress.com/2020/06/04/scan-to-bim-process-that-you-need- to-know/ Caddraftingservices.in A-601/2, Siddhivinayak Business Towers, Nr. Kataria House, Makarba, Ahmedabad, Gujarat 380051 Email: Info@Caddraftingservices.In Phone : +91 79403 07652