Download
1 / 43
430 likes | 467 Views
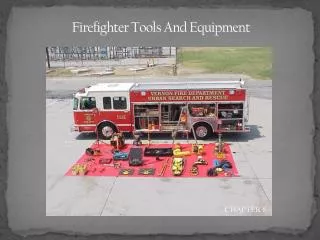
10. POWER TOOLS AND SHOP EQUIPMENT. Figure 10-1 A typical shop compressor. It is usually placed out of the way, yet accessible to provide for maintenance to the unit.

E N D
10 POWER TOOLS AND SHOP EQUIPMENT
Figure 10-1 A typical shop compressor. It is usually placed out of the way, yet accessible to provide for maintenance to the unit.
Figure 10-2 Always use an air nozzle that is OSHA approved. The openings in the side are used to allow air to escape if the nozzle tip were to become clogged.
Figure 10-4 This impact wrench features a variable torque setting using a rotary knob. The direction of rotation can be changed by pressing the button at the bottom.
REAL WORKD FIX: The Case of the Rusty Air Impact Wrenches In one busy shop, it was noticed by several technicians that water was being pumped through the air compressor lines and out of the vents of air impact wrenches whenever they were used. It is normal for moisture in the air to condense in the air storage tank of an air compressor. One of the routine service procedures is to drain the water from the air compressor. The water had been drained regularly from the air compressor at the rear of the shop, but the problem continued. Then someone remembered that there was a second air compressor mounted over the parts department. No one could remember ever draining the tank from that compressor. After that tank was drained, the problem of water in the lines was solved. The service manager assigned a person to drain the water from both compressors every day and to check the oil level. The oil in the compressor is changed every six months to help ensure long life of the expensive compressors.
Figure 10-5 A typical battery-powered 3/8 in. drive impact wrench.
Figure 10-6 A black impact socket. Always use impact-type sockets whenever using an impact wrench to avoid the possibility of shattering the socket, which can cause personal injury.
Figure 10-7 An air ratchet is a very useful tool that allows fast removal and installation of fasteners, especially in areas that are difficult to reach or do not have room enough to move a hand ratchet wrench.
Figure 10-8 This typical die grinder surface preparation kit includes the air-operated die grinder, as well as a variety of sanding discs for smoothing surfaces or removing rust.
Figure 10-9 A fluorescent trouble light operates cooler and is safer to use in the shop because it is protected against accidental breakage where gasoline or other flammable liquids would happen to come in contact with the light.
WARNING: Do not use incandescent trouble lights around gasoline or other flammable liquids. The liquids can cause the bulb to break and the hot filament can ignite the flammable liquid.
Figure 10-10 A typical pedestal grinder with a wire wheel on the left side and a stone wheel on the right side. Even though this machine is equipped with guards, safety glasses or a face shield should always be worn when using a grinder or wire wheel.
Figure 10-12 A hydraulic press is usually used to press bearings on and off on rear axles and transmissions.
Figure 10-13 A typical portable crane used to lift and move heavy assemblies, such as engines and transmissions.
TECH TIP: Cover Work While Pressing Whenever pressing on a bearing or other component, use an old brake drum over the shaft and the bearing. In theevent the bearing shatters during the pressing operation, the brake drum will prevent the parts of the bearing from flying outward where they could cause serious personal injury.
Figure 10-14 Two engines on engine stands. The plastic bags over the engines help keep dirt from getting onto these engines and engine parts.
Figure 10-15 An engine stand that grasps the engine from the sides rather than the end.
SETUP AND LIGHTING A TORCH 1 Inspect the cart and make sure the tanks are chained properly before moving it to the work location.
SETUP AND LIGHTING A TORCH 2 Start by attaching the appropriate work tip to the torch handle. The fitting should only be tightened hand tight. Make sure the valves on the torch handle are closed at this time.
SETUP AND LIGHTING A TORCH 3 Each tank has a regulator assembly with two gauges. The high pressure gauge shows tank pressure, and the low pressure gauge indicates working pressure.
SETUP AND LIGHTING A TORCH 4 Open the oxygen tank valve fully, and open the acetylene tank valve 1/2 turn.
SETUP AND LIGHTING A TORCH 5 Open the oxygen valve on the torch handle 1/4 turn in preparation for adjusting oxygen gas pressure.
SETUP AND LIGHTING A TORCH 6 Turn the oxygen regulator valve clockwise and adjust oxygen gas pressure to 20 PSI. Close the oxygen valve on the torch handle.
SETUP AND LIGHTING A TORCH 7 Open the acetylene valve on the torch handle 1/4 turn and adjust acetylene gas pressure to 7 PSI. Close the acetylene valve on the torch handle.
SETUP AND LIGHTING A TORCH 8 Open the oxygen valve on the torch handle 1/4 turn and use an appropriate size tip cleaner to clean the tip orifice. Finish by closing the oxygen valve.
SETUP AND LIGHTING A TORCH 9 Put on leather gloves and open the acetylene valve on the torch handle 1/4 turn. Use a flint striker to ignite the acetylene gas exiting the torch tip.
SETUP AND LIGHTING A TORCH 10 Adjust the acetylene valve until the base of the flame just touches the torch tip. Slowly open the oxygen valve on the torch handle and adjust for a neutral flame (blue cone is well-defined).
SETUP AND LIGHTING A TORCH 11 Once work is complete, extinguish the flame by quickly closing the acetylene valve on the torch handle. Be prepared to hear a loud “pop” when the flame goes out. Close the oxygen valve on the torch handle.
SETUP AND LIGHTING A TORCH 12 Close the valves on both tanks and turn the regulator handles CCW until they no longer contact the internal springs. Open the gas valves briefly on the torch handle to release gas pressure from the hoses. Close the gas valves on the torch handle and put away the torch assembly.
HEATING METAL 1 Heating attachments include ordinary heating tips, middle and right and a “rosebud” (left). Ordinary heating tips work fine for most purposes, but occasionally the rosebud is utilized when a great deal of heat is needed.
HEATING METAL 2 Note that while acetylene tank pressures are relatively low, the oxygen tank can be filled to over 2,000 PSI. This can represent a serious hazard if precautions are not taken. Be absolutely certain that the tanks are chained properly to the cart before attempting to move it!
HEATING METAL 3 Any time heating or cutting operations are being performed, be sure that any flammables have been removed from the immediate area. A fire blanket may be placed over floor drains or other objects to prevent fires. A fire extinguisher should be on hand in case of an emergency.
HEATING METAL 4 Be sure to wear appropriate personal protective equipment during heating and cutting operations.
HEATING METAL 5 Note that heating operations should be performed over steel or firebrick. Never heat or cut steel close to concrete, as it could cause the concrete to explode.
HEATING METAL 6 When heating steel, move the torch in a circular pattern to prevent melting of the metal. Don’t hold the torch too close to the work as this will cause a “snapping” or “backfire” that can extinguish the flame.
CUTTING METAL 7 Affix the cutting attachment to the torch handle. Note that the cutting attachment has a cutting handle and a separate oxygen valve.
CUTTING METAL 8 Fully open the oxygen valve on the torch handle. Oxygen flow will now be controlled with the valve on the cutting attachment.
CUTTING METAL 9 Oxygen gas pressure should be adjusted to 30 PSI whenever using the cutting attachment. Acetylene pressure is kept at 7 PSI.
CUTTING METAL 10 Open the acetylene valve on the torch handle 1/4 turn and light the torch. Adjust the flame until its base just touches the cutting tip. Slowly open the oxygen valve on the cutting attachment and adjust the flame until the blue cone is well-defined.
CUTTING METAL 11 Direct the flame onto a thin spot or sharp edge of the metal to be cut. This will build the heat quicker in order to get the cut started.
CUTTING METAL 12 When the metal glows red, depress the cutting handle and move the torch to advance the cut. You will need to move the torch faster when cutting thinner pieces of steel. On thicker pieces, point the cutting tip into the direction of the cut.