Download
1 / 31
310 likes | 397 Views
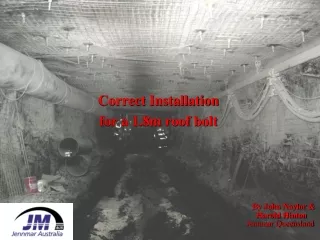
Correct Installation for a 1.8m roof bolt. By John Naylor & Harold Hinton Jennmar Queensland. Differing Strata. Stresses that can cause rock failure. Vertical Stress – Weight of overlaying rock. Horizontal Stress. Horizontal Stress – one direction usually much greater than the other.

E N D
Correct Installation for a 1.8m roof bolt By John Naylor & Harold Hinton Jennmar Queensland Cert IV Workplace Training and Assessment
Stresses that can cause rock failure. Vertical Stress – Weight of overlaying rock Horizontal Stress Horizontal Stress – one direction usually much greater than the other Horizontal Stress – Tectonic plates are moving and pushing into one another
STRESS CONCENTRATIONS AROUND THE DEVELOPMENT HEADING • Horizontal Stress concentrates in the roof/floor • Vertical Stress concentrates in the ribs
Bit Geometry Is greatly dependant on the rock strata and the thrust capabilities of the rig. TwinWing Bit - Positive Rake Twin Wing Bit - Negative Rake Modified Spade Full Spade Rib Bit. Specially sharpened General Purpose Bit, featuring Good general bit features Strongest design of roof bit. for rapid drilling in coal. the good drilling the strength of blade Used for drilling in the Positive rake allows for easy characteristics of a two wing carbide with quicker hardest of roof conditions use with hand borers. bit with the toughness of drilling time than a With the most powerful a negative rake standard spade drill rigs. MOST AGGRESSIVE STYLE BIT LEAST AGGRESSIVE STYLE
1.8m Bolt and 1000mm F/S Resin Most mines in the Bowen basin use a 1.8m bolt in the roof as standard. Other sizes go from 1.5 – 2.4m bolts, with rib bolts going from 1.2 – 1.8m. Belt hanger and structure bolts vary in length from 0.6 – 1.8m. Resins range from 300mm single speed through to 1400mm DUAL speed (TOOSPEED) for every day mining. For today we will work with a Standard 1.8m bolt and a 1000mmFast/Slow resin.
Drilling the Hole Drill Bit :- Usually 27 mm or 28 , no larger Hole depth :- 80-100 mm shorter than bolt Flush the hole well with water • Annular gap between the bolt and the bolt hole should be 4-6mm • Hole drilled to correct depth & diameter will help to ensure • Maximum chemical encapsulation • Maximum load transfer • Thread length available for tensioning Ensure correct rig alignment Incorrect drill rig alignment may cause the nut to break out early, bolt may not get to the back of the hole and resin may be under mixed. In some cases this may cause fractures in the threaded section of the bolt and may cause a bolt fail .
Drilling the Hole for 1.8m Bolt 1700 mm is the ideal length hole for a 1.8m bolt, this leaves 100mm of tail for the roof plate, dome ball and nut leaving 50mm of tail for hanging equipment. A experienced operator can tell while drilling the hole if there are substantial partings parting in the strata by watching the drill head and the speed of the bore hole being drilled.
1000mm Resin Both common types of resin used in the underground coal mines in Australia have around the same spin and hold time on then, this is to minimise any confusion by the end user. There has been some questions lately about the 25 in the part code, this is a generic number. The calculated number should be 23.8mm for the diameter for the resin when doing encapsulation calc's.
Two-Speed Resin Operation • Two-speed resin operates by the fast-set (yellow ) going hard first and allowing the roof bolt to be put in tension by tightening the nut on the bolt. • The slow-set (blue) gels and sets 60 seconds later. • This system helps create the beam of support from the bottom of the fast set to the collar of the drilled hole. • This is the area of the roof which is placed in tension – by “pre-tensioning the bolt” Pre-tension
Inserting the Bolt Through the Resin Once at the back of the hole the bolt should be spun for another 2-4seconds but no more than 5seconds as this may cause the resin to granulate -over mixing of the resin. A 1000mm resin in a 1700mm hole in solid competent ground will normally have a little excess resin come out from the collar of the bore hole indicating a full column of resin. Insert the resin capsule to the back (top) of the hole before commencing full rotation with enough thrust to get through the resin capsule in around 10-12sec. Care must be taken not to burst the capsule or push the bolt into the resin capsule before rotation has commenced, as this may cause gloving of the capsule
Resin Loss into Strata Resin Loss into Strata In some cases the fine silts, granules between the cleats (stacking layers) in the strata and some of the strata material itself can be flushed out when drilling the hole for the bolt which can lead to the bolt not being fully encapsulated . In some cases this has been as much as 50% of the bolt being un-encapsulated . When a section of bolt is not encapsulated with resin, this section is left exposed to corrosion with high alkaline (acidy) water, strata movement – leaving it more susceptible to shear as the strata has more of a chance for movement in this area of the borehole column as there is no fill between the bolt and strata.
Effects that Poor Encapsulation has on the Beam Poor Encapsulation reduces Beam thickness Poor encapsulation exposes bolts to shear • Causes of Poor encapsulation : • Mixing through the chemical too fast • 2. Over drilling • 3. Undetected resin loss into fractures
Strata Compression–Beam Building It is important that after the correct hold time that the nuts on the bolts are tightened correctly. The bolt nut needs tightening until the drill motor stalls to reach the desired pretension for the mine. It is also important that the bolts are tensioned before the slow set resin cures and starts to go hard (60sec). If this happens the pre-tension area between the fast set resin and the bearing plate of the bolt will not be compressed as desired ,and the strata will be left susceptible to movement in the area as the clamping would not have been achieved.
Tightening the Bolt 1. Hold for a minimum of 12 seconds but no longer than 60 seconds. 2. Apply full rotation and tighten the nut / plate to the roof . Tighten until the rig stalls to achieve correct tension THE BOLT IS NOW COMPLETED • HOLD TIME IS CRITICAL • Beware when 1 operator is using 2 rigs that letting the resin set while using the other rig will often exceed 60 seconds cure time – This allows the slow resin to cure and the bolt tension is NOT compressing the bottom roof layers. • Wait for the fast (top) resin to cure enough to carry the 6-8 tonnes pre-tension.
A Reinforced Beam can carry Stresses • Encapsulated bolts resist ground movement axially & in shear • Pre-tension clamps the layers together, increasing friction across bedding planes to help resist movement. • The fuller the encapsulation, the stiffer the beam.
NUTS "Breaking out” early • This is when the nut breaks out before correct mixing is completed. • It can create gloving, unmixed resin and long tails. • Causes- • Resin “out of date” and heat effected resin (thickens &goes hard). • Worn/broken drill bits /very hard bands of rock create a small hole • Poor rig alignment with the hole • e.g. bolt dragging on mesh • Swelling / wet clay bands in the roof. • Drill stops set in-correctly • Nut breaks out when bolt hits back of hole
Over drilled Hole • Chemical not mixed • Bolt not adequately tensioned- in some cases (Plas/Resin-Nut) bolt may come off under load • Load carrying reduced. • No thread tail protruding • Check to see if drill stops on drill mast are operating or missing.
Under Drilled Hole • Designed bolt horizon not reached • Potential partings not supported • Unable to adequately tighten bolt
Bolt Tensioned “Too Soon” “Coat Hanger” • Caused By: • Tensioning before fast set resin has cured • Hitting back of hole with bolt • Broken strata-resin loss
Over Spun Bolt • Chemical – “ground up”-check label on resin carton for spin time & set time • Unable to take loading • A “NON-BOLT” • This bolt must be replaced [drill a new hole and start again.]
“Gloving” is when the plastic resin capsule film is not shredded during installation. It can sit between the resin and the bolt or rock and stop bonding/anchoring of the bolt. CAUSES: Pushing the bolt up into the capsule before starting to spin. Pushing up too fast during mixing , Rapid insertion with minimal spinning on the way up. 4. Not using full speed rotation. “Gloving” For a roof or rib bolt to work efficiently, there must be un-interrupted interaction between the strata, resin and the bolt In this case, the un-shredded capsule (glove) has formed a barrier between resin and strata.
Gloving -continued To avoid the gloving phenomenon, follow the points below, all of which are under theOperatorscontrol : • The annular gap between the bolt and the bolt hole must not be too large (4-6 mm). This could be caused by a large hole –check drill tip size • The bolt is spun through the entire length of the resin capsule. If the bolt is pushed (without spinning) through the resin capsule before rotation commences, some of the capsule skin may be pushed to the top of the hole without effective shredding, and gloving could occur. • Ensure maximum drill speed during bolt installation. • Ensure feed rate (thrust) of bolt into hole from machine is not excessive. This is also very important as high feed rates of the bolt through the DUAL SPEED (TOOSPEEDIE) resin (eg < 3 secs) has also been shown to reduce encapsulation. • Ensure bolt rotation continues when bolt reaches back of hole for 2-3 seconds. .
Overview As previously highlighted, resin bolts are spun and pushed simultaneously to the back of the hole during installation with maximum rpm to mix the resin components and to assist in shredding the capsule skin, to avoid gloving.
Effects that Low Pre-tension has on the Roof Beam • Low pre-tension can cause lower roof ply's to separate more readily • Reduces Beam effectiveness • Causes of Low Pre-tension • Maintenance issues on rig • Not waiting until the rig has stalled when tightening
Effects that Bond Strength has on the Roof Beam Poor Bond Strength caused by: • Under mixing • Over mixing • Oversize drill hole diameter Poor bond strength reduces beam strength
Jennmar AustraliaSupporting the Mining Industry above and belowQuestions Jennmar Australia Pty Ltd